Aroma Rice Cooker Instructions Manual: A Comprehensive Guide
Welcome! This manual provides detailed guidance for your Aroma rice cooker, ensuring perfectly cooked rice and exploring versatile cooking options for optimal enjoyment.
Understanding Your Aroma Rice Cooker
Congratulations on selecting an Aroma rice cooker! This appliance is designed for simplicity and convenience, offering a reliable way to prepare fluffy, delicious rice and a variety of other dishes. Before you begin, familiarize yourself with the core principles of operation. Aroma cookers utilize controlled heating and steaming to achieve optimal results, differing from traditional stovetop methods.
The cooker’s intelligent technology automatically adjusts cooking times and temperatures based on the selected settings. Understanding these settings – white rice, brown rice, steam, and others – is crucial for maximizing your cooking experience. Furthermore, the cool-touch exterior ensures safety during and after operation. This manual will guide you through each feature, empowering you to unlock the full potential of your Aroma rice cooker and consistently create flavorful meals. Remember to always refer to this guide for best practices.
Key Components and Their Functions
Let’s explore the essential parts of your Aroma rice cooker. The inner pot, typically non-stick, holds the rice and liquid; its quality directly impacts cooking performance. The heating plate, located at the base, provides consistent heat distribution. The control panel features buttons for selecting cooking programs and adjusting settings. A crucial element is the steam vent, which releases excess steam during cooking, preventing pressure buildup.
The lid creates a sealed environment for efficient steaming, and often includes a condensation collector. Many models include a measuring cup specifically calibrated for rice, and a rice paddle for serving. The cool-touch housing ensures safe handling. Understanding each component’s role is vital for proper operation and maintenance, guaranteeing consistently excellent results and extending the lifespan of your Aroma cooker. Familiarize yourself with these parts before first use.
Initial Setup and Preparation
Before your first use, careful preparation is key. Begin by removing all packaging materials and inspecting the cooker for any damage. Place the Aroma rice cooker on a stable, level surface, ensuring adequate ventilation around it. Remove the inner pot and wash it thoroughly with warm, soapy water, then rinse and dry completely. Wipe down the cooker’s exterior with a damp cloth.
It’s important to familiarize yourself with the control panel and available settings. Ensure the steam vent is clear of any obstructions. Proper setup prevents potential issues and ensures optimal performance. Avoid using abrasive cleaners, as they can damage the non-stick coating. This initial cleaning process prepares your cooker for years of reliable service, delivering perfectly cooked rice and flavorful meals consistently.
First-Time Use: Cleaning and Seasoning
To begin, thoroughly wash the inner pot with warm, soapy water. Rinse completely and dry. While not strictly required, a light seasoning can enhance longevity and prevent sticking. Add a tablespoon of cooking oil (vegetable or coconut oil work well) to the inner pot and rub it evenly across the surface with a soft cloth.
Plug in the rice cooker and run a single cooking cycle with water only – about 2 cups. This helps eliminate any manufacturing residue. After the cycle completes, discard the water and wipe the pot clean again. This initial cleaning and seasoning process prepares the non-stick surface, ensuring easier rice release and simplified cleanup for years to come. It’s a small step with significant benefits!
Powering On and Basic Controls
To power on your Aroma rice cooker, simply plug it into a grounded electrical outlet. Most models feature a large, easily accessible “Cook/Start” button. Pressing this button initiates the cooking cycle. A “Warm” indicator light will illuminate when cooking is complete, automatically switching the cooker to a warming mode.
Many Aroma cookers also include settings for “White Rice,” “Brown Rice,” “Steam,” and sometimes “Slow Cook.” Select the appropriate setting before adding ingredients. A retractable power cord is a convenient feature for storage. Familiarize yourself with the control panel; understanding these basic functions is key to successful operation. Refer to your specific model’s diagram for precise button locations and functions.

Cooking Perfect Rice
Achieving fluffy, delicious rice is simple with your Aroma cooker! Mastering the correct rice-to-water ratio and cooking times unlocks consistently perfect results every time.
Rice to Water Ratio: A Detailed Breakdown

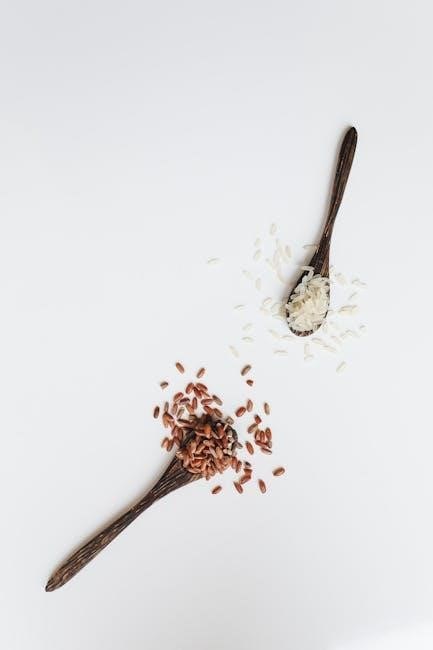
Understanding the ideal rice-to-water ratio is crucial for achieving perfectly cooked rice with your Aroma cooker. This isn’t a one-size-fits-all answer, as different rice varieties require varying amounts of water. For white rice, a general guideline is a 1:1 ratio – one cup of rice to one cup of water. However, for a softer texture, slightly increase the water to 1.25 cups per cup of rice.
Brown rice, being denser, necessitates more water. A common ratio is 1 cup of brown rice to 2.25-2.5 cups of water. Experimentation is key, as brown rice varieties differ significantly. Longer-grain rice typically requires less water than shorter-grain. Always refer to the rice package instructions as a starting point.
Proper measurement is also vital. Use the measuring cup provided with your Aroma cooker for consistent results. Remember that leveling off the rice in the cup ensures accurate proportions. Adjusting the ratio slightly based on your personal preference and the cooker’s performance will lead to consistently delicious rice.
White Rice Cooking Instructions
Preparing white rice in your Aroma cooker is remarkably simple. Begin by measuring the desired amount of white rice – typically a 1:1 ratio with water, though adjustments can be made for texture preference. Rinse the rice under cold water until the water runs clear; this removes excess starch, preventing stickiness.
Place the rinsed rice and measured water into the inner cooking pot. Ensure the pot is clean and properly seated within the cooker. Close the lid securely, and select the “White Rice” setting on your Aroma cooker. Press the “Start” button to initiate the cooking cycle.
The cooker will automatically switch to the “Keep Warm” mode once the rice is cooked. Allow the rice to rest, covered, for 10-15 minutes before fluffing with a fork. This allows steam to redistribute, resulting in evenly cooked, fluffy rice. Enjoy!
Brown Rice Cooking Instructions
Cooking brown rice requires a slightly different approach than white rice due to its bran layer. Generally, a 1:2.25 to 1:2.5 rice-to-water ratio is recommended, but this can vary based on the specific brown rice variety. Rinsing is still beneficial to remove any debris, though not as crucial as with white rice.
Combine the rinsed brown rice and water in the inner pot, ensuring it’s properly positioned. Select the “Brown Rice” setting on your Aroma cooker. This setting provides a longer cooking time and higher temperature necessary to fully cook the grain. Press “Start” to begin the cycle.

Once complete, allow the rice to steam, covered, for 10 minutes before fluffing. This ensures optimal texture. Brown rice may remain slightly chewier than white rice, even when fully cooked.
Adjusting Cooking Time for Different Brown Rice Varieties
Short-grain brown rice, like sushi rice, often requires slightly more water – around a 1:2.5 ratio – and may benefit from an extra 5-10 minutes of steaming after the cycle completes. Long-grain brown rice, such as Basmati or Jasmine, typically cooks well with the standard 1:2.25 ratio, but can become dry if overcooked.
For medium-grain brown rice, a 1:2.33 ratio is a good starting point. If your Aroma cooker doesn’t have a precise brown rice setting, use the “White Rice” setting and add approximately 15-20 minutes to the cooking time. Always monitor the rice during the final stages.
Experimentation is key! Note the results with each variety and adjust water levels and cooking times accordingly to achieve your preferred texture. Consistent results come with practice.
Beyond Rice: Versatile Cooking Options
Expand your culinary horizons! Your Aroma cooker excels at steaming, soups, and grains, offering diverse meal preparation beyond traditional rice cooking capabilities.

Steaming Vegetables and Fish
Unlock healthy cooking! The Aroma rice cooker’s steaming function preserves vital nutrients and natural flavors, offering a superior alternative to boiling. To steam, simply add water to the inner pot – typically one to two cups, depending on steaming time.
Place vegetables or fish in the included steaming basket, ensuring they aren’t submerged in water. Secure the basket within the cooker. Select the “Steam” function, or if unavailable, use the “White Rice” setting and adjust cooking time accordingly.
Steaming times vary; delicate vegetables like broccoli require less time than root vegetables. Fish generally steams in 10-15 minutes. This method delivers moist, flavorful results, maximizing health benefits with every bite, and is a fantastic way to prepare a complete, balanced meal alongside your rice.
Making Soups and Stews
Expand your culinary horizons! Your Aroma rice cooker isn’t limited to rice; it excels at creating delicious soups and hearty stews. Begin by sautéing vegetables directly in the inner pot using the “Sauté” function, if equipped, or by briefly using the “White Rice” setting before adding liquids.
Add broth, meats, and seasonings, then switch to the “Slow Cook” or “Soup” function if available. Alternatively, use the “White Rice” setting and monitor closely, stirring occasionally to prevent sticking.
Cooking times will vary based on ingredients; root vegetables and tougher meats require longer simmering. The cooker’s consistent heat ensures even cooking and flavorful results. Remember to adjust liquid levels as needed throughout the cooking process for a perfectly balanced and comforting meal.
Cooking Grains Other Than Rice (Quinoa, Oats)
Diversify your meals! The Aroma rice cooker is remarkably versatile, extending beyond rice to accommodate various grains like quinoa and oats. For quinoa, use a 1:2 quinoa-to-water ratio, similar to white rice, and cook using the “White Rice” setting. Fluff with a fork after completion.
When cooking oats (rolled or steel-cut), a 1:2 or 1:3 oats-to-water ratio is recommended, depending on desired consistency. Utilize the “White Rice” setting for rolled oats, and the “Slow Cook” function for steel-cut oats, monitoring for potential overflow.
Adjust cooking times slightly based on your cooker model and grain type. Experiment to find the perfect settings for your preferred texture, enjoying nutritious and convenient grain-based dishes.

Maintenance and Troubleshooting
Keep it pristine! Regular cleaning and understanding common issues will ensure your Aroma rice cooker continues to deliver perfectly cooked meals for years to come.
Cleaning Your Aroma Rice Cooker
Maintaining cleanliness is crucial for optimal performance and longevity of your Aroma rice cooker. Always unplug the cooker and allow it to cool completely before cleaning. The inner pot is typically non-stick and can be washed with warm, soapy water, or placed in the dishwasher if indicated in your model’s specific instructions.
The steam vent and lid should also be washed regularly to prevent buildup. Wipe down the exterior of the cooker with a damp cloth. Avoid abrasive cleaners, as they can damage the finish. For stubborn food residue inside the cooker, a paste of baking soda and water can be gently applied and scrubbed.
Ensure all parts are thoroughly dried before reassembling. Regularly inspect the heating plate for any food particles and clean as needed. Proper cleaning not only ensures hygienic cooking but also prevents potential malfunctions and extends the life of your appliance.
Common Issues and Solutions
Encountering issues? Here’s a quick guide to troubleshooting. Rice burning or sticking often results from incorrect water ratios – double-check the recommended amounts for your rice type. Ensure the inner pot is clean and free of residue before each use. If the cooker isn’t turning on, verify the power cord is securely plugged in and the outlet is functioning.
Check the fuse or circuit breaker. Sometimes, the cooker’s safety features may prevent operation if the inner pot isn’t properly seated. If the rice is consistently undercooked, try slightly increasing the cooking time or water amount. Steam leaks are usually normal, but excessive steam could indicate a faulty seal.

For persistent problems, consult the full manual or contact Aroma customer support. Avoid attempting repairs yourself, as this could void the warranty and pose a safety risk.
Rice Burning or Sticking
Experiencing burnt or stuck rice? This is a common issue, often easily resolved. The primary culprit is usually an incorrect rice-to-water ratio. Always adhere to the recommended measurements for the specific type of rice you’re cooking – white, brown, or other varieties require different amounts of liquid.
Ensure the inner pot is thoroughly cleaned before each use, removing any leftover starch or residue. A buildup can contribute to sticking. Also, avoid using abrasive cleaners that could damage the non-stick coating. Consider lightly greasing the pot with cooking oil for particularly sticky rice types.
If burning persists, reduce the cooking time slightly or try a lower heat setting if your cooker offers that option. Regularly inspect the heating element for any signs of damage or buildup.
Cooker Not Turning On
Is your Aroma rice cooker failing to power on? First, verify the power cord is securely plugged into both the cooker and a functioning electrical outlet. Test the outlet with another appliance to confirm it’s receiving power. Inspect the power cord itself for any visible damage, such as cuts or fraying.
Check the cooker’s lid to ensure it’s properly sealed. Many Aroma models have a safety mechanism that prevents operation if the lid isn’t securely in place. Also, examine the control panel for any error messages or indicator lights that might provide clues.
If the issue persists, consult the fuse box or circuit breaker to see if a breaker has tripped. As a last resort, contact Aroma customer support for assistance; do not attempt to disassemble the cooker yourself.