Welcome to the Honeywell Pro 5000 Installation Manual․ This guide provides a comprehensive walkthrough of installing and configuring your Honeywell Pro 5000 thermostat, highlighting its advanced features and system compatibility for a seamless setup experience․
Overview of the Honeywell Pro 5000 Installation Manual
The Honeywell Pro 5000 Installation Manual is a detailed guide designed to assist users in successfully installing and configuring their thermostat․ It covers essential steps, including wallplate installation, wiring connections, and system testing․ The manual also provides troubleshooting tips and customization options to ensure optimal performance․ By following the instructions, users can ensure compatibility with their HVAC system and enjoy efficient temperature control․ This comprehensive resource is tailored for both DIY enthusiasts and professional installers, making it an indispensable tool for a smooth setup process․
Importance of Proper Installation
Proper installation of the Honeywell Pro 5000 thermostat is crucial for ensuring optimal performance, efficiency, and safety․ Incorrect installation can lead to inaccurate temperature control, increased energy consumption, and potential damage to the system․ Following the manual’s guidelines ensures compatibility with your HVAC system, avoids safety hazards, and prolongs the lifespan of the thermostat․ Correct setup also allows you to customize features for enhanced comfort and energy savings, making it essential to adhere to the instructions provided in the manual for a seamless and reliable operation․
Features of the Honeywell Pro 5000 Thermostat
The Honeywell Pro 5000 thermostat offers advanced features designed for efficiency and comfort․ It includes a backlit display, automatic changeover between heating and cooling, and energy-saving modes․ The thermostat is compatible with a wide range of HVAC systems and supports multi-stage heating and cooling․ Its non-programmable design simplifies operation while maintaining precise temperature control․ Additional features like battery operation and easy installation make it a versatile choice for homeowners seeking a reliable and user-friendly thermostat solution to enhance their home automation experience․

System Requirements and Compatibility
The Honeywell Pro 5000 thermostat is compatible with most standard HVAC systems, including single-stage and multi-stage heating and cooling configurations, ensuring seamless integration into your home setup․
Checking Compatibility with Existing HVAC Systems
Before installing the Honeywell Pro 5000 thermostat, ensure compatibility with your HVAC system․ Verify if your system is single-stage, multi-stage, or heat pump compatible․ Check the voltage requirements, typically 24V AC, and wiring configuration․ Refer to the manual for detailed compatibility charts․ Ensure your HVAC system matches the thermostat’s specifications for proper operation․ If unsure, consult a professional to confirm compatibility and avoid installation issues․
Understanding the Heating/Cooling System Requirements
Understanding your heating and cooling system requirements is crucial for proper Honeywell Pro 5000 installation․ Identify if your system is single-stage, multi-stage, or a heat pump․ Verify the voltage requirements, typically 24V AC, and ensure wiring matches the thermostat’s terminals․ Check if your system supports auxiliary heat or emergency heat․ Properly configuring the thermostat to match your system type ensures optimal performance and avoids operational issues․ Refer to the manual for specific guidelines and compatibility charts to align settings with your HVAC system’s capabilities․
Tools and Materials Needed for Installation
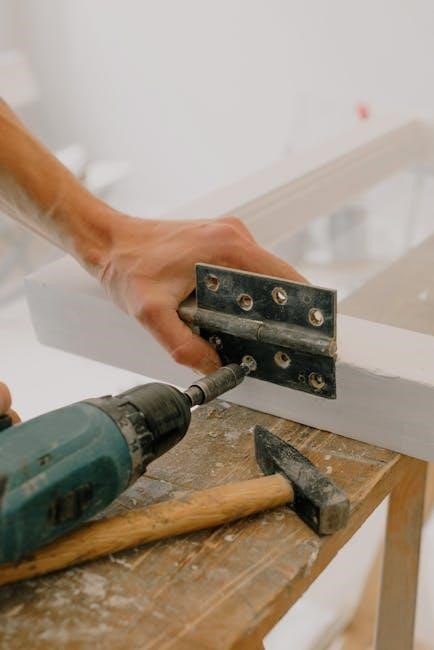
To install the Honeywell Pro 5000 thermostat, gather essential tools and materials․ You will need a Phillips screwdriver for removing the old thermostat and mounting the new wallplate․ A pair of needle-nose pliers may be useful for wiring․ Ensure you have a voltage tester to safely verify power cutoff․ Additional materials include screws, wall anchors, and the provided wallplate․ Refer to the manual for specific wiring labels and system requirements․ Having these tools ready ensures a smooth and efficient installation process․
Preparing for Installation
Before starting, ensure power is turned off at the circuit breaker․ Remove the old thermostat and prepare the wallplate․ Verify system compatibility and review safety guidelines․
Pre-Installation Steps and Safety Precautions
Before installing the Honeywell Pro 5000 thermostat, ensure the power to your HVAC system is turned off at the circuit breaker․ Verify compatibility with your existing system and gather all necessary tools․ Remove the old thermostat carefully to avoid damaging wires․ Handle wiring with caution to prevent electrical shocks․ Double-check the system requirements and ensure all components are compatible․ Familiarize yourself with safety guidelines to avoid injuries or damage during the installation process․ This preparation ensures a smooth and safe setup of your new thermostat․
Disconnecting Power and Old Thermostat Removal
Begin by switching off the power to your HVAC system at the circuit breaker or fuse box․ Verify the power is off using a voltage tester․ Remove the batteries from the old thermostat, if applicable, and gently pull the unit away from the wallplate; Carefully disconnect the wires from the old thermostat, taking note of their labels or colors for reference․ Remove any remaining adhesive or screws holding the old thermostat in place․ Once disconnected, set the old thermostat aside and prepare the area for the new Honeywell Pro 5000 installation․
Preparing the Wallplate and Wiring
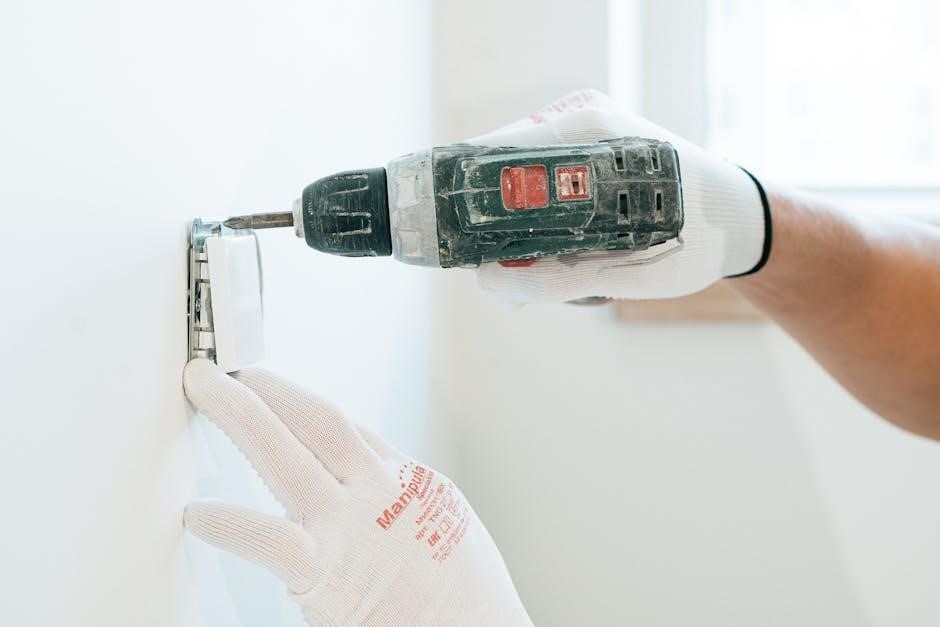
Begin by preparing the wallplate for the Honeywell Pro 5000 thermostat․ Remove the battery holder from the wallplate to access the wiring area․ Gently pull the wires through the wire hole in the wallplate, ensuring they are free from any tangles or damage․ Position the wallplate against the wall, aligning it with the marks made during pre-installation․ Secure the wallplate using the provided screws, ensuring it is level and firmly attached․ If necessary, adjust the mounting brackets to accommodate your specific wiring configuration․ This step ensures a clean and professional installation of your new thermostat․
Installation Steps
Mount the wallplate, connect the wires according to the diagram, install the thermostat unit, and test the system to ensure proper functionality and performance․
Mounting the Wallplate
Begin by removing the battery holder from the thermostat․ Carefully pull the wires through the wire hole in the wallplate․ Position the wallplate on the wall, ensuring it is level and properly aligned․ Secure the wallplate using the provided screws․ Make sure the wallplate is tightly fastened to avoid any movement․ Once mounted, plug the wires into their respective terminals on the back of the wallplate․ Double-check that all connections are secure and correctly matched․ This step ensures a stable base for the thermostat unit to function correctly․
Wiring the Thermostat
Start by turning off the power to your HVAC system at the circuit breaker․ Identify each wire and match them to the corresponding terminals on the Honeywell Pro 5000․ Connect the common wire to the C terminal․ For heat-only systems, ensure the R wire is connected to the R terminal․ If your system requires it, remove the R/Rc jumper․ Secure all connections firmly to avoid loose wires․ Refer to the wiring diagram in the manual for specific configurations․ Double-check all connections before restoring power to ensure proper functionality and safety․
Installing the Thermostat Unit
Once the wallplate is securely mounted, align the Honeywell Pro 5000 thermostat unit with the wallplate, ensuring it fits snugly․ Gently push the thermostat onto the wallplate until it clicks into place․ Secure it with the provided screws if necessary․ Make sure the unit is level and firmly attached to the wall․ Insert the batteries into the thermostat, following the polarity indicated․ Turn the power back on and verify that the display lights up and functions correctly․ Refer to the manual for specific alignment and mounting instructions to ensure proper installation․
Testing the System Post-Installation
After completing the installation, turn the power back on at the circuit breaker․ Test the heating, cooling, and fan systems to ensure they operate correctly․ Verify that the thermostat responds to temperature adjustments and mode changes․ Check the display for proper functionality and ensure all features, such as auto-changeover, are working as expected․ Refer to the manual for specific test procedures, including the Installer System Test table, to confirm everything is functioning properly․ This step ensures your Honeywell Pro 5000 thermostat is installed correctly and ready for use․

Configuration and Customization
Configure the Honeywell Pro 5000 to match your HVAC system, customize features like temperature settings and modes, and perform final checks to ensure optimal performance and functionality․
Setting Up the Thermostat for Your System
After installation, configure the Honeywell Pro 5000 to align with your HVAC system type․ Remove the wallplate and access the wiring․ Match the system settings to your heating or cooling configuration․ Use the control panel to select options like heat, cool, or auto mode․ Ensure the thermostat is programmed to your preferred temperature settings․ Refer to the wiring diagram to confirm connections․ Perform a system test to verify functionality․ Customize features such as temperature range and fan operation for optimal performance․ Final checks ensure the thermostat operates seamlessly with your HVAC system․
Customizing Features and Settings
Personalize your Honeywell Pro 5000 thermostat by adjusting settings to suit your preferences․ Set temperature ranges, enable or disable features like auto-changeover, and customize fan operation․ Program schedules or use the hold feature for temporary adjustments․ Explore advanced settings for precise control over heating and cooling cycles․ Ensure all configurations align with your HVAC system capabilities․ Perform final checks to confirm settings are applied correctly and functionality is optimized for your home’s comfort needs․
Final Checks and System Verification
After completing the installation, perform a thorough system test to ensure the Honeywell Pro 5000 thermostat operates correctly with your HVAC system․ Test all functions, including heating, cooling, and fan modes․ Verify that the thermostat responds accurately to temperature adjustments and schedule settings․ Check for proper wiring connections and ensure the display reflects real-time system status․ Review all customized settings to confirm they align with your preferences․ If any issues arise, consult the manual or troubleshooting section for resolution․ Final verification ensures optimal performance and homeowner satisfaction;
Troubleshooting Common Issues
Identify and resolve common installation problems by checking wiring connections, power supply, and thermostat display issues․ Consult the manual or customer support for advanced solutions if needed․
Identifying and Resolving Common Installation Problems
Common issues during Honeywell Pro 5000 installation include wiring mismatches, power supply problems, or display malfunctions․ Start by verifying all connections match the wiring diagram in the manual․ Ensure the C-terminal is properly connected to the transformer’s common side․ If the thermostat doesn’t power on, check circuit breakers or fuses․ For display issues, restart the thermostat or replace batteries if applicable․ Consult the troubleshooting section in the manual or contact Honeywell support for further assistance․ Regular system tests can help identify and resolve heating or cooling malfunctions effectively․
Advanced Troubleshooting Techniques
For advanced issues, check the R/Rc jumper configuration to ensure it matches your system type․ Test the HVAC system by activating heating, cooling, and fan modes separately․ Verify wiring connections for accuracy, focusing on C, R, W, and Y terminals․ If issues persist, use a multimeter to measure voltage at the thermostat terminals․ Ensure the transformer is properly sized for the system․ Consult the manual or Honeywell support for detailed diagnostic procedures and software updates․ Advanced troubleshooting may require professional assistance to resolve complex system incompatibilities or hardware malfunctions effectively․
For further assistance, visit Honeywell’s official website or consult the Honeywell Pro 5000 manual․ Additional support is available through their customer service or authorized dealers․
The Honeywell Pro 5000 installation involves mounting the wallplate, connecting wires according to the system type, installing the thermostat unit, and testing the heating, cooling, and fan functions․ Ensure compatibility with your HVAC system and follow safety precautions․ Refer to the manual for specific wiring diagrams and configuration steps․ After installation, customize settings and verify system operation to ensure optimal performance․ Proper installation ensures energy efficiency and reliable temperature control․
Where to Find Additional Support and Resources
For further assistance, visit Honeywell’s official website at yourhome․honeywell․com for detailed guides, FAQs, and troubleshooting tips․ The Honeywell Pro 5000 manual is also available as a downloadable PDF․ Additionally, contact Honeywell customer support for personalized help․ You can also explore Honeywell’s social media channels and forums for user discussions and expert advice, ensuring you have all the resources needed for a successful installation and operation of your thermostat․