low gi foods list pdf

The glycemic index (GI) measures how quickly foods raise blood sugar levels․ It categorizes foods into low‚ medium‚ and high GI based on their impact․ Low GI foods‚ with a GI of 55 or less‚ are ideal for stable blood sugar management and overall health benefits․

Benefits of Low GI Foods

Low glycemic index (GI) foods offer numerous health benefits‚ particularly for blood sugar management and overall well-being․ By slowing down glucose absorption‚ low GI foods help maintain stable blood sugar levels‚ reducing the risk of spikes and crashes․ This makes them ideal for individuals with diabetes or those seeking to improve insulin sensitivity․

  • Low GI foods promote sustained energy levels‚ preventing energy crashes and fatigue․
  • They support weight management by increasing satiety and reducing hunger‚ making it easier to maintain a healthy weight․
  • Diets rich in low GI foods are associated with a lower risk of chronic diseases‚ such as heart disease and type 2 diabetes․
  • These foods often have higher fiber and nutrient content‚ contributing to better digestive health and overall nutrition․

Incorporating low GI foods into your diet can lead to improved blood lipid profiles and better blood pressure control․ They also aid in maintaining mental clarity and focus throughout the day․ With their balanced impact on blood sugar‚ low GI foods are a smart choice for long-term health and vitality․
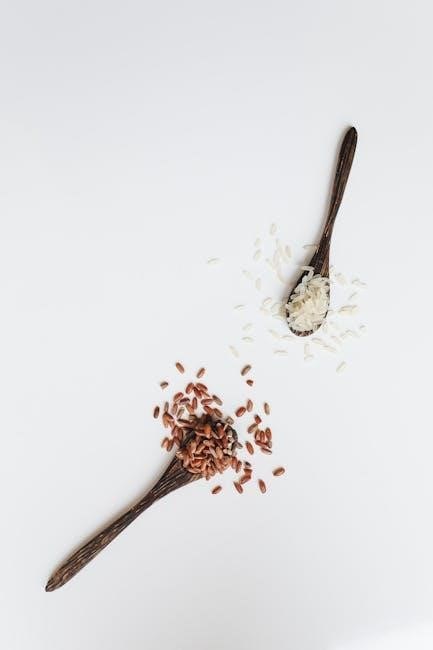
Low GI Foods List

Low GI foods include non-starchy vegetables‚ whole grains‚ legumes‚ and lean proteins․ Fruits like apples and berries‚ and whole grain cereals‚ are excellent choices․ Download a comprehensive Low GI Foods List PDF for easy reference and meal planning․

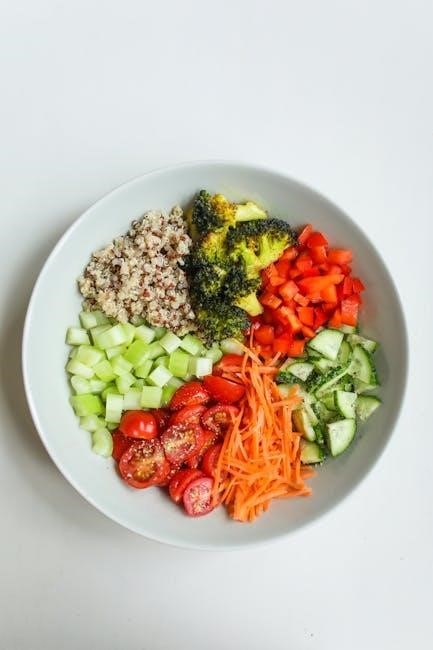
Fruits and Vegetables

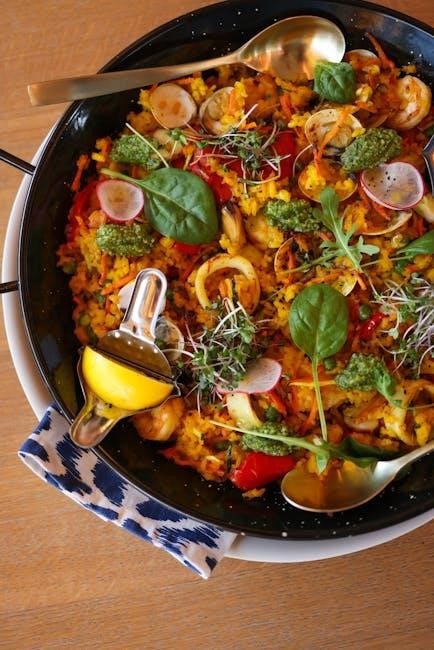
Fruits and vegetables are excellent low GI options‚ offering natural sweetness and essential nutrients․ Most fruits‚ such as apples (GI 34)‚ berries‚ and citrus‚ have a GI of 50 or less‚ making them ideal for blood sugar stability․ Non-starchy vegetables like broccoli‚ spinach‚ and cucumbers are also low in GI and rich in fiber‚ helping to slow digestion and prevent rapid blood sugar spikes․

Some tropical fruits‚ such as mangoes and pineapples‚ have slightly higher GI values but are still relatively low compared to refined sugars․ Pairing fruits with vegetables or nuts can further balance their glycemic impact․

Vegetables like carrots and beets have moderate GI levels but are still beneficial due to their high fiber and nutrient content․ Incorporating a variety of colorful fruits and vegetables ensures a balanced diet while maintaining low GI benefits․ For a complete list‚ refer to the downloadable Low GI Foods List PDF‚ which provides detailed glycemic values for specific fruits and vegetables․

Grains and Proteins

Whole grains and proteins are essential components of a low GI diet‚ offering sustained energy and satiety․ Oats‚ quinoa‚ and barley are excellent low GI grains‚ with GI values typically below 50․ These grains are rich in fiber‚ which slows digestion and prevents rapid blood sugar spikes․

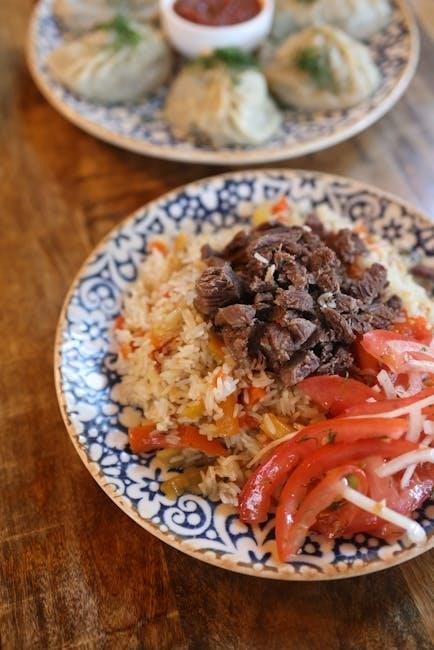
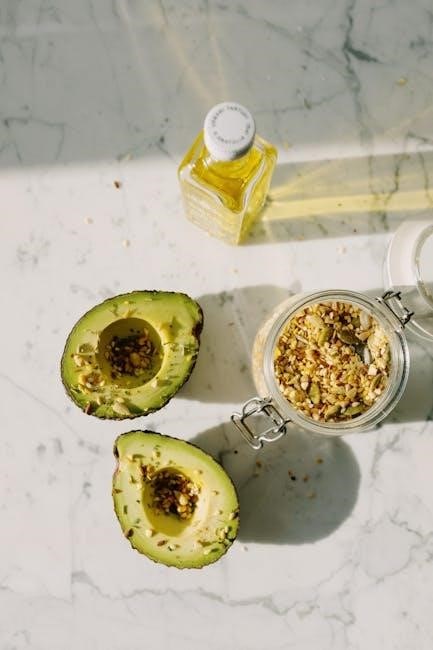
Proteins like lean meats‚ fish‚ eggs‚ and legumes (such as lentils and chickpeas) are naturally low in carbohydrates and have minimal impact on blood sugar levels․ Legumes‚ in particular‚ combine protein with fiber‚ making them a highly effective low GI choice․

Whole grain breads and pasta‚ while slightly higher in GI‚ are still preferable to refined alternatives due to their fiber content․ When selecting grains‚ opt for minimally processed options to retain nutritional benefits․

The downloadable Low GI Foods List PDF provides a comprehensive guide to grains and proteins‚ helping you make informed choices for balanced meals․ These foods not only support blood sugar control but also contribute to overall dietary health and satisfaction․

Incorporating Low GI Foods

Incorporating low GI foods into your diet promotes stable blood sugar levels and enhances overall health․ Swap high GI foods with low GI alternatives like whole grains‚ legumes‚ and proteins to maintain energy and reduce cravings․

Meal Planning

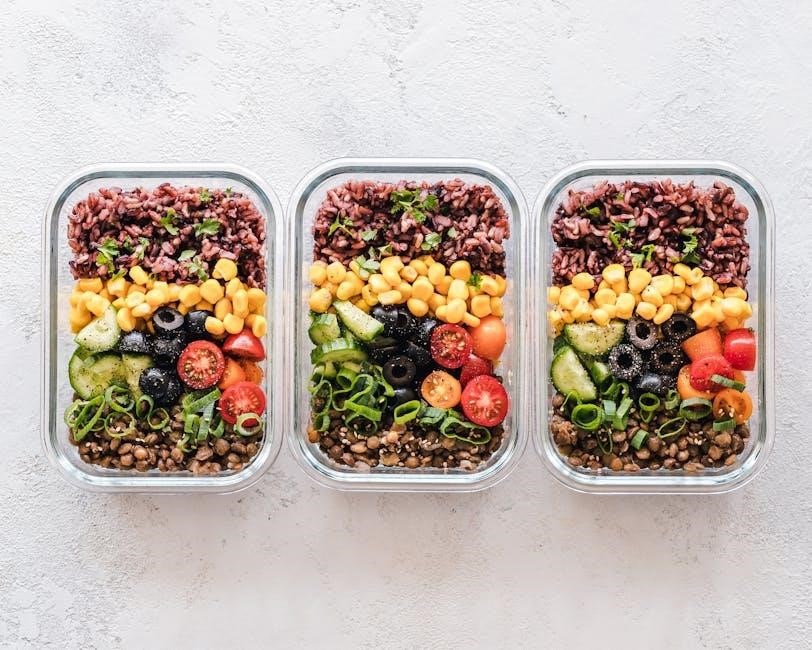
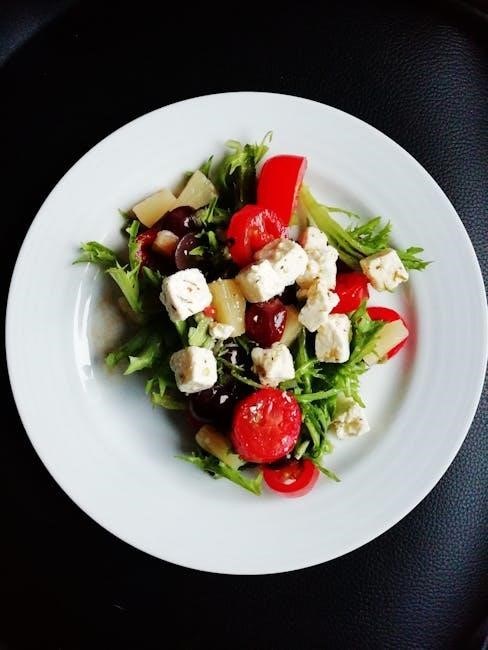
Meal planning is essential for incorporating low GI foods into your diet effectively․ Start by identifying low GI options from the provided list and organizing them into balanced meals․ Focus on combining protein‚ healthy fats‚ and fiber-rich foods to maintain stable energy levels throughout the day․

Breakfast options like oatmeal with nuts or eggs are excellent low GI choices․ For lunch‚ consider whole grain salads with lean proteins and vegetables․ Dinners can include quinoa‚ legumes‚ or grilled meats paired with steamed vegetables․ Snacks like fruits or yogurt with seeds are great for between meals․

Plan meals in advance to avoid last-minute high GI choices․ Use the low GI foods list PDF as a reference to ensure you’re making the best selections․ Rotate ingredients weekly to maintain variety and ensure you’re getting a wide range of nutrients; This approach not only stabilizes blood sugar but also supports overall health and weight management․

Remember‚ portion control is key‚ even with low GI foods․ Pairing low GI carbohydrates with protein or fat can further slow digestion and prevent blood sugar spikes․ By structuring meals thoughtfully‚ you can enjoy lasting energy and improved well-being․

Snacking

Snacking can be a healthy part of your day if you choose low GI options․ These snacks help maintain stable blood sugar levels and prevent energy crashes․ Reach for fruits like apples‚ berries‚ or citrus‚ which are naturally low in GI and rich in fiber․

Nuts and seeds‚ such as almonds‚ walnuts‚ and chia seeds‚ are also excellent choices․ Pair them with a piece of fruit for a balanced snack․ Greek yogurt with a sprinkle of cinnamon or a handful of baby carrots with hummus are other great low GI options․

When selecting snacks‚ avoid processed foods and those high in refined sugars‚ as they can cause rapid blood sugar spikes․ Instead‚ opt for whole‚ unprocessed foods that provide sustained energy․ Portion control is important‚ even with healthy snacks‚ to maintain overall balance․

Keep a list of low GI snacks handy‚ using the low GI foods list PDF as a guide‚ to make quick and nutritious choices․ This approach ensures your snacks support your health goals and keep you feeling satisfied until your next meal․

Downloadable Low GI Foods List PDF

A downloadable Low GI Foods List PDF is a valuable resource for anyone aiming to manage their blood sugar levels or adopt a healthier diet․ This convenient guide provides a comprehensive list of foods categorized by their glycemic index‚ making it easy to identify and choose low GI options․

The PDF typically includes a wide range of foods‚ from fruits and vegetables to grains‚ proteins‚ and snacks․ Each item is ranked based on its GI value‚ with clear indicators for low‚ medium‚ and high GI foods․ This helps users make informed decisions about their meals and snacks․

Having a printable version of the list allows you to keep it handy in the kitchen or on the fridge for quick reference․ It’s also useful for grocery shopping‚ ensuring you select foods that align with your dietary goals․ The list often includes additional tips on portion control and meal planning to maximize its benefits․

By downloading the Low GI Foods List PDF‚ you gain a practical tool to help stabilize blood sugar levels‚ improve energy‚ and enhance overall nutrition․ It’s a simple yet effective way to make healthier choices without sacrificing flavor or variety in your diet․

Identifying True Low GI Foods

Identifying true low GI foods involves understanding the glycemic index (GI) categories and making informed choices․ The GI ranks foods based on how they affect blood sugar levels‚ with low GI foods having a GI of 55 or less․ These foods are ideal for maintaining stable blood sugar levels and overall health․

To identify low GI foods‚ look for whole‚ unprocessed options like whole grains‚ legumes‚ and most fruits and vegetables․ These foods naturally have lower GI values due to their higher fiber and nutrient content․ Avoid highly processed or refined foods‚ as they often have higher GI values․

Additionally‚ be cautious of packaged foods labeled as “low GI․” Some products may contain additives‚ preservatives‚ or unhealthy fats‚ making them less nutritious despite their low GI․ Always check the ingredient list to ensure the food is wholesome and aligns with your dietary goals․

By focusing on whole foods and being mindful of processing‚ you can easily identify and incorporate true low GI foods into your diet for better blood sugar control and improved health outcomes․

The glycemic index serves as a valuable tool for making informed food choices‚ helping you avoid rapid blood sugar spikes and crashes․ Low GI foods not only support stable energy levels but also promote feelings of fullness and satisfaction‚ making them ideal for weight management and long-term health․

With the help of a downloadable low GI foods list PDF‚ you can easily reference and incorporate these foods into your daily meals and snacks․ Remember‚ it’s not just about the glycemic index—focus on nutrient-dense‚ whole foods to maximize the benefits of your diet․

By adopting a low GI lifestyle‚ you’re taking a proactive step toward better health and well-being․ Start today and enjoy the rewards of a balanced‚ sustainable diet!

Continue Reading

vb-mapp pdf

The VB-MAPP is a comprehensive assessment tool for evaluating language and social skills in children with autism or intellectual disabilities, based on Skinner’s verbal behavior analysis․

What is VB-MAPP?

The Verbal Behavior Milestones Assessment and Placement Program (VB-MAPP) is a diagnostic tool designed to assess language and social skills in children with autism or other intellectual disabilities․ Based on B․F․ Skinner’s analysis of verbal behavior, it evaluates developmental milestones and identifies barriers to learning․ The VB-MAPP consists of two main components: the Milestones Assessment and the Barriers Assessment․ The Milestones Assessment tracks 170 skills across three developmental levels (0-18 months, 18-30 months, and 30-48 months), focusing on areas like manding, tacting, and intraverbal skills․ The Barriers Assessment identifies 24 potential obstacles to learning, such as sensory sensitivities or tantrums․ This tool is widely used in Applied Behavior Analysis (ABA) to guide individualized education plans (IEPs) and intervention strategies, making it essential for clinicians and educators working with children with developmental delays․

Components of VB-MAPP

The VB-MAPP includes a Milestones Assessment with 170 skills across three developmental levels and a Barriers Assessment identifying 24 learning obstacles, providing a comprehensive evaluation framework․

Milestones Assessment

The VB-MAPP Milestones Assessment evaluates 170 verbal behavior milestones across three developmental levels: 0-18 months, 18-30 months, and 30-48 months․ These milestones cover foundational skills like attending to stimuli, responding to names, and emitting mands or tacts․ Each milestone is scored based on direct testing (T), observation (O), or either method (E or TO)․ The assessment tracks progress in critical areas such as listener responding, visual perceptual skills, and early language development․ It provides a clear framework for identifying a child’s current skill level and guiding the development of individualized goals․ This tool is particularly valuable for children with autism or other intellectual disabilities, offering a structured approach to assessing and building communication skills systematically․

Barriers Assessment

The VB-MAPP Barriers Assessment identifies 24 potential obstacles that may hinder a child’s learning and language development․ These barriers include challenges such as limited attention, sensory sensitivities, and difficulties with group skills․ The assessment provides a detailed evaluation of factors that could impede progress in communication and social interactions․ By pinpointing these barriers, professionals can develop targeted strategies to address them, ensuring more effective intervention․ This component complements the Milestones Assessment by offering insights into why a child may struggle with specific skills, allowing for a more comprehensive understanding of their needs․ The Barriers Assessment is a crucial tool for creating personalized and effective learning plans tailored to each child’s unique challenges․

Developmental Levels

The VB-MAPP organizes skills into three developmental levels, spanning from birth to approximately 48 months․ Level 1 covers foundational skills like attending to stimuli and emitting simple mands․ Level 2 builds on these basics, introducing more complex verbal and social behaviors․ Level 3 focuses on advanced skills such as reading, writing, and math․ These levels provide a clear progression, ensuring that interventions are age-appropriate․ Each level is divided into milestones, allowing for precise tracking of a child’s progress․ This structure helps professionals identify gaps and set realistic goals․ By aligning with typical developmental timelines, the VB-MAPP offers a framework for assessing and teaching skills systematically․

Administration and Scoring

The VB-MAPP uses a standardized scoring system with specific symbols and codes to mark observations and test results, ensuring consistent and reliable assessment of developmental milestones․

Scoring System

The VB-MAPP scoring system uses specific symbols to mark observations and test results, ensuring consistency and reliability․ Codes such as ‘T’ for direct testing, ‘O’ for observation, ‘E’ for either method, and ‘TO’ for test or observation within a specific timeframe are utilized․ Each milestone is scored based on the child’s performance, with clear criteria for mastery․ The system allows for detailed tracking of progress across developmental levels, providing a comprehensive overview of strengths and areas needing support․ This structured approach ensures accurate assessment of language, social, and academic skills, aiding in tailored intervention planning and progress monitoring over time․

Interpretation of Results

The VB-MAPP results are interpreted to identify a child’s mastery of specific verbal behavior milestones across three developmental levels․ Scores highlight strengths and areas requiring intervention, guiding the development of individualized education plans (IEPs)․ The assessment provides a detailed profile of language, social, and academic skills, enabling clinicians to track progress over time․ By analyzing the milestones achieved, professionals can determine the most appropriate instructional strategies and goals․ The results also help identify barriers to learning, ensuring comprehensive support for children with autism or other intellectual disabilities․ This structured interpretation supports data-driven decision-making, fostering meaningful skill development and measurable outcomes․

Applications in Applied Behavior Analysis (ABA)

The VB-MAPP is widely used in Applied Behavior Analysis (ABA) to guide the development of individualized treatment plans for children with autism or developmental delays․ It provides a clear framework for assessing verbal behavior milestones and identifying skill gaps, enabling clinicians to create targeted interventions․ ABA practitioners utilize the VB-MAPP to prioritize goals, such as enhancing manding, tacting, and intraverbal skills, and to monitor progress over time․ The assessment also helps identify barriers to learning, allowing for tailored strategies to address these challenges․ By aligning with ABA principles, the VB-MAPP supports data-driven decision-making and ensures that interventions are both effective and measurable․ This tool is essential for creating comprehensive and personalized programs that foster meaningful skill acquisition and long-term outcomes․

VB-MAPP Barriers Assessment

The VB-MAPP Barriers Assessment is a critical component of the Verbal Behavior Milestones Assessment and Placement Program, designed to identify 24 specific barriers that may impede a child’s learning and language development․ These barriers include challenges such as limited social reinforcement, sensory sensitivities, and difficulties with executive functioning․ By pinpointing these obstacles, professionals can develop tailored strategies to address them effectively․

The assessment provides a detailed evaluation of potential roadblocks, enabling clinicians to create interventions that foster a more supportive learning environment․ This tool is invaluable for understanding why certain skills may not be emerging as expected, ensuring that treatment plans are comprehensive and targeted to the child’s unique needs․

Comparison with ABLLS-R

The VB-MAPP and ABLLS-R are both widely used assessments in Applied Behavior Analysis (ABA) for evaluating skills in children with autism or other intellectual disabilities․ While both tools focus on language and learning skills, they differ in scope and application․ The VB-MAPP is based on B․F․ Skinner’s analysis of verbal behavior and includes both Milestones and Barriers assessments, providing a broader framework for understanding a child’s abilities and challenges․ In contrast, the ABLLS-R focuses specifically on basic language and learning skills, categorizing them into domains like vocal imitation and intraverbals․ Both tools are valuable, but the VB-MAPP offers additional insights into developmental levels and barriers to learning, making it a more comprehensive option for long-term planning and intervention․

Using VB-MAPP for IEP Goals

The VB-MAPP is a valuable tool for developing Individualized Education Programs (IEPs) by identifying specific skills and goals tailored to a child’s needs․ It assesses 170 milestones across three developmental levels, providing a clear framework for tracking progress․ The assessment highlights strengths and areas needing support, allowing educators to create targeted objectives․ For example, if a child struggles with manding (requesting), the VB-MAPP can inform IEP goals like “Emits 10 mands independently․” The scoring system helps measure progress over time, ensuring goals are measurable and achievable․ By aligning IEP goals with VB-MAPP results, educators can design interventions that address skill deficits and promote meaningful growth․ This approach ensures a child’s educational plan is data-driven, collaborative, and focused on their unique developmental needs․

Case Studies and Practical Applications

The VB-MAPP has been widely applied in real-world settings to assess and intervene with children with autism and other developmental delays․ Case studies demonstrate its effectiveness in tracking progress and guiding intervention․ For instance, educators and clinicians have used the VB-MAPP to identify specific skill deficits and design targeted teaching strategies․ One case study highlighted a 4-year-old child with autism who showed significant improvements in communication skills after interventions based on VB-MAPP results․ The tool’s practical application extends to classroom settings, where it helps teachers monitor developmental milestones and adapt instruction․ By providing clear, data-driven insights, the VB-MAPP enables professionals to make informed decisions, ensuring interventions are both effective and tailored to individual needs․ These practical applications underscore the VB-MAPP’s value in applied behavior analysis and special education․

Limitations of VB-MAPP

Despite its widespread use, the VB-MAPP has several limitations․ One major drawback is its time-intensive administration, requiring significant expertise and resources․ The assessment’s reliance on observational data may lead to subjective interpretations, potentially reducing reliability․ Additionally, the tool focuses primarily on verbal behavior, overlooking other critical skills such as emotional regulation and social initiation․ The VB-MAPP’s scoring system can also be complex, making it challenging for some professionals to interpret results accurately․ Furthermore, it may not fully capture the nuances of children with severe communication impairments․ While it remains a valuable tool in applied behavior analysis, these limitations highlight the need for supplementary assessments to ensure comprehensive understanding of a child’s abilities and challenges․

Future Directions and Updates

Future updates to the VB-MAPP are expected to enhance its utility and accessibility․ Potential advancements include digital versions with automated scoring and real-time data tracking, reducing administrative burden․ Additionally, there may be expansions to address a broader range of developmental levels and incorporate emerging technologies, such as AI-driven assessments․ Researchers are also exploring integration with other tools, like the ABLLS-R, to provide a more holistic evaluation․ Updates may also focus on improving cultural sensitivity and inclusivity, ensuring the assessment is effective across diverse populations․ Furthermore, ongoing research aims to refine the tool’s ability to identify subtle skill gaps and provide more precise recommendations for intervention․ These updates will likely solidify the VB-MAPP’s role as a leading assessment tool in applied behavior analysis and special education․

The VB-MAPP stands as a pivotal tool in assessing and guiding the development of language and social skills in children with autism and other intellectual disabilities․ Its structured approach, rooted in Skinner’s verbal behavior analysis, offers a clear framework for identifying developmental milestones and barriers․ By providing actionable data, the VB-MAPP aids in creating tailored intervention plans and IEP goals, making it indispensable in applied behavior analysis and education․ Despite its limitations, continuous updates and research ensure its relevance and effectiveness․ As a comprehensive and evidence-based resource, the VB-MAPP continues to empower professionals and caregivers in fostering meaningful progress for children with diverse needs․ Its impact is undeniable, shaping both current practices and future directions in the field of developmental assessment․

Continue Reading

rowenta iron instruction manual

Welcome to the Rowenta Iron Instruction Manual. This guide helps you master your Rowenta iron, known for powerful steam and smart design. Explore safety, features, and maintenance tips to ensure optimal performance and extend the lifespan of your appliance.

Overview of Rowenta Iron Models

Rowenta offers a diverse range of iron models, each designed for specific needs. From the Access Steam series with its retractable cord to the SteamForce Pro, known for its powerful steam output, these models cater to both everyday and advanced ironing tasks. The Powerglide and Focus lines feature ergonomic designs and precision tips, while others incorporate eco-friendly technologies. Each model combines innovative features like Microsteam technology and high-quality soleplates for superior results.

Importance of Reading the Instruction Manual

Reading the Rowenta iron instruction manual is essential to unlock your iron’s full potential. It provides step-by-step guides for optimal usage, safety precautions, and troubleshooting tips. By understanding the features and settings specific to your model, you can ensure efficient ironing, prevent damage, and maintain performance. The manual also offers insights into energy-saving modes and maintenance routines to prolong the life of your appliance.

Important Safety Instructions

Always follow safety guidelines to prevent accidents. Avoid immersing the iron in water, keep it out of children’s reach, and use only approved accessories. Ensure proper usage as outlined in the manual to maintain safety and efficiency.

General Safety Precautions

Always prioritize safety when using your Rowenta iron. Keep it out of children’s reach and avoid immersing it in water to prevent electric shock. Use only approved accessories and ensure the iron is placed on a heat-resistant surface. Never leave the iron unattended while in use. Regularly inspect the power cord and plug for damage. Follow all guidelines in the manual to ensure safe and efficient operation.

Electrical Safety Guidelines

Ensure the iron is used with a properly grounded outlet and avoid overloading circuits. Never submerge the iron in water or expose it to moisture. Use only the provided cord and plug, and avoid damaged or frayed cords. Keep the iron away from flammable materials. Always unplug it when not in use or before cleaning. Adhere to voltage requirements and follow all electrical safety standards outlined in the manual to prevent hazards.

Proper Usage and Maintenance Tips

Regularly clean the soleplate to prevent residue buildup and ensure optimal performance. Descale the iron periodically to remove mineral deposits, following the manual’s instructions. Empty the water tank when not in use to prevent bacterial growth. Store the iron in a cool, dry place, away from children. Always use distilled water to maintain steam quality and avoid damage. Avoid ironing delicate fabrics without proper settings or protection.

Understanding Your Rowenta Iron

The Rowenta iron combines advanced technology with a sleek, user-friendly design. It features Microsteam technology for even steam distribution and a stainless steel soleplate for durable performance; This iron is designed to make garment care effortless and efficient, catering to various fabric types with precision and care.

Key Features and Components

Your Rowenta iron is equipped with powerful steam technology and a stainless steel soleplate featuring Microsteam technology for even steam distribution. It includes a steam boost function for tough wrinkles, an eco-mode for energy savings, and a retractable cord for easy storage. The precision metal tip allows for detailed ironing, while the large water tank ensures continuous steam performance. These features combine to deliver professional-grade results with minimal effort.

Different Ironing Modes and Settings

Rowenta irons offer multiple ironing modes, including steam, dry, and eco-mode, to suit various fabrics and needs. Adjust temperature settings for delicate fabrics like silk or high settings for heavy-duty materials like cotton. Utilize the steam boost for stubborn wrinkles and vertical steam for hanging garments. Precision tip allows for detailed ironing, while smart temperature control ensures safe and efficient ironing across all fabric types.

Accessories Included with the Iron

Your Rowenta iron comes with essential accessories to enhance your ironing experience. These include a measuring cup for filling the water tank, a storage bag for convenient organization, and a user manual detailing features and maintenance tips. Some models also include a travel pouch or cleaning kit for descaling. These accessories ensure optimal performance and longevity of your Rowenta iron, making ironing easier and more efficient for all fabric types.

Filling and Using the Water Tank

Filling your Rowenta iron’s water tank is essential for steam functions. Use distilled water to prevent mineral buildup. Fill to the max line for optimal steam performance. Always unplug before refilling to ensure safety and avoid spills. Refer to the manual for specific guidelines to maintain your iron’s efficiency and longevity.

Step-by-Step Guide to Filling the Tank

Ensure the iron is unplugged and cooled down. Locate the water tank, usually on the top or side of the appliance. Use the provided measuring cup to fill with distilled water. Pour slowly to avoid spills. Do not exceed the maximum water level indicated. Wipe any excess water from the tank opening. Plug in the iron and let it heat up before using the steam function. This ensures optimal performance and prevents mineral buildup.

Using the Steam Boost Function

Activate the steam boost function by pressing the dedicated button, typically located on the handle. This releases a powerful burst of steam for tougher wrinkles. Ensure the iron is set to the correct fabric temperature. Use the boost on vertical or horizontal surfaces, holding the iron 6 inches away for vertical steaming. This feature enhances efficiency, making quick work of stubborn creases while protecting delicate fabrics. Always follow the manual’s guidelines for optimal results.

Best Practices for Water Quality

For optimal performance, use tap water with a hardness level suitable for your region. Avoid distilled or demineralized water, as it may reduce steam efficiency. Regularly descale the iron to prevent mineral buildup. If using filtered or softened water, ensure it contains necessary minerals. Poor water quality can clog the steam system, so always follow the manual’s guidelines for water selection and maintenance to ensure long-lasting performance and reliable steam output.

Ironing Techniques and Tips

Use tap water with appropriate hardness for your region. Avoid distilled or demineralized water, as it may reduce steam efficiency. Regular descaling prevents mineral buildup. Filtered or softened water should contain necessary minerals for optimal performance. Poor water quality can clog the steam system, so follow manual guidelines for water selection and maintenance to ensure long-lasting efficiency and reliable steam output.

Mastering Vertical and Horizontal Steam

Vertical steam is ideal for hanging garments, while horizontal steam is perfect for flat surfaces. Use the steam boost for stubborn wrinkles. Always test fabric compatibility and adjust steam settings accordingly; For vertical steaming, ensure the iron is upright and the soleplate is clean. Horizontal steam works best with even pressure and continuous movement. Utilize the steam lock for consistent output and avoid scorching delicate fabrics by reducing heat and steam intensity when necessary.

Ironing Different Fabric Types

Rowenta irons cater to various fabrics, from delicate silks to sturdy linens. For cotton and linen, use higher heat and steam. Delicate fabrics like silk require lower temperatures and steam-free settings. Wool and synthetic fabrics need medium heat with minimal steam. Always test an inconspicuous area first. Adjusting the temperature and steam settings ensures optimal results without damaging fabrics. Use the steam boost for tough wrinkles on thicker materials, but avoid it for sensitive or synthetic fibers to prevent scorching or melting.

Optimizing Steam Distribution

Maintenance and Troubleshooting

Regular descaling and cleaning of the soleplate ensure optimal performance. Check steam holes for blockages and use distilled water to prevent mineral buildup. For issues, refer to troubleshooting guides or contact Rowenta support.

Cleaning and Descale the Iron

Regularly descale your Rowenta iron to remove mineral buildup. Use distilled water to prevent scaling. Clean the soleplate with a damp cloth after use. For steam holes, ensure they are free from blockages. Refer to the manual for specific descaling instructions, as frequency depends on water hardness. Proper maintenance ensures optimal steam performance and extends the iron’s lifespan. Always unplug the iron before cleaning or descaling for safety.

Common Issues and Solutions

Common issues with Rowenta irons include steam not working, water leakage, or the iron not heating. Check power connections and ensure the water tank is filled. Use distilled water to prevent mineral buildup. Descaling regularly can resolve steam issues. Clean the soleplate and steam holes to maintain performance. If problems persist, refer to the manual or contact Rowenta customer support for assistance.

When to Contact Customer Support

Contact Rowenta customer support if you encounter issues not resolved by troubleshooting or maintenance. Seek assistance for complex problems like faulty heating elements or persistent steam malfunctions. Professional help is recommended for repairs requiring technical expertise. Additionally, reach out for warranty-related inquiries or to clarify product features. Visit the official Rowenta website for contact details and support resources.

Frequently Asked Questions (FAQs)

Find answers to common questions about Rowenta iron setup, steam usage, and maintenance. Visit the official website or support page for detailed FAQs and troubleshooting guides.

Common Queries About Rowenta Irons

Users often ask about steam function usage, descaling, and fabric settings. The manual provides clear guidance on these topics. Learn how to optimize performance, troubleshoot issues, and maintain your iron for longevity. For specific queries, refer to the user manual or visit Rowenta’s official support page for detailed answers and resources.

Clarifications on Product Features

Rowenta irons feature advanced technologies like Microsteam soleplates and Eco-Mode for energy efficiency. Clarifications include steam boost functions, fabric settings, and water tank maintenance. The manual details how these features enhance performance, ensuring optimal results. Troubleshooting guides address common issues, while maintenance tips prolong the iron’s lifespan. Understanding these features helps users maximize their ironing experience and maintain the appliance effectively.

Warranty and Service Information

Rowenta irons come with a warranty covering repairs or replacements during the specified period. For service, contact Rowenta’s customer support or visit authorized centers. Registration may be required for warranty activation. Refer to the manual for details on warranty terms and conditions. Proper maintenance ensures warranty validity, while Rowenta’s dedicated support team assists with any inquiries or issues, providing reliable service for your appliance.

Eco-Mode and Energy Efficiency

Eco-Mode on Rowenta irons offers energy-saving settings, optimizing power consumption while maintaining performance. This feature helps reduce environmental impact and promotes sustainable garment care.

Using Eco-Mode for Energy Savings

Activate Eco-Mode on your Rowenta iron to reduce energy consumption while maintaining performance. This feature optimizes power use, lowering your environmental impact. Eco-Mode adjusts heat and steam settings automatically, ensuring efficient garment care without compromising results. By using Eco-Mode, you contribute to energy conservation and extend the lifespan of your iron. It’s a sustainable way to achieve professional-level ironing with minimal energy waste.

Reducing Environmental Impact

Rowenta irons are designed with eco-conscious features to minimize environmental impact. Using Eco-Mode reduces energy consumption, while advanced steam technology lowers water usage. Proper maintenance, like regular descaling, ensures longevity, reducing electronic waste. By choosing energy-efficient settings and maintaining your iron, you contribute to a more sustainable future; Rowenta’s commitment to eco-friendly design helps you iron responsibly while preserving the planet for future generations.

Optimizing Iron Performance

Optimize your Rowenta iron’s performance by using the correct steam settings for different fabrics and regularly cleaning the soleplate. Activate the steam boost for tough wrinkles and utilize vertical steam for hanging garments. Descaling the iron and refilling the water tank with filtered water prevents mineral buildup. Properly storing the iron with the retractable cord ensures longevity. These practices enhance efficiency, maintain steam power, and ensure consistent results for years of reliable service.

Resources for Further Assistance

Visit the official Rowenta website for downloadable user manuals, troubleshooting guides, and customer support contact information to address any questions or concerns about your iron.

Downloading the Full User Manual

Rowenta Customer Support Contact

For any inquiries or assistance with your Rowenta iron, contact their dedicated customer support team. Visit the official Rowenta website for contact details, including phone numbers and email addresses. Regional service centers are also available for repairs and maintenance. If your iron requires service, check the warranty terms for possible free repairs or replacements. Rowenta is committed to providing excellent customer support to ensure your satisfaction.

Online Communities and Forums

Engage with online communities and forums dedicated to Rowenta irons for tips, troubleshooting, and shared experiences. Platforms like Reddit and Quora host discussions on Rowenta products. These spaces allow you to connect with other users, exchange advice, and learn from experts. They are invaluable resources for optimizing your iron’s performance and resolving common issues. Active participation can enhance your ironing experience and provide insights beyond the manual.

Continue Reading

validating statements pdf

Data validation in PDF processing ensures accuracy and compliance by verifying content integrity․ It prevents errors, enhances security, and maintains data reliability, making it essential for trustworthy document handling and digital information exchange․

What is Data Validation?

Data validation is the systematic process of verifying the accuracy, completeness, and consistency of data to ensure it meets predefined criteria and standards․ In the context of PDF processing, it involves checking the integrity of statements, values, and formats within the document․ This process helps prevent errors, inconsistencies, and potential security risks by ensuring that the data aligns with expected norms․ Validation can include checks for data types, lengths, ranges, and formats, as well as compliance with specific rules or regulations․ By implementing robust validation mechanisms, organizations can maintain the reliability and trustworthiness of their PDF documents, whether they contain textual information, numerical data, or complex structured content․ Effective data validation is essential for ensuring that PDFs are free from corruption, adhere to organizational standards, and are suitable for their intended purposes․

Importance of Validating Statements in PDFs

Validating statements in PDFs is crucial for ensuring data integrity, security, and compliance․ PDFs often contain sensitive or critical information, such as legal documents, financial records, or technical specifications, where inaccuracies can lead to severe consequences․ Validation helps detect and correct errors, ensuring that the content is accurate and reliable․ It also prevents unauthorized modifications, safeguarding against fraud and data tampering․ Additionally, validation ensures compliance with industry standards and regulations, which is essential for legal and professional purposes; By verifying the consistency and correctness of statements in PDFs, organizations can maintain trust with stakeholders and avoid potential legal or financial repercussions․ Furthermore, validation enhances the overall quality of documentation, making it more professional and dependable․ In summary, validating statements in PDFs is a critical step to uphold integrity, security, and compliance in digital documentation․

Types of Validation

Validation ensures data accuracy and compliance․ Common types include type checks for data types, length checks for string sizes, range validation for numerical limits, and format compliance for specific patterns like emails or phone numbers․

Type Check

Type checking is a fundamental aspect of data validation that ensures input data conforms to the expected data type․ In Python, this is crucial for maintaining code reliability and preventing type-related errors․ By verifying that inputs are of the correct type, such as integers, floats, or strings, developers can avoid unexpected behavior and potential security vulnerabilities․ For instance, using functions like isinstance allows for precise type verification, ensuring that variables are not misused․ Additionally, libraries like Pydantic offer robust type validation, automatically converting and validating data against predefined schemas․ This approach not only enhances code robustness but also simplifies error handling by providing clear feedback when type mismatches occur․ Implementing type checks is essential for building secure and reliable applications, especially when processing data from untrusted sources like user inputs or external files․

Length Check

A length check is a validation technique used to ensure that input data meets specific length requirements․ This is particularly useful for fields like passwords, usernames, or identifiers, where the data must be within a predefined minimum or maximum length․ In Python, length checks are typically performed using conditional statements such as if or while loops․ For example, a program might verify that a username is between 3 and long or that a password meets a minimum length requirement for security purposes․ Length validation helps prevent issues like truncated data or buffer overflows, ensuring data integrity and consistency․ Additionally, libraries like Pydantic provide built-in support for length validation, making it easier to enforce such constraints․ By implementing length checks, developers can enhance user experience and maintain robust data handling practices in their applications․

Range Validation

Range validation ensures that numeric input falls within a specified range, making it a critical aspect of data integrity․ For instance, validating age inputs to be between 0 and 120 prevents invalid or unrealistic values․ In Python, this is often achieved using conditional statements like if or while loops․ For example, a program might use a while True loop to repeatedly request input until the value meets the defined range criteria․ Additionally, libraries like Pydantic offer robust range validation capabilities, simplifying the process of enforcing such constraints․ Range validation is essential for maintaining data accuracy, preventing errors, and enhancing the reliability of applications․ It is widely used in scenarios such as form validation, scientific data processing, and configuration settings, where values must adhere to specific boundaries․ By implementing range checks, developers can ensure that data conforms to expected limits, reducing the risk of invalid inputs and improving overall system performance․ This validation step is particularly vital in applications where data precision is paramount;

Format Compliance

Format compliance ensures that data adheres to specific structural or syntactic rules, such as email addresses, phone numbers, or date formats․ This validation is crucial for maintaining consistency and preventing errors in PDF documents․ Using regular expressions (regex) is a common method to enforce format compliance, allowing precise pattern matching․ For example, validating an email address involves checking for the presence of an “@” symbol and a domain extension․ In Python, libraries like Pydantic and Colander provide robust tools for format validation, enabling developers to define schemas that data must conform to․ Additionally, conditional statements like if can be used to check formats, while loops ensure continuous input validation until compliance is achieved․ Format compliance is essential in applications requiring strict data standards, such as legal documents or official forms․ By enforcing these rules, developers can prevent invalid data entry, enhance security, and ensure seamless document processing․ This validation step is particularly critical in scenarios where precise formatting is non-negotiable․

Using Conditional Statements for Validation

Conditional statements like if and while enable precise control over validation processes․ They check conditions, ensuring data meets criteria before execution․ These statements enhance data integrity by allowing iterative validation until requirements are fulfilled․

If Statements

If statements are fundamental in implementing conditional logic for validation․ They allow programs to execute specific code blocks based on predefined conditions, ensuring data meets required criteria before further processing․ For instance, an if statement can check if a user’s input falls within an acceptable range or matches a specific format․ This is particularly useful in validating numerical data, such as ages or identification numbers, where values must lie within certain boundaries․ Additionally, if statements can be combined with other conditional operators like elif and else to handle multiple validation scenarios․ Proper use of if statements enhances data integrity by preventing invalid inputs from being processed․ They are also essential for providing clear error messages, improving user experience․ By incorporating if statements into validation routines, developers can ensure robust and reliable data handling in their applications․ This approach is both flexible and scalable, making it a cornerstone of effective data validation strategies․

While Loops

While loops are essential for iterative validation processes, enabling continuous checks until conditions are met․ They are particularly useful for ensuring user input compliance․ For example, a while loop can repeatedly prompt for a valid age until the input falls within an acceptable range․ This ensures data integrity by preventing invalid entries from proceeding․ Additionally, while loops can be used to validate formats, such as ensuring a string matches a specific pattern (e․g․, email or phone number)․ By combining while loops with conditional statements, developers can create robust validation systems․ The loop runs indefinitely until the break statement is triggered, allowing for precise control over data flow․ This approach is both efficient and user-friendly, as it provides immediate feedback and guidance for correction․ Implementing while loops in validation enhances overall application reliability and streamlines the data entry process․ They are a versatile tool for handling complex validation scenarios, ensuring accuracy and consistency in data handling․ While loops are a cornerstone of effective input validation strategies․

Continue Reading

business expenses list pdf

Business expenses are costs incurred while operating a business, essential for tax deductions, financial health, and growth. Tracking and categorizing these expenses ensures compliance and optimizes planning.

1.1 What Are Business Expenses?

Business expenses are costs incurred during business operations, such as salaries, taxes, office supplies, and travel. These expenses are ordinary and necessary for running a business, ensuring its functionality and growth. Tracking them is crucial for tax deductions and maintaining financial health, as outlined in resources like the IRS Business Expense Categories Guide.

1.2 Importance of Tracking Business Expenses

Tracking business expenses is crucial for tax compliance, understanding financial health, and optimizing resources. It helps identify deductions, budget effectively, and monitor cash flow; Accurate records ensure accountability and informed decision-making, while also preparing for audits and financial reporting. Proper tracking maximizes tax savings and enhances overall business efficiency, as outlined in IRS guidelines and expense management resources.

Common Business Expense Categories

Common business expense categories include payroll, office supplies, travel, marketing, taxes, utilities, insurance, and professional fees. These categories help organize and manage financial resources effectively.

2.1 Payroll Expenses

Payroll expenses include salaries, wages, taxes, and employee benefits. Accurate tracking ensures compliance with tax regulations and proper allocation of funds. These expenses are crucial for managing labor costs and determining tax deductions, benefiting both employers and employees.

2.2 Office Expenses

Office expenses encompass costs for supplies, software, and equipment necessary for daily operations. These include stationery, ink cartridges, postage, and online subscriptions. Tracking these expenses helps in budgeting and claiming deductions, ensuring efficient office management and financial accountability.

2.3 Travel Expenses

Travel expenses include costs for business-related trips, such as transportation, lodging, meals, and related incidentals. These are deductible if documented and deemed ordinary and necessary for business operations. Tracking travel expenses helps in budgeting and ensures compliance with tax regulations, maximizing eligible deductions and maintaining financial transparency.

2.4 Advertising and Marketing

Advertising and marketing expenses cover costs for promoting products or services, including online ads, print media, and promotional materials. These expenses are deductible if they are reasonable and directly related to attracting customers or generating sales. Proper documentation and categorization ensure these costs are claimed accurately, supporting business growth and tax compliance.

Tax-Deductible Business Expenses

Tax-deductible business expenses are costs that can be subtracted from taxable income, reducing tax liability. These must be ordinary and necessary for the business operation.

3.1 IRS Guidelines for Deductible Expenses

The IRS requires that deductible business expenses be ordinary and necessary for the business operation. Expenses must be documented and directly related to generating income. Common examples include payroll, rent, utilities, advertising, and travel expenses. Personal expenses are not deductible. Ensure compliance by consulting IRS guidelines and maintaining accurate records for all claims.

3.2 Common Deductible Expenses

Common deductible expenses include salaries, rent, utilities, and office supplies. Travel expenses, such as meals and lodging, are deductible if business-related. Advertising, professional fees, and insurance premiums also qualify. Ensure accurate documentation and compliance with IRS guidelines to maximize deductions and avoid audits. Proper categorization is key for seamless tax filing and financial planning.

Tracking and Organizing Business Expenses

Effective tracking and organizing of business expenses involve using digital tools, spreadsheets, and cloud-based software. This ensures accuracy, compliance, and maximizes tax deductions.

4.1 Methods for Tracking Expenses

Common methods include manual logging in journals, digital spreadsheets, or specialized software. Mobile apps enable scanning receipts and categorizing expenses. Cloud-based tools offer real-time tracking and accessibility. Combining these methods ensures accurate, organized records, simplifying tax compliance and financial reporting.

4.2 Tools for Organizing Expenses

Popular tools include QuickBooks, Xero, and Expensify, which simplify expense tracking and categorization. Receipt scanning apps like Shoeboxed automate data entry. Cloud-based platforms offer secure storage and easy access. These tools generate detailed reports, ensuring compliance and streamlining tax preparation. They integrate with accounting software, making expense management efficient and organized.

Best Practices for Managing Business Expenses

Effective expense management involves regular budgeting, monitoring, and reporting. Automate tracking, enforce policies, and review expenses to ensure compliance and optimize financial performance.

5.1 Budgeting and Forecasting

Budgeting and forecasting are critical for managing expenses. Create detailed budgets aligned with business goals, using historical data to predict future spending. Regularly monitor and adjust forecasts to reflect market changes and financial performance. This ensures resource allocation is optimized and financial risks are minimized, fostering sustainable growth and operational efficiency.

5.2 Expense Reporting and Compliance

Accurate and transparent expense reporting is essential for compliance with tax regulations. Maintain organized records of all transactions, ensuring adherence to IRS guidelines. Proper documentation of receipts, invoices, and bank statements supports audit preparedness. Compliance avoids penalties and ensures eligibility for tax deductions, fostering trust and financial integrity within the organization.

Creating a Comprehensive Business Expenses List PDF

A comprehensive business expenses list PDF streamlines tax preparation and financial transparency. Include dates, amounts, categories, and receipts to ensure accuracy and compliance with IRS guidelines.

6.1 Steps to Compile an Expenses List

Gather all financial documents, including invoices, receipts, and bank statements; Categorize expenses based on IRS guidelines, such as payroll, office supplies, and travel. Include dates, amounts, and descriptions for each transaction. Organize receipts and ensure compliance with tax regulations for accurate reporting. This process aids in tax preparation and provides financial transparency.

6.2 Including Necessary Details

Include dates, amounts, descriptions, and vendor names for each expense. Attach receipts and invoices for verification. Ensure compliance with IRS guidelines by categorizing expenses clearly. Add notes for unclear transactions and maintain consistency in formatting. This ensures accuracy, transparency, and ease of review for tax purposes and financial planning.

Industry-Specific Business Expenses

Industry-specific expenses vary, such as manufacturing equipment or service industry labor costs. These unique costs must be tracked separately to ensure accurate financial reporting and compliance.

7.1 Expenses Unique to Service Industries

Service industries often incur expenses like labor costs, professional fees, and marketing. These expenses are crucial for delivering intangible products, ensuring customer satisfaction, and maintaining operational efficiency. Proper categorization aids in tax deductions and financial clarity, helping businesses optimize resources effectively.

7.2 Expenses Specific to Retail and Manufacturing

Retail and manufacturing businesses face unique costs like inventory, production materials, and warehouse operations. These expenses are vital for producing goods and maintaining stock, ensuring smooth supply chain processes. Accurate tracking and categorization help businesses claim deductions and manage budgets effectively, supporting overall profitability and scalability.

Avoiding Common Mistakes in Business Expenses

Avoid misclassifying expenses and failing to document transactions. Ensure compliance with IRS guidelines to prevent audits and penalties, maintaining accurate records for eligible deductions and tax compliance.

8.1 Overlooking Deductible Expenses

Overlooking deductible expenses can lead to missed tax savings. Commonly forgotten expenses include home office costs, travel meals, and professional fees. Ensure thorough tracking and categorization to claim all eligible deductions, as outlined in IRS guidelines, to maximize tax benefits and maintain financial health for your business operations and growth strategies effectively.

8.2 Non-Compliance with Tax Regulations

Non-compliance with tax regulations can result in penalties, audits, and financial losses. Common issues include improper documentation, misclassification of expenses, and ignoring IRS guidelines. Businesses must stay informed about tax laws and ensure accurate reporting to avoid legal consequences. Consulting tax professionals can help maintain compliance and prevent costly mistakes during tax filings.

Properly managing business expenses is essential for financial health and tax compliance. Use the business expenses list PDF to implement effective tracking and optimization strategies for your business.

9.1 Summary of Key Points

Effective expense management is crucial for business success. Categorizing expenses helps in tax deductions, financial planning, and compliance. A business expenses list PDF provides a structured approach to tracking costs like salaries, office supplies, and travel. Regular reviews ensure accuracy and optimize financial performance. Refer to IRS guidelines for detailed expense categorization and compliance requirements to maximize tax benefits and maintain fiscal health.

9;2 Implementing Effective Expense Management

Start by creating a detailed business expenses list PDF, categorizing costs like salaries, office supplies, and travel. Adhere to IRS guidelines for tax compliance. Utilize tools like Microsoft 365 for tracking and organizing expenses. Regular audits ensure accuracy. Train employees on recording expenses. Continuously review and refine expense management practices to optimize savings, improve financial clarity, and support informed decision-making for growth.

Continue Reading

jeep wj manual transmission

The Jeep WJ, produced from 1999 to 2004, is the second generation of the Grand Cherokee, known for its durability and off-road prowess․ The manual transmission options, including the AX-5 and AX-15, offered enthusiasts enhanced control and performance, making them a popular choice for both on-road driving and off-road adventures․

Overview of the Jeep WJ and Its Transmission Options

The Jeep WJ, produced from 1999 to 2004, is the second generation of the Grand Cherokee, renowned for its ruggedness and off-road capabilities․ It offered a range of transmission options, including manual and automatic․ For manual transmission enthusiasts, the WJ featured the AX-5 and AX-15 transmissions․ The AX-5, a 5-speed manual, was typically paired with the 4-cylinder and smaller V6 engines, while the AX-15, also a 5-speed, was designed for the more powerful 4․0L inline-6 engine․ These manual transmissions provided drivers with greater control and performance, both on-road and off-road, making them a favorite among Jeep enthusiasts seeking an engaging driving experience․

Why Manual Transmission is Popular Among Jeep Enthusiasts

Manual transmissions have long been a favorite among Jeep enthusiasts due to the enhanced control and connection they provide between driver and vehicle․ For Jeep WJ owners, the manual transmission offers precise gear shifts, allowing for better acceleration and torque management, especially in off-road conditions․ The ability to manually select gears enables drivers to optimize power delivery on challenging terrain, such as steep inclines or rocky trails․ Additionally, manual transmissions are often lighter and more fuel-efficient compared to their automatic counterparts, which appeals to those seeking improved performance and reduced weight․ This hands-on driving experience aligns with the rugged, adventurous spirit of Jeep ownership, making manual transmissions a preferred choice for many enthusiasts․

Jeep WJ Manual Transmission Types

The Jeep WJ features two primary manual transmissions: the AX-5 and AX-15․ The AX-5 is paired with the 4․0L inline-six, while the AX-15 is used with smaller engines․

AX-5 Transmission Details and Specifications

The AX-5 is a 5-speed manual transmission designed for the Jeep WJ, offering a durable and reliable drivetrain solution․ It features a compact design and is typically paired with the 4․0L inline-six engine, providing smooth gear transitions․ The AX-5 is known for its strength in handling moderate torque outputs, making it suitable for both on-road and off-road applications․ Gear ratios are optimized for a balance of performance and fuel efficiency, while its robust construction ensures longevity under various driving conditions․ This transmission is a popular choice among Jeep enthusiasts due to its simplicity and compatibility with the WJ’s transfer case, enhancing overall off-road capability and driver control․

AX-15 Transmission Details and Specifications

The AX-15 is a medium-duty, 5-speed manual transmission used in various Jeep models, including the WJ Grand Cherokee․ Designed by Aisin, it is paired with the 4․0L inline-six engine, offering a robust and reliable drivetrain․ The AX-15 features a stronger build compared to the AX-5, with higher torque capacity, making it suitable for more demanding applications․ Its gear ratios are optimized for both on-road performance and off-road capability, providing smooth shifts and consistent power delivery․ The transmission’s durability and compatibility with the WJ’s transfer case make it a preferred choice for enthusiasts seeking enhanced control and performance in challenging driving conditions․

Jeep WJ Manual Transmission Specifications

The Jeep WJ manual transmission specifications include AX-5 and AX-15 options, both 5-speed, with the AX-15 offering higher torque capacity and compatibility with the 4․0L engine․

Gear Ratios and Torque Capacity

The Jeep WJ’s AX-5 manual transmission features gear ratios of 3․93 (1st), 2․33 (2nd), 1․44 (3rd), 1․0 (4th), and 0․82 (5th), with a torque capacity of up to 225 lb-ft․ The AX-15 offers similar gear ratios but supports higher torque levels, up to 260 lb-ft, making it suitable for the 4․0L inline-six engine․ These specifications ensure smooth power delivery both on-road and off-road, providing drivers with optimal control and performance in various driving conditions․

Transmission Compatibility with Different Engines

The AX-5 manual transmission is compatible with the 2․5L I4 and 2․8L V6 engines, offering smooth power delivery and optimal gear ratios for smaller powerplants․ The AX-15, with its higher torque capacity, is paired exclusively with the 4․0L inline-six engine, ensuring robust performance and reliability․ This compatibility ensures that each transmission is tailored to the specific power and torque outputs of its paired engine, providing drivers with seamless control and enhanced driving experiences across various engine configurations․

Maintenance and Service of Jeep WJ Manual Transmission

Regular maintenance is crucial for the longevity of the Jeep WJ manual transmission․ This includes fluid changes, gear inspections, and ensuring proper torque specifications are met․

Recommended Maintenance Schedule

Regular maintenance is essential to ensure the longevity and performance of the Jeep WJ manual transmission․ The recommended schedule includes changing the transmission fluid every 30,000 to 60,000 miles, depending on driving conditions; Inspect the clutch assembly and gear components annually or if symptoms like slippage or grinding occur․ Lubricate the shift linkage and bearings every 15,000 miles to maintain smooth operation․ Additionally, check the transmission mounts for wear and replace them if necessary․ Following this schedule helps prevent costly repairs and ensures optimal performance both on and off the road․

  • Change transmission fluid every 30,000 to 60,000 miles․
  • Inspect clutch and gear components annually․
  • Lubricate shift linkage and bearings every 15,000 miles․
  • Check transmission mounts for wear․

Common Issues and Troubleshooting

Jeep WJ manual transmissions, particularly the AX-5 and AX-15, may experience issues over time․ Common problems include worn synchronizers, leading to difficulty shifting gears, and bearings wearing out, causing noise during operation․ Clutch failure is another issue, often due to excessive wear or improper engagement․ Leaks from the transmission case or bellhousing can occur, requiring immediate attention to prevent fluid loss․ Troubleshooting involves inspecting for worn components, checking fluid levels, and addressing any mechanical damage․ Regular maintenance, such as fluid changes and component inspections, can help mitigate these issues and ensure smooth transmission performance․

  • Worn synchronizers cause shifting difficulties․
  • Bearing wear results in operational noise․
  • Clutch failure from wear or misuse․
  • Leaks from the transmission case or bellhousing․

Upgrading and Swapping Manual Transmission in Jeep WJ

Upgrading or swapping the manual transmission in a Jeep WJ can enhance performance, durability, and off-road capability; Popular swaps include the AX-15 and NV4500 transmissions, offering improved gear ratios and strength․ Ensure compatibility with your engine and drivetrain, and consider factors like cost, installation difficulty, and required modifications․ Proper planning and professional expertise are recommended for a successful swap․

Popular Transmission Swap Options

For Jeep WJ enthusiasts, popular manual transmission swap options include the AX-15 and NV4500․ The AX-15, known for its durability and smooth shifting, is a medium-duty 5-speed transmission that pairs well with the 4․0L I6 engine․ The NV4500, a heavy-duty 5-speed, offers superior strength and is ideal for high-torque applications․ Both transmissions are sought after for their reliability and performance in off-road conditions․ These swaps are favored by owners seeking enhanced control and durability, especially in demanding environments․ Proper installation and compatibility checks are essential to ensure seamless integration with the WJ’s drivetrain system․

Steps and Considerations for a Manual Transmission Swap

Swapping a manual transmission in a Jeep WJ requires careful planning and execution․ First, ensure the new transmission is compatible with the vehicle’s engine and drivetrain․ Compatibility checks include verifying gear ratios, input shaft splines, and bellhousing alignment․ Next, gather necessary components such as crossmembers, transmission mounts, and shift linkages․ Electrical and hydraulic systems may need modifications to accommodate the manual setup․ Proper alignment and secure installation are critical to prevent damage․ Additionally, consider upgrading the clutch and flywheel for optimal performance․ Consulting a professional or detailed service manual is highly recommended, especially for inexperienced enthusiasts․ Proper execution ensures reliability and enhances the driving experience․

Performance Benefits of Manual Transmission in Jeep WJ

Manual transmissions in the Jeep WJ enhance driving control, offering crisp shifts and precise command over power delivery, which is ideal for both on-road and off-road excursions․

Improved Fuel Efficiency

The manual transmission in the Jeep WJ contributes to improved fuel efficiency, especially when compared to its automatic counterparts․ By allowing drivers to control gear shifts precisely, manual transmissions often achieve better mileage in both city and highway driving conditions․ For instance, the 4․0L inline-six engine paired with a manual transmission in the WJ typically delivers slightly higher fuel economy ratings than automatic variants․ This efficiency is particularly beneficial for off-road enthusiasts who value both performance and cost-effectiveness․ The ability to optimize gear usage ensures that fuel is used more effectively, making the WJ a practical choice for those seeking a balance between power and economy․

Enhanced Driving Control and Off-Road Performance

The manual transmission in the Jeep WJ elevates driving control, offering a more direct connection between the driver and the vehicle․ This is particularly advantageous in off-road scenarios, where precise control over gear shifts is crucial for navigating challenging terrain․ The ability to manually select the appropriate gear allows drivers to maintain optimal engine speed, ensuring maximum torque delivery when needed․ This feature is especially beneficial for rock crawling or steep inclines, where automatic transmissions might struggle to maintain traction․ The AX-5 and AX-15 transmissions, with their robust designs and suitable gear ratios, complement the WJ’s four-wheel-drive system, enhancing its legendary off-road capabilities and making it a favorite among enthusiasts seeking ultimate control and performance in rugged environments․

The Jeep WJ manual transmission, particularly the AX-5 and AX-15, stands as a testament to durability and capability, offering enthusiasts precise control and timeless off-road performance․

Final Thoughts on the Jeep WJ Manual Transmission

The Jeep WJ manual transmission, particularly the AX-5 and AX-15, offers a blend of durability, performance, and driver engagement, making it a preferred choice for enthusiasts seeking control over both on-road and off-road terrains․ These transmissions, known for their robust construction and precise shifting, have become iconic in the Jeep community․ Owners and modifiers alike appreciate the ability to enhance their driving experience through upgrades and swaps, ensuring the WJ remains a capable and reliable vehicle․ With proper maintenance, the manual transmission in the WJ continues to deliver exceptional performance, solidifying its place as a cherished component of Jeep’s legacy․

Continue Reading

vivint thermostat user manual

Welcome to the Vivint Element Smart Thermostat user manual. This guide provides comprehensive instructions for installing, operating, and maintaining your smart thermostat, ensuring optimal performance and energy efficiency.

Overview of the Vivint Element Smart Thermostat

The Vivint Element Smart Thermostat is a cutting-edge, wireless device designed to seamlessly integrate with your home’s HVAC system. Its sleek, modern design features a hidden display that activates when needed, ensuring a minimalist aesthetic. This thermostat is compatible with Z-Wave technology, enabling smart home integration and voice control through platforms like Alexa. It offers advanced temperature and humidity tracking, allowing users to adjust settings remotely via the Vivint Smart Home app. The thermostat is designed for energy efficiency, providing smart scheduling and customizable settings to optimize comfort and savings. For detailed instructions, refer to the Vivint Element Smart Thermostat user manual.

Key Features and Benefits of the Vivint Thermostat

The Vivint Element Smart Thermostat offers a range of innovative features designed to enhance comfort and energy efficiency. With Z-Wave compatibility, it seamlessly integrates into smart home systems, enabling voice control through platforms like Alexa. The thermostat features smart scheduling, allowing users to customize temperature settings based on daily routines. It also provides advanced energy-saving modes to reduce utility bills. The device boasts a user-friendly interface with a hidden display that activates when needed, ensuring a sleek, modern appearance. Remote access via the Vivint Smart Home app lets users adjust settings from anywhere. These features combine to deliver a convenient, energy-efficient, and customizable heating and cooling experience.

Installation and Wiring Guide

Get step-by-step instructions for installing your Vivint Thermostat, including wiring diagrams and compatibility checks. Ensure compliance with local codes and consider professional installation for complex setups. Troubleshooting tips included.

Step-by-Step Installation Instructions

Start by turning off the power to your HVAC system at the circuit breaker. Remove the existing thermostat and label the wires for easy identification. Mount the new Vivint thermostat base to the wall using the provided screws. Connect the labeled wires to the corresponding terminals on the base, ensuring they are securely attached. Reattach the faceplate and turn the power back on. Follow the on-screen instructions to complete the setup, including connecting to your smart home system. If unsure, refer to the wiring diagram or consult a professional for assistance. Proper installation ensures optimal performance and safety.

Understanding the Vivint Thermostat Wiring Diagram

The Vivint Thermostat wiring diagram is essential for a successful installation. It illustrates the connections between the thermostat and your HVAC system. Identify the wires by their standard labels: R (24V power), W (heat), Y (cool), G (fan), C (common), and any additional wires for advanced features. Match these wires to the corresponding terminals on the Vivint thermostat base. Ensure all connections are secure to avoid malfunctions. Refer to the diagram for specific configurations, such as heat pumps or dual-fuel systems. If unsure, consult the user manual or contact a professional for assistance. Proper wiring ensures safe and efficient operation of your smart thermostat.

Operating the Vivint Thermostat

The Vivint Thermostat is designed for intuitive operation. Use the touchscreen interface to set temperatures, switch modes, and access basic settings effortlessly for optimal comfort and efficiency.

Basic Operations: Setting Temperature and Modes

Setting the temperature and modes on your Vivint Thermostat is straightforward. Use the touchscreen interface to adjust the target temperature by touching the /- arrows. Select between modes like HEAT, COOL, or AUTO to match your comfort needs. For manual operation, press the MENU button and navigate to the temperature settings. You can also control the thermostat via the Vivint Smart Home app or voice commands with Alexa. Note that the thermostat does not provide specific instructions for manually turning on the furnace but allows seamless integration with your smart home system for energy-efficient control.

Advanced Features: Smart Scheduling and Energy Savings

The Vivint Thermostat offers advanced features for smart scheduling and energy savings. Use the Vivint Smart Home app to create customized temperature schedules, optimizing comfort and energy use. The thermostat learns your preferences over time, automatically adjusting settings to reduce energy consumption. Enable geofencing to adjust temperatures based on your location, ensuring efficiency when you’re away. Access detailed energy reports to track usage and identify savings opportunities. Smart scheduling integrates seamlessly with voice commands and smart home systems, making it easy to manage your energy usage efficiently while maintaining comfort. These features help you save money and reduce your environmental impact without compromising on convenience.

Smart Home Integration

The Vivint Thermostat seamlessly integrates with your smart home system, enabling voice control via Alexa and remote management through the Vivint Smart Home app for enhanced convenience.

Connecting the Thermostat to Your Smart Home System

To connect your Vivint Thermostat to your smart home system, start by setting your primary controller to INCLUDE mode. Press and release the MENU button on the thermostat, then press the MATE button to access the network screen. A large “r1” will appear, indicating the thermostat is ready to connect. Follow the on-screen instructions or refer to your specific controller’s user manual for detailed steps. Once connected, you can control the thermostat through the Vivint Smart Home app or voice commands with Alexa. This integration allows seamless temperature adjustments, smart scheduling, and energy monitoring, enhancing your home’s comfort and efficiency.

Using Voice Commands with Alexa for Thermostat Control

To control your Vivint Thermostat with Alexa, enable the Vivint Smart Home skill in the Alexa app. Link your Vivint account and discover devices. Use voice commands like, “Alexa, set the living room to 72 degrees,” or “Alexa, turn off the thermostat.” You can also ask, “What’s the current temperature?” for real-time updates. Ensure your thermostat is connected to your smart home system and Alexa is properly configured. This integration allows hands-free control, enhancing convenience and smart home automation. Refer to the Vivint Smart Home app or Alexa support for troubleshooting if commands don’t respond.

Troubleshooting and Maintenance

Identify common issues and perform routine checks to ensure optimal performance. Clean the display, check wiring, and replace batteries as needed. Refer to the troubleshooting guide for detailed solutions.

Common Issues and Solutions for the Vivint Thermostat

Resolve common issues with your Vivint Thermostat by following these troubleshooting steps. If the display is unresponsive, restart the device or check the power supply. For connectivity problems, ensure the thermostat is connected to your smart home system and restart your router. If the thermostat isn’t cooling or heating, verify the temperature settings and mode (HEAT, COOL, or AUTO). Clean the display regularly to maintain functionality. For firmware updates, ensure the device is connected to Wi-Fi. Refer to the user manual for detailed solutions and reset procedures to restore optimal performance.

Regular Maintenance Tips for Optimal Performance

Keep your Vivint Thermostat running smoothly with regular maintenance. Clean the display screen gently with a soft cloth to avoid dust buildup. Replace batteries annually or ensure the C-wire is functioning properly. Check wiring connections to prevent loose links, which can cause malfunctions. Update the thermostat’s firmware via the Vivint app to access the latest features. Inspect and replace air filters every 1-3 months to maintain efficient heating and cooling. Verify temperature calibration for accuracy. Schedule annual professional HVAC system checks to ensure compatibility. For detailed guidance, refer to the user manual or contact Vivint support for assistance.

Final Tips for Maximizing Your Vivint Thermostat Experience

To get the most out of your Vivint Thermostat, ensure it’s updated with the latest software. Regularly check and replace batteries if needed, and use the Smart Home app for remote adjustments. Utilize smart scheduling to optimize energy savings and comfort. Adjust temperature settings seasonally and consider geofencing for automatic adjustments when you leave or arrive home. For troubleshooting, refer to the manual or contact Vivint support. Explore voice commands with Alexa for hands-free control. Finally, review energy usage reports to refine your settings and maintain optimal performance year-round.

Where to Find Additional Resources and Support

Pursue additional resources and support for your Vivint Thermostat through the official Vivint SmartHome ELEMENT thermostat user manual available online. Visit support.vivint;com for comprehensive guides, troubleshooting tips, and detailed instructions tailored to enhance your user experience. You can also download the PDF version of the manual from the Vivint website or through the Vivint Smart Home app for convenient access. For immediate assistance, contact Vivint customer support at 855-819-8137 or refer to the provided documentation for further guidance and troubleshooting. Ensure you have the latest software updates and make the most of your smart thermostat’s advanced features for optimal performance, energy savings, and enhanced functionality.

Continue Reading

nutribullet rice cooker instructions

The NutriBullet EveryGrain Cooker is a versatile kitchen appliance designed to simplify grain cooking. With preset programs for white rice‚ brown rice‚ and other grains‚ it ensures perfect results every time. Its multi-functional design allows for cooking soups‚ desserts‚ and even steaming. Compact and user-friendly‚ it’s a great addition to any kitchen‚ offering healthy and efficient meal preparation.

Experience the convenience of cooking a variety of grains‚ oats‚ and quinoa with ease. The NutriBullet Rice Cooker is a must-have for home cooks and meal preppers alike.

Overview of the NutriBullet EveryGrain Cooker

The NutriBullet EveryGrain Cooker is a multi-functional kitchen appliance designed to simplify grain preparation. It features 5 preset programs for cooking white rice‚ brown rice‚ quinoa‚ oats‚ and exotic grains‚ ensuring perfect results every time. This cooker is not limited to grains; it can also prepare soups‚ desserts‚ and even steam vegetables. Its compact design makes it ideal for kitchens of all sizes. With its user-friendly interface and automatic cooking technology‚ the EveryGrain Cooker is perfect for both beginners and experienced cooks. It’s a versatile addition to any kitchen‚ offering healthy and efficient meal preparation for a variety of dishes.

Key Features of the NutriBullet Rice Cooker

The NutriBullet Rice Cooker offers a range of features that make it a versatile and essential kitchen appliance. It comes with 5 automatic cooking programs tailored for white rice‚ brown rice‚ quinoa‚ oats‚ and exotic grains‚ ensuring precise cooking results. The cooker also includes a delay start function‚ allowing users to schedule cooking up to 15 hours in advance. Additionally‚ it features a keep-warm mode that maintains the perfect temperature for up to 12 hours. The cooker is equipped with a 10-cup cooking pot and a steaming basket for added versatility. Its compact and modern design‚ along with a user-friendly interface‚ makes it easy to use and integrate into any kitchen setup.

Unboxing and Assembly

Upon unboxing‚ you’ll find the NutriBullet Rice Cooker‚ a 10-cup cooking pot‚ steaming basket‚ spatula‚ and power cord. Assembly involves plugging in the cord‚ placing the pot in the cooker‚ and attaching the steaming basket if needed.

Components of the NutriBullet Rice Cooker

The NutriBullet Rice Cooker comes with a set of essential components designed for efficient cooking. The main unit includes the cooker base‚ which houses the electronic controls and heating element; The 10-cup cooking pot is durable and non-stick‚ perfect for cooking rice‚ grains‚ and other dishes. A steaming basket is included for steaming vegetables‚ meats‚ or seafood. Additionally‚ a spatula/rice spoon is provided for serving and portioning. The power cord ensures easy operation‚ and the cooker also features a delay start and keep warm function for convenience. These components work together to make cooking a variety of meals simple and enjoyable.

Step-by-Step Assembly Guide

Assembling the NutriBullet Rice Cooker is straightforward and requires minimal effort. First‚ place the cooker base on a flat surface and ensure it is stable. Next‚ attach the power cord to the base and plug it into a nearby electrical outlet. Carefully place the 10-cup cooking pot into the cooker base‚ ensuring it aligns securely. If using the steaming basket‚ position it inside the cooking pot. Finally‚ place the spatula/rice spoon in a convenient location for serving. Once assembled‚ the cooker is ready for use. Always follow the manufacturer’s guidelines for proper setup and operation to ensure safety and optimal performance.

Cooking Instructions

The NutriBullet Rice Cooker simplifies grain preparation with preset programs. Rinse grains‚ add water‚ and select the appropriate program. White rice cooks in 20-30 minutes‚ while brown rice takes 40-50 minutes. Use the delay start function for convenient meal prep. Always follow the ratio guidelines for best results.

How to Cook White Rice

Cooking white rice in the NutriBullet Rice Cooker is straightforward. Rinse the rice in a fine mesh strainer under cold water until clear. Place up to 5 scoops of rice into the cooking pot. Add water according to the inner pot markings or recipe guidelines. Close the lid‚ select the White Rice program‚ and press Start. The cooker will automatically handle the cooking process. Cooking time is typically 20-30 minutes. Once done‚ let it rest for 5 minutes‚ then fluff with a spatula. For optimal results‚ avoid opening the lid during cooking. The cooker also features a Keep Warm function to maintain temperature after cooking.

How to Cook Brown Rice

Cooking brown rice in the NutriBullet Rice Cooker is simple and efficient. Start by rinsing the brown rice under cold water until the water runs clear. Place up to 5 scoops of brown rice into the cooking pot. Add water at a 1:1.25 ratio (1 scoop of rice to 1.25 scoops of water). Close the lid‚ select the Brown Rice program‚ and press Start. The cooker will automatically adjust cooking time‚ typically taking 40-50 minutes. Avoid opening the lid during cooking for best results. Once done‚ let it rest for 5 minutes‚ then fluff gently with the included spatula. The cooker’s Keep Warm function will maintain the perfect temperature until you’re ready to serve.

Cooking Other Grains and Recipes

Beyond rice‚ the NutriBullet Rice Cooker excels at preparing quinoa‚ oats‚ and other grains. For quinoa‚ use up to 4 scoops and add water accordingly. Oats can be cooked to a creamy consistency by following the oat program. The cooker also handles soups‚ stews‚ and even desserts like oatmeal or rice pudding. Experiment with ingredients like vegetables‚ proteins‚ and spices for flavorful dishes. Use the steam function for healthier meal options‚ such as steamed vegetables or seafood. The NutriBullet Rice Cooker is versatile‚ making it ideal for exploring a variety of recipes. Refer to the manual for specific grain-to-water ratios and cooking times to ensure perfect results every time.

Cooking Programs and Settings

The NutriBullet Rice Cooker features preset programs for white rice‚ brown rice‚ quinoa‚ and oats‚ plus delay start and keep warm functions for added convenience.

Understanding the Auto-Cook Programs

The NutriBullet Rice Cooker offers five preset Auto-Cook Programs for different grain types‚ ensuring perfect results every time. These programs include settings for white rice‚ brown rice‚ quinoa‚ oats‚ and exotic grains. Each program is designed to automatically adjust cooking time and temperature based on the grain type‚ eliminating guesswork. Additionally‚ a Steam function allows for healthy steaming of vegetables or proteins. The cooker also features a Delay Start option‚ enabling you to prepare meals in advance‚ and a Keep Warm function to maintain the perfect temperature for up to 24 hours. These intuitive settings make it easy to achieve delicious‚ consistent results for a variety of dishes.

Using the Delay Start and Keep Warm Functions

The NutriBullet Rice Cooker features a convenient Delay Start function‚ allowing you to schedule cooking up to 24 hours in advance. Simply add your ingredients‚ set the desired start time‚ and let the cooker handle the rest; This is perfect for busy schedules‚ ensuring a freshly cooked meal is ready when you need it.

The Keep Warm function automatically activates once cooking is complete‚ maintaining the optimal temperature for up to 24 hours. This ensures your dish stays hot and ready to serve‚ without overcooking or drying out. These features make meal planning effortless and stress-free.

Safety Precautions and Maintenance

Always handle hot surfaces with care‚ using oven mitts when lifting. Regularly clean the cooker with a damp cloth‚ avoiding abrasive materials. Ensure all parts are dry after washing to prevent damage. Follow these maintenance tips to ensure longevity and safe operation.

Safety Tips for Using the NutriBullet Rice Cooker

Always exercise caution when handling the NutriBullet Rice Cooker‚ as the surfaces may become hot during operation. Use oven mitts or handles to lift the cooking pot or steaming basket. Avoid touching hot components directly. Keep the cooker out of reach of children to prevent accidents. Regularly clean the cooker with a soft‚ damp cloth to avoid food residue buildup. Never submerge the base or electrical components in water; Ensure all parts are dry after cleaning to prevent damage. Avoid using abrasive materials that could scratch the surfaces. Unplug the cooker when not in use or before cleaning. Follow these guidelines to ensure safe and efficient operation of your NutriBullet Rice Cooker.

Cleaning and Maintenance Tips

Regular cleaning is essential to maintain the performance and hygiene of your NutriBullet Rice Cooker. After each use‚ remove the cooking pot and wash it with warm soapy water using a non-abrasive sponge. The steaming basket should also be cleaned thoroughly. Wipe the exterior of the cooker with a damp cloth‚ ensuring no moisture enters the electrical components. Dry all parts completely after cleaning to prevent rust or damage. For tough stains or residue‚ mix equal parts water and white vinegar in the cooking pot and let it simmer on low heat for 10 minutes before rinsing. Avoid submerging the base in water. Regular maintenance ensures optimal functionality and longevity of your cooker.

By following these simple steps‚ you can keep your NutriBullet Rice Cooker in excellent condition for years to come.

Troubleshooting Common Issues

Address common issues like rice texture problems by adjusting water ratios or rinsing rice. Consult the manual for error codes and ensure regular cleaning for optimal performance.

Resolving Issues with Rice Texture

If your rice turns out soggy or undercooked‚ check the water ratio and ensure it matches the manual’s guidelines. For white rice‚ use 1:1.2 ratio‚ and for brown rice‚ 1:1.5. Rinsing rice before cooking can also improve texture. If grains are mushy‚ reduce water slightly next time. For crunchy rice‚ increase water or extend cooking time. Ensure the lid is sealed properly during cooking to maintain steam. Refer to the NutriBullet EveryGrain Cooker’s manual for specific instructions. Adjusting these factors should help achieve perfectly cooked rice every time. Regular cleaning of the cooker also prevents leftover residue from affecting texture.

Addressing Error Codes or Malfunctions

If your NutriBullet Rice Cooker displays error codes like E1‚ E2‚ or E3‚ refer to the user manual for specific meanings. Common issues include faulty sensors or power supply problems. Ensure the cooker is properly plugged in and the outlet is working. Clean the sensors and inner pot regularly to avoid malfunctions. If the cooker stops mid-cycle‚ unplug it‚ wait 30 seconds‚ then restart. For persistent errors‚ reset the device by pressing and holding the Start button for 10 seconds. If issues persist‚ contact NutriBullet customer support for assistance. Always follow the manual’s troubleshooting guide for detailed solutions.

The NutriBullet Rice Cooker offers efficient‚ versatile cooking solutions. For more recipes and support‚ visit the official NutriBullet website or explore their cookbook collection for inspiration.

Final Thoughts on the NutriBullet Rice Cooker

The NutriBullet EveryGrain Cooker stands out as a versatile and reliable kitchen appliance‚ perfect for cooking various grains‚ soups‚ and even desserts. Its preset programs ensure consistent results‚ while its compact design makes it a practical addition to any kitchen. Whether you’re preparing white rice‚ brown rice‚ quinoa‚ or oats‚ this cooker delivers perfectly cooked meals every time. The included features like delay start and keep warm functions add convenience‚ making it ideal for busy home cooks and meal preppers. With its user-friendly interface and efficient performance‚ the NutriBullet Rice Cooker is a worthwhile investment for anyone seeking to elevate their grain-cooking experience.

Where to Find More Recipes and Support

For more recipes and support‚ visit the official NutriBullet website‚ which offers a variety of resources‚ including recipe ideas and user guides. The user manual provided with the cooker is also a great starting point‚ featuring basic instructions and tips for getting the most out of your appliance. Additionally‚ you can explore online communities‚ forums‚ and social media groups dedicated to grain cooking and NutriBullet products. Many users share their favorite recipes and troubleshooting advice. For further assistance‚ contact NutriBullet customer support directly for personalized help. Lastly‚ consider cookbooks or online recipe platforms that specialize in rice cooker meals‚ as they often include compatible ideas for the NutriBullet EveryGrain Cooker.

Continue Reading

primus iq trailer brake controller manual

Installation of the Primus IQ Trailer Brake Controller

The Primus IQ Trailer Brake Controller offers a straightforward installation process with a Plug-N-Play port for easy connection. Ensure your vehicle has a compatible wiring harness and follow the provided manual for step-by-step guidance. Mount the controller at an angle between 0 and 70 degrees for optimal performance. Visit Tekonsha’s website for detailed installation instructions and wiring diagrams.

1.1 Vehicle Compatibility and Requirements

The Primus IQ Trailer Brake Controller is compatible with vehicles equipped with a factory tow package featuring a 7-way connector. It works seamlessly with electric braking systems and requires a Tekonsha OEM-specific wiring harness for hardwiring. Ensure your vehicle meets the Gross Combined Weight Rating (GCWR) specified in the manual. For vehicles without a tow package‚ a portable option is available‚ eliminating the need for hardwiring. The controller is suitable for various models‚ including select Dodge Ram‚ Ford F-150‚ and Chevrolet Silverado trucks. Always verify compatibility with your vehicle’s make‚ model‚ and year before installation.

1.2 Step-by-Step Installation Guide

Begin by mounting the Primus IQ Trailer Brake Controller at an angle between 0 and 70 degrees for optimal performance. Connect the controller to your vehicle’s wiring harness‚ ensuring all terminals are securely attached. If your vehicle has a factory tow package‚ use a Tekonsha OEM-specific wiring harness for a seamless connection. For vehicles without a tow package‚ consider the portable option by plugging into the 12V cig lighter socket. Once installed‚ test the brakes by driving at 25 mph and applying the manual override. Adjust the power setting if the trailer brakes lock up. Refer to the Tekonsha website for detailed instructions and wiring diagrams to ensure proper setup and safety.

Features of the Primus IQ Trailer Brake Controller

The Primus IQ Trailer Brake Controller features a proportional braking system‚ ensuring smooth and balanced braking proportional to the vehicle’s deceleration. It also includes a manual override function‚ allowing drivers to independently apply trailer brakes in specific situations. Designed for ease of use‚ the controller offers a compact design and Plug-N-Play connectivity for straightforward installation. Its compatibility with OEM wiring harnesses enhances its versatility for various towing setups‚ making it a reliable and efficient choice for trailer braking needs.

2.1 Proportional Braking System

The Primus IQ Trailer Brake Controller features a proportional braking system that applies trailer brakes in direct proportion to the vehicle’s deceleration. This system ensures smooth and balanced braking‚ enhancing control and safety while towing. By sensing the vehicle’s motion and adjusting brake output accordingly‚ it provides consistent performance in various driving conditions. The proportional design reduces wear on both the vehicle and trailer brakes‚ offering a more efficient and responsive towing experience. This feature is particularly beneficial in emergency stops or uneven terrain‚ where precise brake control is crucial. The system operates seamlessly with electric brakes‚ making it a reliable choice for trailer towing applications.

2.2 Manual Override Functionality

The Primus IQ Trailer Brake Controller includes a manual override feature‚ allowing drivers to apply the trailer brakes independently of the vehicle’s braking system. This functionality is accessed via a sliding knob‚ enabling variable control over the trailer’s braking intensity. The manual override is particularly useful in situations requiring additional braking power‚ such as when descending steep inclines or needing to slow the trailer without engaging the vehicle’s brakes. The sliding mechanism offers precise control‚ allowing drivers to adjust the braking force smoothly and efficiently. This feature enhances overall towing safety and provides greater command over the trailer in diverse driving conditions. The manual override complements the proportional braking system‚ ensuring versatile and reliable braking performance.

Operation and Adjustments

Understand how the Primus IQ responds to deceleration for proportional braking. Adjust settings to fine-tune trailer brake response‚ ensuring smooth and safe towing experiences with precise control;

3.1 Understanding Proportional Braking

The Primus IQ utilizes a proportional braking system‚ which applies trailer brakes in sync with the tow vehicle’s deceleration. This ensures smooth‚ balanced stopping power‚ enhancing safety and control. The system automatically adjusts brake intensity based on the vehicle’s speed and how firmly the brakes are applied‚ preventing sudden jerks or lock-ups. This proportional response is especially beneficial in varying driving conditions‚ such as uneven terrain or emergencies‚ providing a more stable towing experience. By mimicking the driver’s braking habits‚ the Primus IQ delivers consistent and reliable performance‚ making it easier to tow trailers confidently under any circumstances.

3.2 Adjusting Trailer Brake Settings

Adjusting the trailer brake settings on the Primus IQ ensures optimal braking performance. Start by setting the power level according to the trailer’s weight and braking requirements. Use the manual slide knob to fine-tune the braking intensity during initial setup. Test the brakes by driving at a moderate speed and applying the brakes gently to ensure the trailer responds smoothly. If the brakes lock up‚ reduce the power level. For proportional braking‚ ensure the controller is mounted correctly and calibrated. Refer to the manual for specific adjustment procedures and safety guidelines. Regularly check and adjust the settings to maintain consistent braking performance and ensure safe towing conditions. Proper adjustments enhance overall control and stability while towing. Always follow the manufacturer’s recommendations for precise calibration.

Troubleshooting Common Issues

Common issues include brake lock-up and calibration problems. Adjust power levels‚ recalibrate‚ or check wiring connections. Visit Tekonsha support for detailed solutions.

4.1 Brake Controller Calibration

Calibrating the Primus IQ Trailer Brake Controller ensures proper braking response. Start by driving your vehicle and trailer on a dry‚ level surface at 25 mph. Fully apply the manual override to check if brakes lock up. If they do‚ reduce the power setting. Repeat until smooth braking occurs without locking. Calibration is crucial for proportional braking performance and safety. Refer to the manual for detailed steps or troubleshooting tips if issues persist. Proper calibration ensures your trailer brakes respond accurately to deceleration‚ enhancing overall towing safety and control.

4.2 Resolving Brake Lock-Up Problems

Brake lock-up issues with the Primus IQ Trailer Brake Controller often occur due to incorrect power settings or improper adjustment. To resolve this‚ reduce the power level using the control knob until smooth braking is achieved. Ensure the trailer brakes are not over-adjusted‚ as this can cause premature locking. If lock-ups persist‚ refer to the manual for calibration steps and adjust the brake gain accordingly. Additionally‚ check the trailer’s load distribution‚ as an uneven load can exacerbate braking issues. Regularly inspect and clean the brake connectors to prevent electrical interference. For severe cases‚ consult the troubleshooting guide or contact Tekonsha support for assistance. Proper adjustment ensures safe and reliable braking performance.

Maintenance and Warranty Information

Regularly inspect and clean the Primus IQ Trailer Brake Controller’s electrical connections to ensure optimal performance. Store the unit in a dry environment when not in use. Refer to the Tekonsha website for detailed maintenance tips and warranty terms‚ which typically include a 1-year limited warranty covering manufacturing defects.

5.1 Routine Maintenance Tips

Regular inspections are crucial for maintaining the Primus IQ Trailer Brake Controller’s performance. Clean the electrical connections to prevent corrosion and ensure proper connectivity. Check the wiring harness for any signs of wear or damage‚ and replace it if necessary. Store the controller in a dry‚ cool environment when not in use to avoid moisture damage. Refer to the Tekonsha manual for specific maintenance recommendations tailored to the TK90160 model. Additionally‚ ensure the brake controller is securely mounted to prevent movement during towing. Following these routine maintenance tips will extend the lifespan of your Primus IQ Trailer Brake Controller and ensure reliable braking performance.

5.2 Warranty Coverage and Support

The Primus IQ Trailer Brake Controller is backed by a limited warranty that covers defects in materials and workmanship for a specified period‚ typically one year from the date of purchase. The warranty does not cover damage caused by improper installation‚ misuse‚ or normal wear and tear. For detailed warranty terms‚ refer to the official Tekonsha website. Customer support is available to assist with troubleshooting and warranty claims. Ensure to keep your purchase receipt and follow the registration process for warranty validation. Tekonsha also provides online resources and manuals to help users maintain and repair their brake controllers effectively.

Continue Reading

the trial franz kafka pdf

Franz Kafka’s The Trial is a seminal 20th-century novel exploring themes of alienation and injustice. Its digital versions, including PDF, are widely available for free download, offering readers accessible formats to engage with this profound work.

1.1 Background and Publication History

The Trial, written by Franz Kafka between 1914 and 1915, remained unfinished during his lifetime. Kafka requested its destruction, but his friend Max Brod defied his wishes and published it posthumously in 1925. The novel gained prominence for its exploration of alienation and bureaucratic labyrinths. Its availability in PDF and other digital formats has made it accessible to global readers, ensuring its enduring relevance in modern literature.

1.2 Major Themes and Symbolism

The Trial delves into themes of absurdism, existentialism, and alienation, reflecting Josef K.’s struggle against an enigmatic legal system. The court symbolizes an incomprehensible bureaucracy, while the door represents inaccessible justice. Kafka’s use of symbolism underscores the futility of seeking meaning in a indifferent, labyrinthine world, resonating with readers seeking understanding of existential crises and the human condition in modern society;

Plot Summary of “The Trial”

The Trial follows Josef K., a bank clerk arrested without knowing the charges. He navigates a mysterious legal system, encountering bizarre court proceedings, but never receives a formal trial, culminating in his execution.

2.1 Key Events and Structure

The novel begins with Josef K.’s sudden arrest without clear charges. He attends a hearing, but the proceedings are opaque and intimidating. As Josef navigates the labyrinthine court system, he encounters strange characters and bureaucratic hurdles. The story unfolds through his attempts to understand the charges against him, emphasizing his growing frustration and alienation. The structure mirrors Josef’s psychological unraveling, blending surrealism with a fragmented narrative flow.

2.2 Climax and Ending

The climax occurs as Josef K. is led to his execution in a desolate location. Refusing to plead his case, he is stabbed in the heart. The ending is stark and ambiguous, leaving Josef’s fate unresolved and the nature of justice unexplained. This abrupt conclusion underscores Kafka’s exploration of absurdity and the futility of seeking clarity in an indifferent, oppressive system.

Themes in “The Trial”

The Trial explores themes of absurdism, existentialism, alienation, and the elusive nature of justice, reflecting Kafka’s profound critique of bureaucratic systems and human isolation.

3.1 Absurdism and Existentialism

Kafka’s The Trial embodies absurdism through its illogical, bureaucratic labyrinth, where Josef K. faces an unseen authority. Existential themes emerge as Josef seeks meaning in a chaotic, indifferent world, highlighting the individual’s struggle against an incomprehensible system. The novel critiques modern society’s dehumanizing structures, leaving readers with a profound sense of existential despair and the absurdity of seeking justice in a void of understanding.

3.2 Alienation and Isolation

Alienation and isolation are central themes in The Trial, as Josef K. experiences a profound disconnection from society and even his own identity. The novel portrays a bureaucratic system that dehumanizes individuals, leaving Josef feeling isolated and powerless. Kafka’s exploration of alienation reflects the modern individual’s struggle to find meaning in an indifferent, often absurd world, highlighting the psychological and emotional toll of such isolation.

3.3 The Nature of Justice

In The Trial, Kafka critiques the nature of justice through Josef K.’s enigmatic legal ordeal. The court’s opacity and arbitrary decisions underscore a system devoid of transparency or fairness. This portrayal challenges traditional notions of justice, instead presenting it as a labyrinthine, inaccessible force that perpetuates confusion and despair, leaving individuals at the mercy of an incomprehensible authority.

Main Characters in “The Trial”

Josef K., the protagonist, faces mysterious charges, embodying alienation and existential despair. The Court, an enigmatic force, represents oppressive authority, central to Kafka’s exploration of injustice and bureaucratic absurdity.

4.1 Josef K.

Josef K., the protagonist, is an ordinary bank clerk suddenly entangled in a mysterious legal process. His struggle to comprehend the charges against him reflects existential despair and alienation. Throughout the novel, Josef K.’s emotional and psychological turmoil highlights Kafka’s exploration of individual helplessness against an oppressive, incomprehensible system. His character embodies the absurdity of modern life and the search for meaning in a chaotic world.

4.2 The Court

The Court in Kafka’s The Trial symbolizes an enigmatic and oppressive authority. It operates with unclear procedures, emphasizing the absurdity of bureaucracy. The Court’s remoteness and inaccessibility heighten Josef K.’s alienation, representing a faceless, omnipotent system that denies individual justice. Its elusive nature underscores themes of existential despair and the futility of seeking rational explanations within an incomprehensible framework.

Historical and Cultural Context

Franz Kafka’s The Trial reflects early 20th-century Europe’s political tensions and social upheaval. Kafka’s Jewish heritage and experiences in Prague influenced his exploration of alienation and bureaucratic absurdity.

5.1 Influence of Kafka’s Life

Franz Kafka’s tumultuous relationship with his father and struggles with identity deeply influenced The Trial. His experiences as a Jew in Prague and battles with health issues shaped themes of alienation and existential despair. Kafka’s inner turmoil and feelings of isolation are reflected in Josef K.’s plight, mirroring the author’s own sense of helplessness against an indifferent world.

5.2 Political and Social Climate

Franz Kafka wrote The Trial during a period of social upheaval in early 20th-century Europe. The rise of bureaucracy and authoritarianism influenced the novel’s themes of alienation and existential despair. Kafka’s portrayal of a labyrinthine legal system reflects the anxieties of modernization and the dehumanizing effects of institutional power, resonating with the broader societal tensions of his time.

Symbolism in “The Trial”

The Court symbolizes oppressive authority and existential absurdity, while Josef K.’s journey reflects alienation and the futility of seeking meaning in a bureaucratic void.

6.1 The Court as a Symbol

The Court in The Trial symbolizes an oppressive, inaccessible authority, embodying bureaucratic absurdity and existential alienation. Its remote, mysterious nature reflects the incomprehensible power structures governing Josef K.’s fate, emphasizing themes of isolation and the futility of seeking justice in an opaque system.

6.2 The Door and Access

The door in The Trial represents both physical and metaphorical barriers, symbolizing Josef K.’s struggle for access to justice and understanding. Its inaccessibility mirrors the impenetrable nature of the Court, highlighting themes of alienation and the futility of seeking clarity in an incomprehensible system. This motif underscores Kafka’s exploration of existential despair and bureaucratic opacity.

Philosophical Insights

The Trial delves into existentialist and absurdist themes, questioning meaning in a chaotic world. Kafka reflects on the individual’s struggle for purpose and justice, echoing existentialist philosophy.

7.1 Existentialist Philosophy

Kafka’s The Trial embodies existentialist philosophy through Josef K.’s struggle against an indifferent, oppressive system. His plight reflects the individual’s search for identity and self-determination, aligning with existentialist ideas of freedom and responsibility. The novel’s exploration of absurdity and isolation resonates with thinkers like Sartre and Camus, offering insights into human existence. Available in PDF, the book remains a cornerstone of existential literature, accessible to modern readers.

7.2 The Absurd

The Trial exemplifies the absurdist tradition, as Josef K. confronts a labyrinthine, irrational legal system. His arrest and prosecution without clear charges symbolize the absurdity of bureaucratic authority. Kafka’s exploration of meaninglessness and futility aligns with Albert Camus’ concept of the absurd, where individuals seek purpose in an indifferent world. The novel’s digital formats, like PDF, allow readers to delve into this profound exploration of existential despair and the human condition.

Style and Structure

Franz Kafka’s The Trial features a minimalist, fragmented narrative style, creating a sense of realism and immediacy; The novel’s structure is episodic, with no clear resolution, reflecting Josef K.’s disorientation and the absurdity of his situation. Available in PDF formats, the text maintains its original tone and structure, preserving Kafka’s unique writing style and philosophical depth.

8.1 Narrative Technique

Kafka employs a minimalist, fragmented narrative style in The Trial, fostering a sense of realism and immediacy. The story is told through Josef K.’s limited perspective, creating intimacy and heightening his confusion. The text’s episodic structure, with abrupt shifts and unresolved scenes, mirrors Josef K.’s disorientation. This technique emphasizes alienation and existential themes, preserved in PDF versions of the novel, ensuring Kafka’s unique voice and philosophical depth remain intact.

8.2 Language and Tone

Kafka’s prose in The Trial is characterized by its sparse, objective style, creating a sense of detachment and clinical chill. The tone is somber and ominous, reflecting Josef K.’s growing alienation. Kafka’s language is precise yet evasive, mirroring the absurdity of the bureaucratic labyrinth. This duality enhances the novel’s existential themes, as the cold, impersonal tone contrasts with Josef K.’s emotional turmoil, preserving the text’s philosophical depth in its PDF formats.

Translations and Editions

The Trial has numerous translations, with David Wyllie’s English version being prominent. It is available in PDF, EPUB, and other formats, ensuring accessibility across various readers.

9.1 English Translations

Franz Kafka’s The Trial has been translated into English by several notable translators, including David Wyllie, whose version is widely acclaimed. The novel is available in various digital formats, such as PDF, EPUB, and MOBI, making it accessible to readers worldwide. These translations preserve the original’s complexity and depth, ensuring that Kafka’s themes resonate with English-speaking audiences. Free downloads of these editions can be found on platforms like Planet eBook and Project Gutenberg, catering to diverse reader preferences.

9.2 Notable Editions

Notable editions of The Trial include translations by David Wyllie and A.L. Boats, offering unique interpretations of Kafka’s text. These editions are available in PDF, EPUB, and MOBI formats, ensuring accessibility for modern readers. Many notable editions provide critical commentary, introductions, and annotations, enriching the reader’s understanding of the novel’s themes and complexity. These versions cater to both casual readers and scholars, making Kafka’s work widely accessible and engaging.

PDF and Digital Availability

The Trial is widely available in digital formats, including PDF, EPUB, and MOBI, with free downloads accessible through various platforms, allowing readers to engage with Kafka’s work conveniently online.

10.1 Free Downloads

The Trial by Franz Kafka is available as a free PDF download from platforms like Planet eBook and Project Gutenberg. These digital versions, translated by David Wyllie and others, offer readers access to Kafka’s seminal work without registration or cost. The novel can also be downloaded in EPUB, MOBI, and AZW formats, catering to various e-readers and devices, ensuring its accessibility to a global audience interested in exploring Kafka’s profound exploration of alienation and justice.

10.2 Formats and Readers

The Trial is available in multiple digital formats, including PDF, EPUB, MOBI, and AZW, ensuring compatibility with popular e-readers like Kindle, Nook, and Kobo. These formats allow readers to access Kafka’s work on various devices, from smartphones to tablets, providing flexibility and convenience. The PDF version, in particular, is widely downloaded for its clarity and readability on both desktop and mobile platforms, catering to diverse reader preferences and needs.

Adaptations and Interpretations

The Trial has been adapted into films and stage productions, offering diverse interpretations of Kafka’s exploration of bureaucracy and existential despair. These adaptations enrich the novel’s themes through visual and theatrical storytelling, attracting new audiences to Kafka’s timeless work.

11.1 Film Adaptations

Franz Kafka’s The Trial has been adapted into several films, including Orson Welles’ 1962 version, which remains faithful to the novel’s themes of bureaucratic absurdity. A 1993 film starring Anthony Perkins also explores Josef K.’s surreal ordeal. These adaptations visually reinterpret Kafka’s existential despair, capturing the novel’s eerie atmosphere and timeless relevance for modern audiences.

11.2 Stage Productions

The Trial has been adapted into numerous stage productions, each capturing Kafka’s existential themes. Theaters worldwide have interpreted Josef K.’s journey through minimalist sets and experimental narratives, emphasizing the absurdity and isolation central to the novel. These productions often blend dramatic dialogue with surreal visuals, creating a haunting reflection of Kafka’s exploration of justice and human despair.

Critical Analysis and Reception

The Trial is hailed as a masterpiece of modernist literature, with scholars praising its exploration of alienation and existential themes. Its digital availability in PDF formats has made it accessible for academic study and global readership, further cementing its influence in literary discourse and cultural critique.

12.1 Initial Reception

Initially, The Trial received mixed reviews due to its unconventional narrative and themes. Critics found its absurdity and lack of resolution challenging, but it gradually gained recognition for its profound psychological depth and critique of bureaucracy. The novel’s posthumous publication in 1925, facilitated by Max Brod, introduced it to a broader audience, sparking early debates about its modernist significance.

12.2 Modern Criticism

Modern scholars acclaim The Trial as a masterpiece of existentialist literature, praising its exploration of alienation, absurdism, and the individual’s struggle against oppressive systems. Critics highlight Kafka’s unique prose and the novel’s enduring relevance in reflecting contemporary societal anxieties. Digital formats, including PDF, have made the text accessible, ensuring its continued study and appreciation in academic and literary circles worldwide.

The Trial remains a profound exploration of alienation, absurdism, and the search for meaning. Its digital availability in PDF and other formats ensures accessibility for modern readers. Kafka’s masterpiece continues to resonate, offering insights into existential struggles and bureaucratic labyrinths, solidifying its place as a literary milestone.

Continue Reading