swimwear size guide

Welcome to our comprehensive swimwear size guide, designed to help you navigate the complexities of finding the perfect fit. Discover how to overcome sizing challenges and feel confident in your swimwear choice with expert tips and insights.

Why Understanding Swimwear Sizes is Important

Understanding swimwear sizes ensures a comfortable and confident fit, as improper sizing can lead to discomfort and poor performance. With variations between brands, accurate measurements are crucial. A well-fitting swimsuit enhances both style and functionality, making it essential to grasp sizing differences for the best experience.

Understanding Size Variation Among Brands

Swimwear sizes differ significantly across brands due to varying cut styles, fabrics, and fit preferences. This inconsistency makes comparing sizes challenging, emphasizing the need for brand-specific guides.

Why Swimwear Sizes Vary Between Brands

Differences in swimwear sizing stem from variations in design, fabric stretch, and brand fit philosophies. Some brands may cut styles smaller or larger, while others cater to specific body types. Additionally, international sizing standards and material choices can lead to discrepancies, making it essential to consult each brand’s size chart for accurate measurements and fits.

How to Read and Interpret Brand-Specific Size Charts

Reading brand-specific size charts requires attention to detail. Start by locating your measurements within the chart, matching your bust, waist, and hips to the corresponding sizes. Note that some charts include international size comparisons. Look for fit descriptions, such as “runs small” or “relaxed,” and consider customer reviews for additional insights to ensure the best fit for your body type.

How to Measure Yourself for Swimwear

Accurately measure your bust, hips, and waist using a flexible tape measure. Ensure the tape is level and not too tight for precise sizing to find your perfect fit.

Key Measurements Needed for Accurate Sizing

To ensure the best fit, measure your bust, hips, and waist. Use a flexible tape measure, keeping it level and snug but not too tight. For swimwear, these measurements are crucial for matching your body proportions to size charts. Some styles may also require torso or inseam measurements for optimal comfort and support.

How to Measure Your Body Accurately

Use a flexible tape measure and keep it snug but not too tight. Measure your hips at the widest point, your natural waistline, and your bust at the fullest part. Ensure the tape measure is parallel to the floor for accurate results. Consider asking someone to help for precise measurements, especially for hard-to-reach areas like your back or hips.

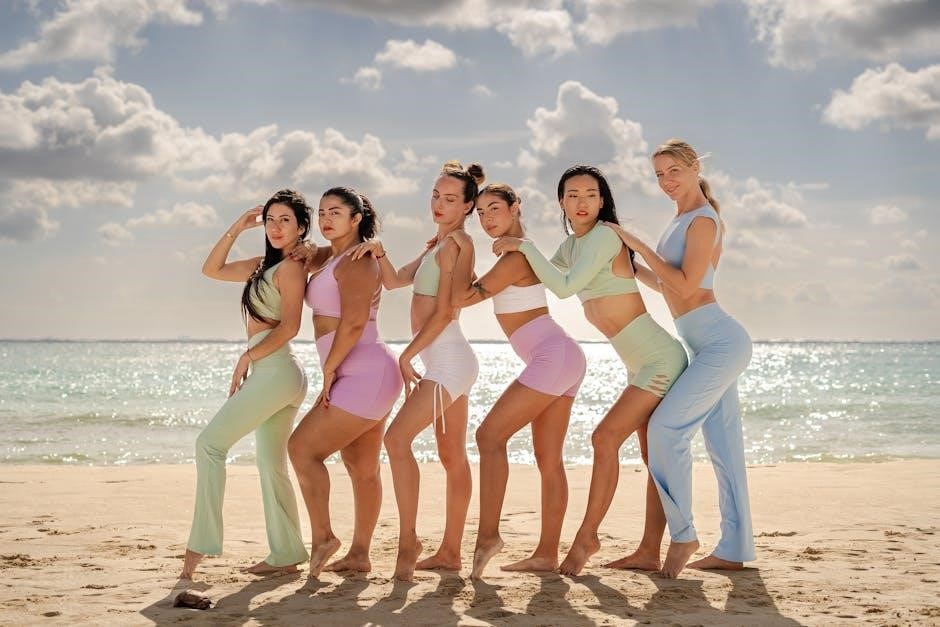
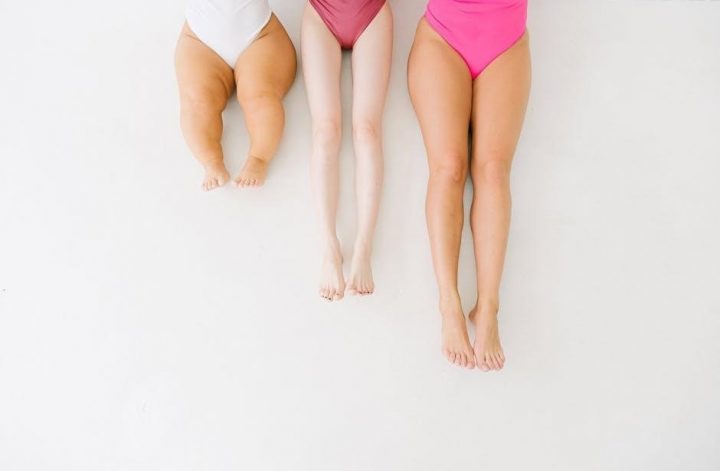
Swimwear for Different Body Types

Discover how to balance your silhouette, enhance curves, and find supportive styles tailored to your body shape, ensuring confidence and comfort in your swimwear choice.

Understanding Your Body Shape

Identifying your body shape—hourglass, pear, rectangular, or apple—is crucial for selecting flattering swimwear. Hourglass figures have a defined waist, while pear-shaped individuals carry weight in hips and thighs. Rectangular body types have balanced proportions, and apple shapes store weight in the midsection. Recognizing your silhouette helps tailor swimwear choices to enhance your natural curves and create a balanced look.

Choosing the Right Style for Your Body Type

For hourglass figures, bikinis and high-waisted styles accentuate curves. Pear-shaped bodies benefit from hip-covering bottoms and ruffled tops. Rectangular frames look great in push-up bikinis or belted styles. Apple shapes shine in one-pieces with ruching or V-necks. Tailoring your swimwear choice to your body type ensures confidence, comfort, and a flattering fit. Experiment with styles to find what works best for you.

Fabric and Fit: What You Need to Know

Fabric and fit are crucial for comfort and support in swimwear. Different fabrics offer varying levels of stretch and support, ensuring a comfortable and secure fit. Sustainable materials are also becoming popular for eco-conscious swimwear.

How Fabric Choice Impacts Fit and Comfort

Fabric choice significantly affects swimwear fit and comfort. Stretchy materials like spandex and polyester provide flexibility, while breathable fabrics enhance comfort. Thick, supportive fabrics are ideal for structured styles, offering confidence. Eco-friendly materials, such as recycled polyester, blend sustainability with performance. Always consider fabric type to ensure your swimwear meets your needs for activity and relaxation.

Understanding Stretch and Support in Swimwear

Stretch and support in swimwear are crucial for comfort and confidence. Fabrics with high elastane content, like spandex, offer excellent stretch for active movements. Supportive features such as underwire, molded cups, or high-compression fabrics provide structure. Balancing stretch and support ensures a flattering fit tailored to your lifestyle, whether lounging or engaging in water activities.

Common Swimwear Styles and Their Fits

Explore popular swimwear styles like bikinis, one-pieces, and rash guards, each offering unique fits to suit different body types and preferences for comfort and confidence.

Popular Swimwear Styles and Their Characteristics

From bikini bottoms offering medium coverage to high-waisted styles for added comfort, and one-piece suits for a sleek look, each swimwear style caters to diverse needs. Bikinis are ideal for minimalism, while rash guards provide UV protection and support. High-waisted bottoms and one-pieces often suit those seeking more coverage, ensuring a flattering fit for every body type.

How to Determine the Best Style for Your Needs

Consider your lifestyle, body type, and preferences when selecting swimwear. For active swimming, opt for durable styles like rash guards or one-pieces offering support. Bikinis are ideal for minimalism, while high-waisted bottoms provide coverage. Think about your activities—whether lounging, swimming laps, or water sports—and choose a style that balances comfort, functionality, and confidence for your unique needs.

Using a Size Chart for Accuracy

Using a size chart ensures accurate sizing. Measure yourself and compare with the chart to find your best fit. It’s a reliable tool for perfect swimwear sizing every time.

How to Use a Size Chart Effectively

To use a size chart effectively, start by taking accurate body measurements, such as bust, waist, and hips. Compare these measurements to the brand’s size chart, ensuring alignment for your body type. Pay attention to specific styles, as swimwear fits vary. Consider international size comparisons if needed. Double-check customer reviews for sizing insights and refer to return policies for online purchases. This approach ensures the best fit and comfort.

International Size Comparisons

Swimwear sizes vary globally, with different standards in the UK, US, EU, and Australia. Use an international size chart to convert your size seamlessly across regions. For example, a US size 8 may align with a UK size 12 or EU size 38. Always check the brand’s specific conversion guide to ensure accuracy and avoid sizing mismatches when shopping internationally.

Tips for Choosing the Right Size

Always check size charts and customer reviews for sizing insights. Consider fabric stretch and support needs. Try before buying if possible, and utilize return policies for the best fit.

Trying Before Buying: Why It Matters

Trying swimwear before purchasing ensures a precise fit, as sizes vary between brands. It allows you to assess comfort, support, and how the fabric feels against your skin. This step is crucial for avoiding returns and exchanges, saving time and effort. If in-store isn’t possible, opt for brands with flexible return policies to try at home.

How to Use Customer Reviews for Sizing Insights

Customer reviews are a valuable resource for sizing accuracy. Many shoppers share detailed feedback about how a swimsuit fits, helping you gauge if a brand runs small, large, or true to size. Look for mentions of comfort, support, and how the fabric performs. Reviews can also highlight styles that flatter specific body types, ensuring a better fit for your needs.

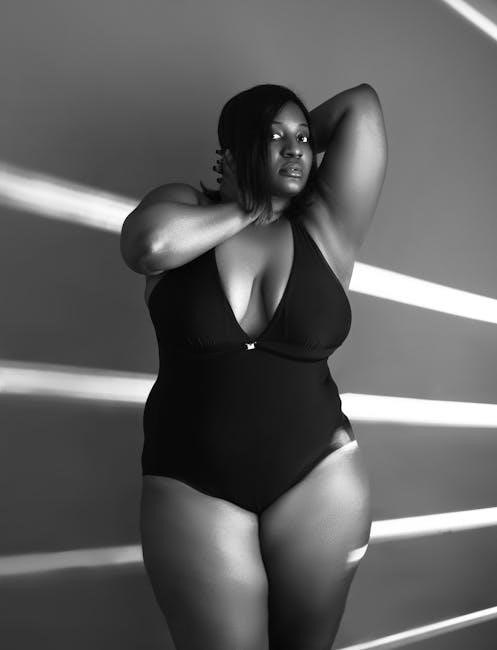
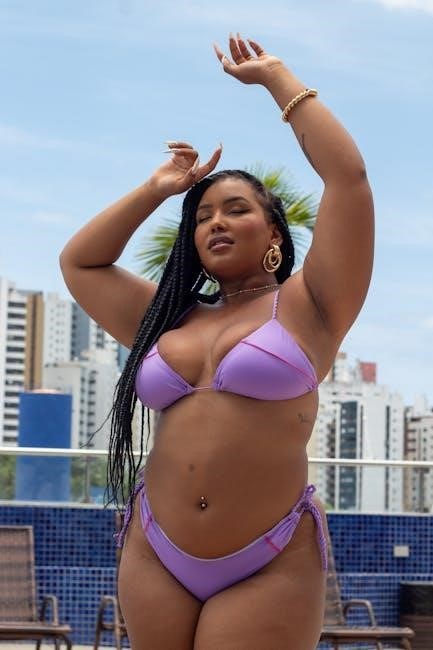
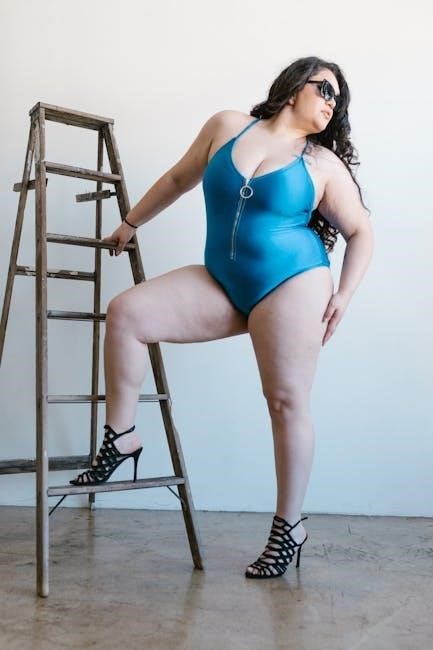
Plus-Size Swimwear: Finding Your Perfect Fit

Discover a wide range of plus-size swimwear options designed for comfort and confidence. Explore styles offering excellent support, flattering cuts, and vibrant designs to suit every body.

Understanding Plus-Size Swimwear Options

Plus-size swimwear offers diverse styles, from high-waisted bikinis to supportive one-pieces. Look for brands that prioritize comfort with features like adjustable straps and tummy control. Many labels now cater specifically to curves, ensuring a flattering fit and boosted confidence; Explore designs that celebrate body positivity and provide both style and functionality for all shapes.

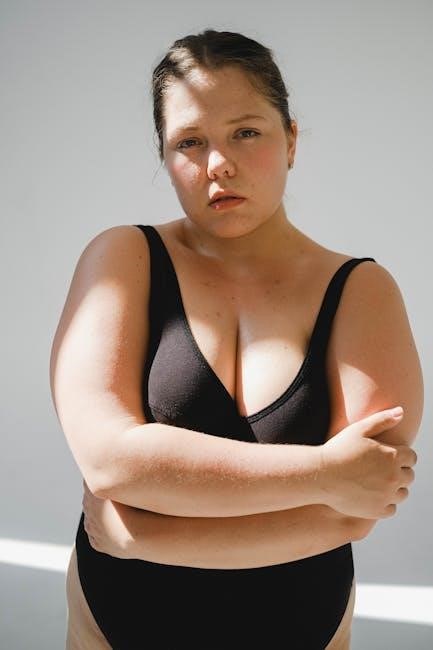
Tips for Finding Supportive and Comfortable Plus-Size Swimwear

Opt for high-waisted bikinis or one-pieces with adjustable straps for enhanced support. Look for tummy control features and breathable, stretchy fabrics. Consider sustainable materials for durability and comfort. Always consult size charts and read customer reviews for fit insights. Don’t hesitate to contact brands for sizing clarity to ensure your swimwear feels both supportive and empowering.

Swimwear for Kids: Sizing and Fit

Ensure a comfortable fit by using size charts and considering growth room. Opt for stretchy fabrics, adjustable straps, and UV protection for durability and safety.

How to Choose the Right Size for Children

Consult size charts and measure your child accurately. Opt for swimwear with adjustable straps and stretchy fabrics for growth room. Consider swim nappies for younger kids. Ensure UV protection and ease of movement. Choose styles that balance comfort and durability, keeping up with active lifestyles while maintaining a secure fit.

Special Considerations for Kids’ Swimwear

Kids’ swimwear requires attention to safety, comfort, and functionality. Look for lightweight, quick-drying materials and UPF protection to prevent sunburn. Adjustable straps ensure a secure fit, while built-in swim diapers are essential for toddlers. Consider styles that allow easy movement for swimming lessons or play. Ensure comfort and durability to keep up with active children in and out of the water.

Sustainable Swimwear and Sizing

Sustainable swimwear often uses eco-friendly materials that may fit differently. Ethical brands prioritize comfort and durability, ensuring sizing aligns with quality craftsmanship for a perfect, guilt-free fit.

How Sustainable Materials Affect Fit

Eco-friendly materials like recycled polyester and plant-based fabrics can impact swimwear fit. These materials often offer superior stretch and recovery, enhancing comfort. However, some sustainable fabrics may be less flexible, requiring careful sizing. Brands using ethical practices ensure their size charts account for these differences, providing accurate measurements for a flattering and comfortable fit every time.

Ethical Brands and Their Sizing Practices

Ethical swimwear brands prioritize transparency in sizing, offering detailed charts to ensure the best fit. Many use inclusive sizing and sustainable materials, while others adopt universal sizing for consistency. These practices aim to reduce waste and cater to diverse body types, ensuring comfort and confidence for all customers. Their commitment to ethical practices extends to accurate sizing, enhancing the shopping experience.

Common Mistakes to Avoid When Buying Swimwear

Common mistakes include not measuring accurately, ignoring size charts, and assuming universal sizing across brands. Avoid guessing your size and not considering fabric stretch for optimal comfort.

Mistakes That Can Lead to Poor Fit

Common errors include ignoring size charts, not measuring accurately, and assuming sizes are consistent across brands. Relying on standard clothing sizes rather than swimwear-specific measurements can also cause poor fit. Avoid guessing your size and not considering fabric stretch or support features, as these factors significantly impact comfort and overall appearance.

How to Ensure the Best Fit

To ensure the best fit, always use brand-specific size charts and measure yourself accurately. Consider fabric type and support features for comfort. Check customer reviews for sizing insights and try before buying if possible. Don’t hesitate to contact brands for size clarifications. Prioritize quality materials and styles that complement your body shape for a confident and comfortable swimming experience.

With this guide, you’re equipped to find your perfect swimwear size. Remember to measure accurately, use size charts, and embrace styles that flatter your body. Confidently enjoy your swimwear choice!

Recap of Key Tips for Finding Your Perfect Swimwear Size

Measure yourself accurately, refer to brand-specific size charts, and consider your body shape. Try before buying if possible, and use customer reviews for sizing insights. Don’t hesitate to contact brands for clarity, and remember, fit and comfort are just as important as style. Confidence shines when you feel great in what you’re wearing!

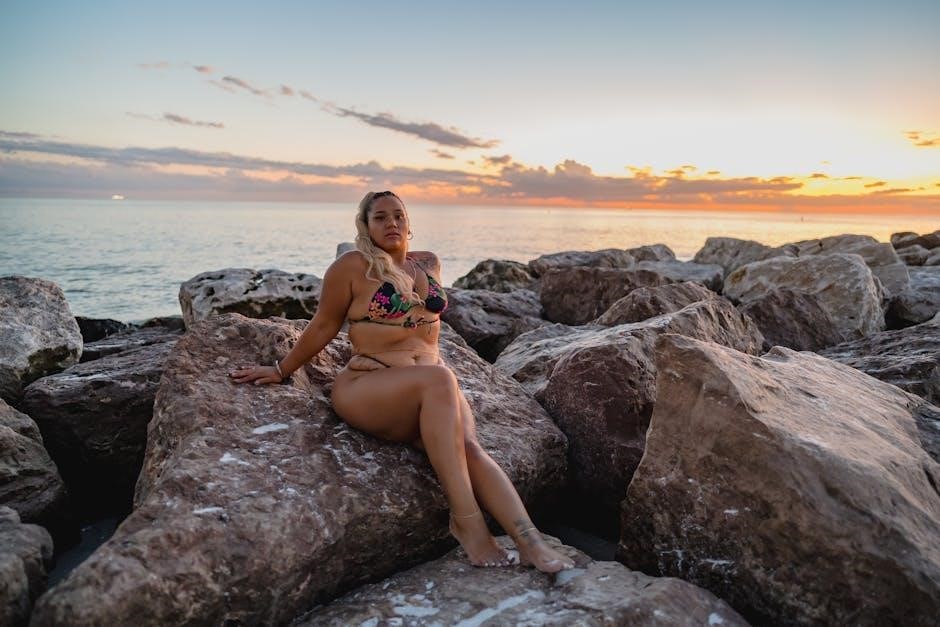
Confidence in Your Swimwear Choice

Confidence in your swimwear choice comes from knowing you’ve selected a style that flatters your body and meets your needs. The right fit, support, and design can boost your self-assurance, whether you’re lounging by the pool or diving into the waves. Embrace your unique shape and celebrate comfort and style—after all, feeling great in what you wear is the ultimate goal!

Continue Reading

honeywell rth2300b1038 manual

The Honeywell RTH2300B1038 is a 5-2 day programmable thermostat designed for energy efficiency and ease of use. It features a backlit display and compatibility with various HVAC systems, ensuring optimal climate control and comfort in your home while reducing energy costs.

Overview of the Honeywell RTH2300B1038

The Honeywell RTH2300B1038 is a 5-2 day programmable thermostat designed to provide reliable and efficient temperature control for your home. It is part of the RTH2300 series, known for its user-friendly interface and energy-saving features. This thermostat is compatible with a variety of HVAC systems, including gas, oil, and electric furnaces, central air conditioners, and hot water systems. Its backlit display ensures easy readability, even in low-light conditions. The RTH2300B1038 is designed to help homeowners optimize energy usage while maintaining a comfortable indoor climate. It is a cost-effective solution for those seeking a programmable thermostat without advanced smart features. With its straightforward installation and intuitive programming, this thermostat is ideal for individuals looking to upgrade their home’s heating and cooling system control.

Key Features of the Honeywell RTH2300B1038

The Honeywell RTH2300B1038 features a backlit display for easy readability, 5-2 day programmable functionality, and compatibility with various HVAC systems, ensuring efficient temperature control and energy savings.

Backlit Display for Enhanced Visibility

The Honeywell RTH2300B1038 features a backlit display, providing clear visibility in low-light conditions. This feature ensures that users can easily read the temperature settings and navigate through menus without needing external light sources. The backlit display illuminates when buttons are pressed, making it convenient to adjust settings even in the dark. This functionality is particularly useful for nighttime adjustments or in rooms with limited lighting. The display’s brightness is balanced to avoid being too harsh, ensuring it remains comfortable to view. This feature enhances the overall user experience by making the thermostat more accessible and user-friendly. The backlit display is a practical addition that complements the thermostat’s energy-efficient and programmable capabilities, ensuring seamless operation in any environment.

5-2 Day Programmable Functionality

The Honeywell RTH2300B1038 offers a 5-2 day programmable feature, allowing users to set different temperature schedules for weekdays and weekends. This functionality enables homeowners to optimize their heating and cooling usage based on daily routines, enhancing energy efficiency and comfort. With the ability to program four time periods daily, users can customize settings to match their lifestyle, such as warmer temperatures during wake hours and cooler settings while sleeping or away. The programmable feature is user-friendly, ensuring easy setup and adjustments. By tailoring temperature settings, homeowners can reduce energy consumption and lower utility bills. This feature is particularly beneficial for those with consistent schedules, providing consistent comfort while minimizing waste. The 5-2 day programming capability makes the Honeywell RTH2300B1038 an ideal choice for households seeking balance between convenience and energy savings.

Compatibility with Multiple HVAC Systems

The Honeywell RTH2300B1038 thermostat is designed to work seamlessly with a wide range of heating, ventilation, and air conditioning (HVAC) systems. It is compatible with gas, oil, or electric furnaces, central air conditioning systems, and hot water systems with or without pumps. Additionally, it supports millivolt systems, making it versatile for various home configurations. The thermostat operates on 24-volt or 750 mV systems, ensuring compatibility with standard HVAC setups. However, it is not suitable for multi-stage conventional systems. This broad compatibility allows homeowners to install the RTH2300B1038 with confidence, knowing it will integrate effectively with their existing HVAC infrastructure. Its adaptability makes it a reliable choice for maintaining consistent temperatures and optimizing energy use across different systems.

Installation Guide for the Honeywell RTH2300B1038

The Honeywell RTH2300B1038 installation is straightforward, requiring levelling, attaching the thermostat to the wall, and connecting wires. Ensure the system switch matches your HVAC type for proper operation. Always follow the manual for accurate setup.

Step-by-Step Installation Process

Begin by turning off the power to your HVAC system at the circuit breaker. Remove the old thermostat and take note of the wire connections for reference. Mount the new Honeywell RTH2300B1038 thermostat base to the wall using the supplied hardware, ensuring it is level for proper function. Connect the wires to the appropriate terminals, matching the labels from your system; If unsure, consult the manual or a professional. Once wired, attach the thermostat faceplate to the base. Turn the power back on and test the system to ensure it operates correctly. Finally, program your desired settings using the backlit display and buttons. Always follow the manual instructions for precise installation and configuration to avoid errors. Proper installation ensures reliable performance and energy efficiency.

System Compatibility Check

To ensure proper functionality, verify that the Honeywell RTH2300B1038 is compatible with your HVAC system. This thermostat works with gas, oil, or electric furnaces, central air conditioners, and hot water systems with or without pumps. It is also compatible with millivolt systems and requires a 24-volt or 750mV power supply. However, it is not suitable for multi-stage conventional systems. Before installation, check the voltage and system type to avoid incompatibility issues. Refer to the manual for detailed specifications and compatibility guidelines. Proper system matching ensures efficient operation and prevents potential damage to your HVAC equipment. Always consult a professional if unsure about your system type or voltage requirements to guarantee safe and effective installation. This step is crucial for optimal performance and long-term reliability of the thermostat.

Programming the Honeywell RTH2300B1038 Thermostat

Programming the Honeywell RTH2300B1038 allows you to easily set daily schedules, override settings, and optimize energy use for comfort and efficiency effortlessly.

Setting Up Daily Schedules

Setting up daily schedules on the Honeywell RTH2300B1038 is straightforward and allows you to customize your home’s temperature settings for optimal comfort and energy savings. The thermostat enables you to program four different time periods each day, with distinct settings for weekdays and weekends. Simply use the buttons to select the desired time and temperature for each period. For example, you can set a lower temperature during sleep hours or when the house is unoccupied. The thermostat’s 5-2 day programmable functionality ensures flexibility, letting you tailor your schedule to fit your lifestyle. Once programmed, the thermostat automatically adjusts the temperature according to your preferences, helping you save energy and maintain a consistent indoor climate. This feature is particularly useful for balancing comfort and efficiency throughout the day.

Understanding Override and Manual Adjustments

The Honeywell RTH2300B1038 allows users to override the programmed schedule or make manual adjustments for temporary comfort. The override feature lets you adjust the temperature without altering the daily schedule, reverting to the programmed settings after the next scheduled period. Manual adjustments are ideal for days when the usual schedule isn’t needed. To override, press the buttons to select the desired temperature, and the thermostat will maintain it until the next programmed time. For manual operation, disable the programmable mode and set the temperature directly. This flexibility ensures you can customize your comfort levels while still benefiting from energy-saving programmable features. Refer to the manual for step-by-step instructions on using these functions effectively. This feature is especially useful for maintaining comfort during unexpected changes in your daily routine or when you prefer not to follow the preset schedule.

Troubleshooting Common Issues

The Honeywell RTH2300B1038 may experience issues like display malfunctions or system incompatibility. Check power connections, ensure proper installation, and refer to the manual for diagnostic steps and solutions.

Resolving Display Malfunctions

If the display on your Honeywell RTH2300B1038 thermostat is not functioning properly, start by ensuring the device is receiving adequate power. Check the circuit breaker or fuse box to confirm the power supply is stable. Next, verify that all wiring connections are secure and not loose. If the issue persists, try restarting the thermostat by turning it off and on again. For a blank or dim display, ensure the backlight feature is enabled. If the display is malfunctioning due to a software glitch, perform a factory reset by following the instructions in the manual. If none of these steps resolve the issue, consult the troubleshooting section of the manual or contact Honeywell customer support for further assistance. Always refer to the official manual for detailed diagnostic procedures and solutions.

Addressing System Incompatibility Problems

If your Honeywell RTH2300B1038 thermostat is not functioning properly with your HVAC system, ensure compatibility by verifying the system type. This thermostat is designed for gas, oil, or electric furnaces, central air conditioners, and hot water systems. It is not compatible with multi-stage conventional systems. Check the wiring connections to ensure they match the terminal designations on both the thermostat and your HVAC system. If issues persist, consult the manual to confirm system compatibility and wiring requirements. For systems requiring millivolt or 750mV compatibility, ensure proper setup. If the thermostat still does not operate, contact Honeywell customer support for assistance or consider a different thermostat model suited to your HVAC system. Always refer to the official manual for detailed compatibility guidelines and troubleshooting steps.

Continue Reading

freedom small group workbook pdf

The Freedom Small Group Workbook is a transformative resource designed to guide participants in discovering true freedom through God’s truth and purpose. Available in both physical and digital formats, this workbook offers a structured 13-week curriculum for small group discussions, equipping individuals to live victoriously and abundantly. It is complemented by the 7 Pillars Journal and online resources, providing a comprehensive journey toward spiritual growth and transformation.

1.1 Overview of the Workbook

The Freedom Small Group Workbook is a foundational resource for 13-week small group studies, guiding participants to discover true freedom in God’s truth. Available in physical and digital formats, it offers structured lessons and discussions, complemented by the 7 Pillars Journal and online resources. Designed to help remove obstacles to intimacy with God, this workbook equips individuals to walk in the freedom Christ provides.

1.2 Purpose and Objectives

The Freedom Small Group Workbook aims to equip participants with biblical truths to overcome personal struggles and live in true freedom. Its objective is to create a safe space for spiritual growth, fostering intimacy with God and practical application of His Word. Through weekly discussions and reflections, the workbook guides individuals to break free from bondage and embrace the abundant life Christ offers, supported by Bible verses and transformative discussions.

Structure and Content of the Workbook

The Freedom Small Group Workbook features a 13-week curriculum with weekly lessons and discussions. Each session includes Bible verses and practical steps to apply God’s truth for freedom.

2.1 Weekly Lessons and Discussions

The workbook is structured with weekly lessons, each containing Bible-based discussions and practical steps to apply God’s truth. These sessions foster group interaction, accountability, and personal reflection, helping participants deepen their understanding of freedom in Christ and overcome life’s challenges through transformative spiritual growth.

2.2 13-Week Curriculum

The Freedom Small Group Workbook follows a 13-week curriculum, designed to guide participants through a comprehensive journey of spiritual growth and transformation. Each week focuses on specific themes and lessons, supported by Bible verses and discussion questions, ensuring a gradual and meaningful progression toward understanding and living in true freedom through Christ.

Benefits of the Freedom Small Group Workbook

The workbook fosters spiritual growth, helping participants break free from destructive patterns and embrace God’s truth. It equips individuals to overcome personal struggles and live in true freedom, offering practical tools for transformation and a deeper connection with Christ.

3.1 Spiritual Growth and Transformation

The workbook guides participants in a journey of spiritual growth, helping them understand God’s truth and purpose. Through structured lessons and discussions, individuals deepen their faith, break free from bondage, and experience transformation. It equips believers to walk in true freedom, fostering a victorious and abundant life rooted in Christ’s teachings. This journey is supported by practical tools and resources for sustained spiritual development;

3.2 Overcoming Personal Struggles

The Freedom Small Group Workbook empowers individuals to overcome personal struggles by addressing root issues and applying biblical truths. Through guided discussions and reflective exercises, participants gain tools to break free from destructive patterns and embrace God’s plan for their lives. The workbook fosters a safe environment for sharing and growth, helping individuals move toward healing and lasting transformation.

Tools and Resources

The Freedom Small Group Workbook is supported by the 7 Pillars Journal and online resources, providing a comprehensive toolkit for spiritual growth and transformation.

4.1 The Workbook Itself

The Freedom Small Group Workbook is a comprehensive guide designed for individual and group use. It provides structured lessons, discussion questions, and practical exercises to help participants apply biblical truths. The workbook is available in both physical and digital formats, ensuring accessibility for all. It serves as the primary resource for the 13-week curriculum, fostering a deeper understanding of God’s plan for freedom and abundant living.

4.2 7 Pillars Journal

The 7 Pillars Journal is a vital companion to the Freedom Small Group Workbook, designed to help participants apply biblical truths personally. It offers space for reflection, note-taking, and tracking progress throughout the 13-week journey. Each pillar corresponds to key lessons, providing practical prompts to deepen understanding and foster spiritual growth. Available separately or with the workbook, it’s an essential tool for personal freedom and transformation.

4.3 Online Resources

Complementing the workbook, the Freedom Small Group Workbook offers a range of online resources to enhance learning and community engagement. These include downloadable PDF guides, video teachings, discussion questions, and supplementary materials. Leaders and participants can access these tools to deepen their understanding and apply principles effectively, ensuring a dynamic and impactful small group experience that fosters spiritual growth and transformation.

Group Dynamics

Fostering a safe environment and encouraging participation are key to effective group dynamics. Worship songs help settle hearts, while active engagement drives meaningful connections and growth.

5.1 Creating a Safe Environment

Creating a safe environment in Freedom Small Groups is essential for fostering trust and openness. Leaders should encourage respect, active listening, and confidentiality among members. Establishing clear boundaries and promoting a non-judgmental space allows participants to share freely and grow spiritually. Weekly meetings should begin with worship or prayer to set a reverent tone, ensuring everyone feels comfortable and valued. This foundation of safety and respect is crucial for meaningful discussions and transformation.

5.2 Encouraging Participation

Encouraging participation in Freedom Small Groups involves fostering an environment where everyone feels valued and heard. Leaders should promote respect and active listening, ensuring all members contribute. Sharing personal insights and experiences enriches discussions, while transparency and vulnerability build deeper connections. Regular check-ins and open-ended questions motivate engagement, helping participants grow spiritually and personally through collective learning and shared journey toward freedom.

Leadership and Facilitation

Effective leadership in Freedom Small Groups involves guiding discussions, maintaining focus, and fostering a safe environment. Leaders facilitate meaningful conversations, ensuring participants engage deeply with the curriculum and its transformative goals.

6.1 Role of the Leader

The leader’s role is crucial in facilitating the Freedom Small Group Workbook. They create a safe, structured environment, guide discussions, and ensure participants engage with the material. Leaders are responsible for fostering openness and accountability, helping members apply biblical truths to their lives. Their guidance empowers participants to embrace transformation and freedom through active participation and personal reflection.

6.2 Facilitation Techniques

Effective facilitation involves creating a safe, open environment where participants feel comfortable sharing. Leaders use worship songs, prayer, and guided discussions to foster engagement. Encouraging active participation through thoughtful questions and personal reflections helps deepen understanding. Leaders also promote accountability and transparency, ensuring the group stays focused on the curriculum and its transformative goals. These techniques empower participants to embrace freedom and growth collectively.

Integration with Other Events

The Freedom Small Group Workbook complements the Freedom Conference and Freedom Weekend, offering a cohesive journey from weekly discussions to transformative event experiences.

7.1 Freedom Conference

The Freedom Conference serves as a pivotal event, amplifying the workbook’s teachings and offering a transformative experience. It provides a platform for deeper connection, worship, and teachings, helping participants apply the workbook’s principles. The conference bridges the gap between small group discussions and personal freedom, culminating in a powerful weekend of renewal and spiritual breakthrough.

7.2 Freedom Weekend

The Freedom Weekend is a climax of the Freedom Small Group Workbook journey, designed to help participants experience true freedom in Christ. This event provides intensive teaching, worship, and personal reflection, building on the workbook’s lessons. It equips individuals to break free from bondage and walk in God’s truth, offering a powerful conclusion to the 13-week curriculum and setting the stage for ongoing spiritual growth and transformation.

Participant Preparation

Participants are encouraged to complete the workbook before each meeting and actively engage in discussions. This preparation enhances personal growth and fosters meaningful group interactions.

8.1 Importance of Completing the Workbook

Completing the workbook is essential for meaningful participation in Freedom Small Group discussions. It ensures participants are prepared to engage deeply with the material, fostering personal growth and a stronger understanding of God’s truth. Regular completion also enhances group dynamics, creating a cohesive and transformative experience for all members. This commitment lays the foundation for spiritual breakthroughs and lasting freedom.

8.2 Active Participation in Discussions

Active participation in discussions is vital for a fruitful Freedom Small Group experience. By sharing insights and engaging openly, participants create a supportive environment where everyone can grow. This interaction fosters accountability, deeper understanding, and mutual encouragement, helping individuals apply God’s truth to their lives and walk in true freedom. Consistent engagement ensures each member benefits fully from the curriculum and community.

Personal Growth and Transformation

The Freedom Small Group Workbook guides participants in understanding God’s truth and walking in true freedom. It equips individuals to live abundantly, challenging them to step toward deeper faith and self-awareness, fostering lasting transformation through biblical principles and practical application.

9.1 Understanding God’s Truth

The Freedom Small Group Workbook emphasizes understanding God’s truth as the foundation for true freedom. Through biblical teachings and guided discussions, participants explore God’s plan and purpose, learning to apply His Word to their lives. This section helps individuals identify and reject lies, embracing God’s truth to break free from spiritual bondage and live in His freedom and grace.

9.2 Walking in True Freedom

Walking in true freedom involves applying God’s truth to daily life, breaking free from bondage and living victoriously in Christ. The workbook guides participants to recognize and reject lies, embracing God’s grace and empowerment. Through practical steps and group discussions, individuals learn to maintain their freedom, living confidently in their identity in Christ and experiencing abundant life as He intended.

Availability and Accessibility

The Freedom Small Group Workbook is available in physical and digital formats, including a downloadable PDF. Physical copies can be purchased in bookstores for $10.

10.1 Physical and Digital Formats

The Freedom Small Group Workbook is accessible in both physical and digital formats, ensuring convenience for all learners. The physical version is available for purchase in bookstores, priced at $10, making it easily accessible. Additionally, the digital format, including a downloadable PDF, allows participants to engage with the material anytime, anywhere, facilitating a seamless learning experience.

10.2 Purchasing Options

The Freedom Small Group Workbook can be purchased in various ways to suit individual preferences. Physical copies are available at local bookstores for $10, while digital versions, including the PDF format, can be downloaded online. Bulk purchases are also offered for groups, with discounts available for multiple copies. Additionally, many churches provide the workbook through their ministries or online platforms, ensuring easy accessibility for all participants.

Reviews and Testimonials

Participants praise the workbook for its transformative impact, sharing stories of spiritual growth and freedom. Many describe it as a life-changing resource that deepens their faith journey.

11.1 Feedback from Participants

Participants often describe the workbook as a life-changing tool that fosters spiritual growth and freedom. Many share testimonies of overcoming personal struggles and gaining a deeper understanding of God’s truth. The structured discussions and practical exercises are frequently highlighted as key elements that promote transformative experiences. Overall, participants express gratitude for the workbook’s role in their journey toward true freedom.

11.2 Church and Leader Endorsements

Church leaders and pastors widely endorse the Freedom Small Group Workbook, praising its structured approach to spiritual growth. Many recommend it for its ability to foster transformative discussions and help participants overcome personal struggles. Several churches, including Church of the Highlands, have adopted it as a key resource for small group ministries. Leaders highlight its effectiveness in guiding individuals toward true freedom in Christ, making it a valuable tool for faith communities.

The Freedom Small Group Workbook is a life-changing resource that guides individuals toward spiritual growth and true freedom. Its structured approach and availability in physical and digital formats make it accessible for all. By completing the workbook, participants are empowered to live victoriously and abundantly, experiencing the transformative power of God’s truth.

12.1 Final Thoughts

12.2 Next Steps

After completing the workbook, participants are encouraged to attend the Freedom Conference or Freedom Weekend for deeper spiritual growth. Sharing experiences and continuing the journey with a community will reinforce the lessons learned. Leaders should guide participants in applying the truths discovered and staying committed to their walk in true freedom. Further resources and events can aid in sustaining transformation and fostering ongoing spiritual development.

Continue Reading

imagine sheet music pdf

Imagine by John Lennon is a timeless ballad available as a free PDF download, offering piano, guitar, and instrumental arrangements for musicians of all skill levels.

Overview of the Song and Its Significance

Imagine, composed by John Lennon, is a powerful ballad advocating for peace and unity. Its poignant lyrics envision a world without conflict or division, resonating globally. The song’s simplicity, paired with its profound message, has made it one of Lennon’s most enduring works. Available as a PDF, the sheet music offers arrangements for piano, guitar, and other instruments, making it accessible to musicians of all levels. Its timeless appeal continues to inspire performances and interpretations worldwide.

Why “Imagine” Remains a Timeless Classic

Imagine endures as a timeless classic due to its universal message of peace and unity. Its simple yet profound melody, coupled with Lennon’s emotive vocals, creates a deeply moving experience. The song’s ability to transcend generations and cultures solidifies its relevance. Available as a PDF, the sheet music allows musicians to explore its elegant composition, ensuring its legacy continues to inspire both performers and listeners worldwide. Its enduring appeal lies in its heartfelt simplicity and enduring message of hope.

Downloading “Imagine” Sheet Music PDF

The Imagine sheet music PDF is readily available for free, offering arrangements for piano, guitar, and other instruments. It caters to both beginners and advanced musicians, ensuring accessibility and versatility for all skill levels.

Free Sources for Piano and Guitar Sheet Music

Multiple websites offer free “Imagine” sheet music PDFs for piano and guitar, catering to diverse skill levels. Platforms like SheetMusic-Free.com and Musopen.org provide downloadable versions, ensuring easy access. These arrangements are available in various formats, including PDF and MIDI, making them versatile for musicians. The sheet music often includes chord progressions, melodies, and lyrics, making it ideal for both beginners and experienced players. This accessibility allows everyone to enjoy and perform John Lennon’s iconic song with ease and creativity.

How to Access and Print the PDF File

To access the “Imagine” sheet music PDF, visit websites like SheetMusic-Free.com or Musopen.org. These platforms offer free downloads without registration. Once downloaded, open the PDF using a viewer like Adobe Acrobat. Ensure your printer is set to “Actual Size” for proper scaling. Some versions may require creating an account or using Google Drive for access. After printing, you can play the melody on piano, guitar, or other instruments. MIDI files are also available for digital practice.

Structure of the Sheet Music

The sheet music for Imagine includes verses, chorus, and a bridge, with chord progressions like C, F, Am, and Dm7, maintaining a steady tempo and emotional dynamics.

Understanding the Musical Composition

Imagine is a heartfelt piano ballad with a simple yet powerful structure. The sheet music features chord progressions like C, F, Am, and Dm7, creating a melancholic yet hopeful tone. The steady tempo and repetitive melody make it accessible to musicians of all levels. The composition emphasizes emotional depth through minimalistic arrangements, allowing performers to connect deeply with the song’s message. This timeless piece remains a favorite for its universal appeal and ease of interpretation.

Chords and Melody Breakdown

The sheet music for Imagine features a simple yet evocative melody, accompanied by chords like C, F, Am, Dm7, G, and G7. The chord progressions create a somber yet hopeful atmosphere, while the melody flows gently, making it easy to follow. The repetitive structure simplifies learning, allowing musicians to focus on expression. Available arrangements include piano, guitar, and other instruments, ensuring accessibility for diverse skill levels and preferences. This breakdown highlights the song’s timeless appeal and emotional depth.

Instrument-Specific Arrangements

The sheet music for Imagine is available for piano, guitar, flute, saxophone, and other instruments, ensuring versatile arrangements that cater to diverse musical preferences and skill levels.

Piano Sheet Music: Simplified and Advanced Versions

The piano sheet music for Imagine is available in both simplified and advanced versions, catering to musicians of all skill levels. The simplified version focuses on the iconic melody and essential chords, making it accessible for beginners. Meanwhile, the advanced arrangement includes intricate harmonies and nuanced dynamics, perfect for experienced pianists. Both versions are downloadable as PDF files, ensuring ease of access for those looking to bring John Lennon’s timeless classic to life on the piano.

Guitar Chords and Tabs for “Imagine”

Guitar enthusiasts can access Imagine sheet music with detailed chords and tabs, available in PDF format. The arrangement includes chords like C, F, Am, and Dm7, making it suitable for both beginners and advanced players. Tabs provide a clear guide for finger placement, while chord diagrams ensure accuracy. These resources are widely available online, allowing guitarists to learn and perform John Lennon’s iconic melody with ease, regardless of their skill level. This makes Imagine a versatile choice for guitar lovers worldwide.

Arrangements for Other Instruments (Flute, Saxophone, etc.)

Sheet music for Imagine is also available for flute, saxophone, and other instruments, offering a diverse range of arrangements. Both alto and tenor saxophone versions are popular, with backing tracks available for purchase. Violin arrangements provide a beautiful melodic interpretation, while flute scores capture the song’s ethereal quality. These adaptations ensure that musicians across various instruments can enjoy playing John Lennon’s timeless classic. Digital formats like PDF and MIDI make these arrangements easily accessible for download and performance.

Learning to Play “Imagine”

Imagine can be mastered with free tutorials and simplified scores. Beginners can start with easy piano arrangements, while experienced musicians can explore advanced techniques and interpretations.

Tips for Beginners: Simplifying the Piano Score

Beginners can simplify Imagine by focusing on the melody and basic chords (C, F, Am, Dm7). Break the song into sections, practice slowly, and gradually increase tempo. Use free tutorials and simplified scores to learn the piano arrangement. Start with the verse, then move to the chorus, and finally the bridge. Emphasize rhythm and timing with a metronome. Practice regularly to build confidence and fluency in playing this iconic ballad.

Advanced Techniques for Experienced Musicians

Experienced musicians can enhance their performance of Imagine by incorporating advanced techniques like arpeggios, chord voicings, and nuanced dynamics. Experiment with improvisation over the iconic C-F-Am-Dm7 progression, adding intricate runs or harmonies. Pay attention to phrasing and emotional expression, as John Lennon’s vision demands depth. For pianists, explore complex arrangements or reharmonizations while maintaining the song’s essence. Guitarists can delve into fingerstyle patterns or advanced tablature for a richer sound. These techniques elevate the interpretation, making it a standout performance.

The Historical Context of “Imagine”

Imagine, released in 1971, reflects John Lennon’s vision of a peaceful world amidst global turmoil, resonating deeply during the Vietnam War and social movements of the era.

John Lennon’s Vision and the Song’s Message

John Lennon’s Imagine envisions a world without division, conflict, or materialism, advocating for peace and unity. The song’s lyrics, written during a turbulent era, reflect Lennon’s idealistic belief in a harmonious society. Its message transcends time, resonating globally as a powerful anthem for humanity. The sheet music captures this emotional depth, allowing musicians to convey Lennon’s timeless plea for a better world through melody and chord progressions that evoke both simplicity and profound emotion.

The Song’s Impact on Music and Culture

Imagine has left an indelible mark on music and culture, becoming an anthem for peace and human rights. Its simple yet powerful composition has inspired countless covers and reinterpretations, showcasing its universal appeal. The song’s message of unity and equality continues to resonate globally, influencing artists and movements alike. Its enduring relevance is evident in modern live performances, such as a stunning sunrise rendition on TV, proving its timeless impact on both music and societal ideals.

Popular Cover Versions and Arrangements

Imagine has inspired countless cover versions, including live performances and instrumental arrangements for piano, guitar, and more, showcasing its enduring appeal and versatility across genres.

Famous Performances and Interpretations

Imagine has been beautifully reimagined in various performances, including a stunning live loop rendition on TV and a serene sunrise version. Artists worldwide have created soulful interpretations, from piano duets to instrumental arrangements for saxophone and violin, highlighting the song’s universal appeal and emotional depth. These performances showcase the timeless message and versatility of Lennon’s masterpiece, resonating with audiences across generations and genres.

Modern Remixes and Live Performances

Modern interpretations of Imagine continue to captivate audiences, blending Lennon’s original vision with contemporary creativity. A breathtaking live loop performance on TV and a serene sunrise rendition exemplify its enduring appeal. Musicians worldwide have reimagined the song, infusing it with fresh energy while preserving its heartfelt message. These modern takes, including instrumental and vocal reinterpretations, highlight the track’s timeless relevance and universal resonance, inspiring new generations to connect with its powerful lyrics and melody.

Imagine remains a powerful anthem, with its sheet music widely accessible in PDF formats. Its timeless message continues to inspire musicians and fans, ensuring its enduring legacy.

The Legacy of “Imagine” in Sheet Music

Imagine has left an indelible mark on music history, with its sheet music remaining a popular choice for pianists, guitarists, and instrumentalists. The song’s timeless message of peace and unity continues to resonate globally, making its PDF arrangements a cherished resource for both beginners and seasoned musicians. Its universal appeal ensures that John Lennon’s vision endures, inspiring future generations to embrace the power of music for social change and personal expression. The sheet music’s accessibility has cemented its place as a cultural icon.

Encouraging Musicians to Explore the Song

Musicians of all levels are encouraged to explore Imagine through its readily available sheet music. With free PDF downloads for piano, guitar, and other instruments, the song offers a versatile canvas for creativity. Whether you’re a beginner seeking simplified arrangements or an advanced player looking for intricate details, Imagine provides a rewarding experience. Its emotional depth and timeless message make it a piece that inspires personal interpretation and connection, fostering a deeper appreciation for music and its universal language.

Continue Reading

art history timeline pdf

An art history timeline provides a chronological overview of major art movements and periods‚ from prehistoric to contemporary art․ It highlights key styles‚ artists‚ and cultural influences‚ offering a structured framework for understanding artistic evolution․ PDF resources and downloadable guides simplify studying and teaching art history‚ making it accessible for both students and enthusiasts․ These tools outline significant eras‚ such as the Paleolithic‚ Renaissance‚ and Modern periods‚ showcasing how art reflects societal changes and creative innovation across time․

Prehistoric Art

Prehistoric art spans from the Paleolithic Era‚ featuring cave paintings like Lascaux and Altamira‚ to the Neolithic Era‚ with sculptures like the Venus of Willendorf․ These early works reflect humanity’s transition from nomadic to agricultural societies‚ showcasing symbolic expression and early cultural development through art․

2․1 Paleolithic Era

The Paleolithic Era‚ spanning from approximately 30‚000 to 10‚000 BCE‚ marks the earliest phase of prehistoric art․ Characterized by cave paintings‚ such as the renowned Lascaux in France and Altamira in Spain‚ this period showcases humanity’s initial forays into artistic expression․ These paintings often depict animals like bison‚ horses‚ and deer‚ executed with remarkable detail using natural pigments․ The Venus of Willendorf‚ a small statue symbolizing fertility‚ is another iconic piece from this era․ Art during this time was likely tied to religious or ritualistic purposes‚ reflecting the spiritual and survival-oriented nature of Paleolithic societies․ The use of stone and bone tools‚ along with primitive painting techniques‚ underscores the resourcefulness of early humans․ These works not only provide insights into the lives of our ancestors but also demonstrate an early appreciation for aesthetics and symbolism‚ laying the foundation for the development of art in subsequent eras․

2․2 Neolithic Era

The Neolithic Era‚ dating from around 10‚000 to 2‚000 BCE‚ marked a significant shift in human society with the rise of agriculture and settled communities․ Art from this period reflects these changes‚ with a focus on pottery‚ sculpture‚ and monumental architecture․ The development of ceramics allowed for both functional and decorative pieces‚ often adorned with intricate designs․ Megalithic structures‚ such as Stonehenge‚ began to appear‚ showcasing communal efforts and possibly serving religious or ceremonial purposes․ Figurines‚ like those found in Çatalhöyük‚ suggest a continued interest in symbolism and ritual․ The art of this era highlights the transition from nomadic to agrarian lifestyles‚ with creations that often celebrated fertility‚ community‚ and the natural world․ These innovations laid the groundwork for more complex artistic expressions in subsequent periods‚ demonstrating humanity’s growing capacity for creativity and organization․

Ancient Art

Ancient art encompasses Egyptian‚ Greek‚ and Roman periods‚ characterized by monumental structures‚ symbolic imagery‚ and the representation of spirituality and power․ These cultures laid the foundation for Western artistic traditions‚ influencing future movements․

3․1 Egyptian Art

Egyptian art‚ spanning circa 3000 BCE to 300 CE‚ is renowned for its monumental architecture‚ symbolic imagery‚ and rigid stylistic conventions․ It primarily served religious and political purposes‚ aiming to honor gods and pharaohs․ Key works include the Great Pyramids of Giza and the Great Sphinx‚ which exemplify the civilization’s engineering prowess and spiritual beliefs․ Tomb paintings and reliefs often depicted rituals‚ hieroglyphs‚ and idealized human forms‚ emphasizing harmony and balance․ Techniques like relief sculpture and hieroglyphic writing were central to conveying narratives and preserving history․ The use of materials such as limestone‚ sandstone‚ and gold reflects the society’s wealth and technological advancement․ Egyptian art’s adherence to tradition and its emphasis on immortality strongly influenced later art movements‚ particularly in the Mediterranean world․ Its legacy endures as a testament to ancient Egypt’s cultural and artistic achievements‚ offering profound insights into its people’s beliefs and way of life․

3․2 Greek Art

Greek art‚ flourishing from circa 800 BCE to 100 CE‚ is celebrated for its emphasis on humanism‚ proportion‚ and naturalism․ It evolved through distinct periods: the Archaic‚ Classical‚ and Hellenistic․ The Archaic period introduced rigid‚ stylized forms‚ while the Classical era perfected idealized human figures‚ as seen in works like the Venus de Milo and the Discus Thrower․ Hellenistic art embraced dramatic poses and emotional expression․ Greek art excelled in sculpture‚ particularly in marble‚ and in pottery‚ with red-figure and black-figure techniques․ Architecture‚ exemplified by the Parthenon‚ showcased precision and harmony․ Paintings often depicted mythological themes‚ reflecting the cultural significance of mythology․ The art of this period was deeply intertwined with public and religious life‚ serving to honor deities and celebrate civic identity․ Greek art’s influence persisted‚ shaping Roman art and later Western art movements‚ particularly during the Renaissance․ Its legacy lies in its enduring ideals of beauty‚ balance‚ and the celebration of human potential․

3․3 Roman Art

Roman art‚ spanning from 509 BCE to 500 CE‚ was deeply influenced by Greek traditions but developed distinct characteristics․ It emphasized practicality‚ engineering prowess‚ and public grandeur․ Roman architecture‚ such as aqueducts‚ roads‚ and monumental structures like the Colosseum‚ showcased their mastery of concrete and marble․ Sculpture evolved from idealized Greek forms to realistic portraits of Roman leaders‚ capturing individual traits and emotions․ Mosaics became a prominent art form‚ adorning floors and walls with vibrant narratives․ Roman art often served political and religious purposes‚ glorifying emperors and deities․ Public monuments‚ like triumphal arches and columns‚ commemorated military victories and imperial power․ The art of this period reflected Roman values of authority‚ unity‚ and civic identity․ As the empire expanded‚ Roman art incorporated diverse styles from conquered regions‚ creating a rich‚ eclectic legacy that endured well into the medieval period․ Its influence can still be seen in Western architecture and art today․

Medieval Art

Medieval art‚ spanning from the 5th to the 15th century‚ reflects the cultural‚ religious‚ and social dynamics of Europe during this period․ It is characterized by a focus on religious themes‚ with art serving primarily as a means to convey Christian beliefs and moral values․ Early medieval art often featured simple‚ symbolic forms‚ while the later periods saw the rise of more intricate and detailed works․ The Byzantine style‚ with its use of gold and mosaics‚ heavily influenced early medieval art‚ particularly in the production of illuminated manuscripts and religious icons․ Romanesque art‚ emerging in the 10th century‚ emphasized sturdy structures and solemn expressions‚ often seen in cathedrals and sculptures․ Gothic art‚ beginning in the 12th century‚ introduced taller‚ lighter buildings with stained glass and more expressive sculptures․ Medieval art also included tapestries‚ metalwork‚ and illuminated manuscripts‚ many of which were created in monasteries․ This period laid the groundwork for the artistic innovations of the Renaissance‚ blending spirituality with evolving artistic techniques․

Renaissance Art

The Renaissance marked a cultural and artistic transformation in Europe‚ emerging in the 14th to 17th centuries․ It emphasized humanism‚ realism‚ and classical influences‚ leading to groundbreaking techniques like perspective and sfumato․ Artists revived ancient Greek and Roman styles‚ creating iconic works that celebrated human potential and emotion․ This era saw the rise of masterpieces by figures like Leonardo da Vinci and Michelangelo‚ fueled by patronage from powerful families and the Church․ The Renaissance bridged the gap between medieval traditions and modern artistic expression‚ laying the foundation for future movements․

5․1 Revival of Classical Themes

The Renaissance saw a profound revival of classical themes‚ drawing inspiration from ancient Greek and Roman art‚ literature‚ and philosophy․ Artists and scholars sought to emulate the ideals of classical antiquity‚ leading to a resurgence of mythological subjects‚ classical motifs‚ and historical narratives in their works․ This revival was driven by the rediscovery of ancient texts and artifacts‚ which influenced both the content and style of Renaissance art․ Sculptors like Michelangelo studied classical forms to create naturalistic and idealized figures‚ while painters incorporated classical elements into their compositions․ The use of perspective and proportion‚ rooted in classical principles‚ became central to Renaissance artistic techniques․ This emphasis on classical themes not only reflected a admiration for the past but also a desire to surpass it‚ fostering innovation and setting the stage for the development of new artistic styles․

5․2 Key Figures of the Renaissance

The Renaissance was defined by visionary artists who revolutionized creativity and technique․ Leonardo da Vinci‚ renowned for his mastery of anatomy and perspective‚ created iconic works like the Mona Lisa and The Last Supper․ Michelangelo‚ a sculptor and painter‚ is celebrated for his breathtaking Sistine Chapel ceiling and David‚ exemplifying perfect human form․ Raphael‚ known for his harmonious compositions‚ painted the School of Athens‚ capturing classical ideals․ These artists‚ supported by patrons like the Medici family‚ laid the foundation for modern art․ Their innovations in perspective‚ realism‚ and emotional depth continue to inspire․ Other notable figures include Sandro Botticelli‚ known for mythological scenes‚ and Titian‚ who excelled in color and portraiture․ Together‚ they transformed art‚ blending technical brilliance with intellectual curiosity‚ and left a lasting legacy in the history of art․

Modern Art Movements

Modern art movements emerged in the late 19th and 20th centuries‚ marked by a departure from traditional techniques and the exploration of new artistic expressions․ Impressionism‚ led by Claude Monet‚ emphasized light and color‚ while Post-Impressionism‚ with artists like Vincent van Gogh‚ focused on emotional intensity․ Cubism‚ pioneered by Pablo Picasso‚ fragmented forms into geometric shapes‚ revolutionizing visual representation․ Surrealism‚ led by Salvador Dalí‚ explored the subconscious through fantastical imagery․ Abstract Expressionism‚ with figures like Jackson Pollock‚ prioritized process over representation‚ creating dynamic‚ nonfigurative works․ Pop Art‚ exemplified by Andy Warhol‚ celebrated popular culture and consumerism․ Minimalism‚ characterized by simplicity and repetition‚ sought to strip art to its essence․ These movements‚ documented in art history timelines‚ reflect the diverse and innovative spirit of modern art‚ influencing contemporary practices and cultural narratives․ Resources like PDF guides and online timelines provide detailed overviews of these movements‚ making them accessible for study and appreciation․

Contemporary Art

Contemporary art encompasses a broad range of artistic practices from the late 20th century to the present day․ It is characterized by its diversity‚ experimentation‚ and engagement with global issues․ Artists today explore various mediums‚ including painting‚ sculpture‚ photography‚ digital art‚ and installation․ The rise of digital platforms has democratized art‚ allowing for wider dissemination and participation․ Websites like DeviantArt host millions of artworks‚ fostering a vibrant community of creators and enthusiasts․ Contemporary art often addresses themes such as identity‚ technology‚ environmentalism‚ and social justice․ Notable artists like Banksy and Takashi Murakami blend fine art with popular culture‚ reaching global audiences․ Art history timelines now include digital and interactive art‚ reflecting the evolving nature of creativity․ This era emphasizes innovation‚ pushing boundaries and challenging traditional notions of art․ As a result‚ contemporary art remains dynamic‚ inclusive‚ and deeply connected to the world we live in․

The Digital Age in Art History

The digital age has revolutionized the study and presentation of art history‚ offering unparalleled accessibility and interactivity․ Online platforms like DeviantArt and the Metropolitan Museum of Art’s Heilbrunn Timeline of Art History provide comprehensive resources‚ including downloadable PDFs and interactive timelines; These tools enable users to explore art history chronologically‚ with detailed information on movements‚ key artists‚ and major works․ Digital art itself has become a significant part of contemporary culture‚ with artists using software and digital media to create innovative pieces․ Platforms like DeviantArt have fostered a global community of artists‚ allowing for the sharing and discovery of new works․ The digital age has also made art history more engaging‚ with virtual exhibitions and 3D scans of artworks․ This era has transformed how we learn about and interact with art‚ ensuring its relevance for future generations․ Digital resources have become indispensable for both education and artistic inspiration․

Resources for Art History Timelines

Various online resources provide comprehensive art history timelines in formats like PDF‚ Word documents‚ and PowerPoint presentations․ Websites such as the Metropolitan Museum of Art’s Heilbrunn Timeline offer detailed‚ scientifically grounded information․ DeviantArt and other platforms showcase user-generated content‚ blending historical insights with contemporary artistic interpretations․ Additionally‚ educational sites provide free downloadable PDFs that outline major art movements‚ making them ideal for classroom use or self-study․ These resources often include images‚ key dates‚ and notable artists‚ offering a structured approach to understanding art history․ They also highlight how each era influences the next‚ creating a rich tapestry of human creativity․ By utilizing these tools‚ learners can gain a deeper appreciation of art’s evolution and its cultural significance․ These resources serve as valuable aids for both educators and enthusiasts‚ ensuring art history remains accessible and engaging for all․

Continue Reading

multiplication coloring worksheets pdf

Multiplication coloring worksheets PDFs offer an engaging way to learn math through colorful activities. These fun‚ educational tools combine multiplication practice with creative coloring‚ making learning enjoyable for kids.

What Are Multiplication Coloring Worksheets?

Multiplication coloring worksheets are interactive PDF resources that combine math practice with creative coloring. Each worksheet features multiplication problems where the answers correspond to specific colors‚ allowing children to fill in the picture based on the correct solutions. These tools make learning multiplication facts engaging and fun‚ blending education with art to create a motivating experience for young learners. They are ideal for developing math skills while fostering creativity and fine motor abilities.

Benefits of Using Multiplication Coloring Worksheets

Multiplication coloring worksheets make learning multiplication enjoyable and effective by combining math with coloring‚ enhancing engagement and helping children master their multiplication facts through a fun‚ creative process.

Combining Learning with Fun

Multiplication coloring worksheets merge math practice with creative coloring‚ creating an engaging experience for children. This innovative approach transforms repetitive multiplication practice into a joyful activity‚ capturing students’ attention and fostering a love for learning. By linking math problems to colorful illustrations‚ these worksheets make mastering multiplication facts both entertaining and rewarding‚ ensuring children stay motivated and eager to learn more.

Improving Motor Skills

Multiplication coloring worksheets enhance both fine and gross motor skills in children. Coloring within designated areas improves hand-eye coordination and dexterity‚ while selecting colors strengthens cognitive-motor connections. These activities also boost creativity and provide a sense of accomplishment‚ making math practice a rewarding experience that fosters physical and mental development.

Enhancing Spatial and Logical Skills

Multiplication coloring worksheets help children develop spatial awareness and logical reasoning. By following color codes tied to multiplication problems‚ kids visualize patterns and sequences‚ strengthening their understanding of mathematical relationships. This interactive approach fosters problem-solving abilities and enhances cognitive development‚ making complex concepts more accessible and engaging for young learners.

How to Use Multiplication Coloring Worksheets

Download and print the PDF worksheets‚ then distribute them to students. Have them use color codes to fill in multiplication answers‚ making learning interactive and enjoyable for all ages.

Step-by-Step Guide

Download the PDF worksheet and print it on high-quality paper.

Review the multiplication problems and corresponding color codes.

Use colored markers or pencils to fill in the answers based on the key.

Encourage students to stay within the lines for precise coloring.

Allow them to creatively express themselves while practicing math.

This method ensures an interactive and enjoyable learning experience for children‚ blending education with artistry.

Appropriate Uses

Multiplication coloring worksheets are ideal for various educational settings. They can be used as homework assignments‚ math center activities‚ or independent practice. Teachers can incorporate them during holiday-themed lessons or as a fun review tool. Parents can also use these worksheets at home to reinforce multiplication skills in an engaging way. Their versatility makes them suitable for classrooms‚ homeschooling‚ or supplemental learning‚ ensuring math practice remains enjoyable and effective for students.

Themes and Designs in Multiplication Coloring Worksheets

Multiplication coloring worksheets feature diverse themes like space‚ dinosaurs‚ and seasonal designs‚ making learning fun and engaging for children while practicing math skills.

Popular Themes

Popular themes in multiplication coloring worksheets include space adventures‚ friendly dinosaurs‚ magical unicorns‚ and seasonal designs like Christmas or Halloween. These engaging themes cater to diverse interests‚ making math practice enjoyable for children. By incorporating colorful characters and festive elements‚ these worksheets ensure that learning multiplication remains fun and exciting. Seasonal themes also help keep the learning process fresh and relevant throughout the year‚ adding variety to math practice.

Customizable Options

Multiplication coloring worksheets offer customizable options to cater to different learning needs and preferences. Teachers or parents can adjust the difficulty level‚ choose specific multiplication facts‚ or select preferred themes. Some worksheets allow customization of colors‚ patterns‚ or even the addition of a child’s name. This flexibility ensures that the learning experience is tailored to individual interests and skill levels‚ making math practice more personalized and engaging for children.

Skill Development Through Multiplication Coloring Worksheets

Multiplication coloring worksheets enhance fine motor skills‚ spatial reasoning‚ and logical thinking. They build confidence and mastery of multiplication facts‚ fostering a strong foundation for math proficiency.

Mastery of Multiplication Facts

Multiplication coloring worksheets PDFs help students master multiplication facts through interactive and visual learning. By solving problems and coloring corresponding areas‚ kids reinforce their understanding of times tables. This method ensures they grasp single-digit multiplication before progressing to double-digit problems‚ building a solid mathematical foundation. The engaging design makes practice enjoyable and effective‚ leading to long-term retention of multiplication skills and improved academic performance.

Building Confidence

Multiplication coloring worksheets PDFs foster confidence in students by providing a sense of accomplishment with each completed task. The interactive nature of coloring combined with math problems makes learning feel less intimidating. As children see their colorful creations come to life‚ they develop pride in their work‚ boosting self-esteem. This positive reinforcement encourages a growth mindset‚ helping them tackle multiplication challenges with greater enthusiasm and assurance‚ while also enhancing their overall academic confidence.

Free Multiplication Coloring Worksheets PDF

Access high-quality‚ free multiplication coloring worksheets in PDF format‚ designed to make learning fun. These printable resources are perfect for engaging students with colorful‚ theme-based math practice.

Where to Find Free Resources

Discover numerous websites offering free multiplication coloring worksheets in PDF format. Platforms like Cuemath‚ Teachers Pay Teachers‚ and educational blogs provide a variety of themed sheets. Many sites feature holiday and seasonal designs‚ ensuring year-round engagement. Additionally‚ resources like ColoringUS and Tim’s Printables offer downloadable PDFs‚ making it easy to access and print these fun learning tools for classrooms or home use.

Downloading and Printing

Downloading multiplication coloring worksheets is straightforward. Simply visit educational websites‚ select your preferred PDF‚ and click download. Ensure you have a printer and compatible software like Adobe Acrobat. These worksheets are accessible on both desktop and mobile devices‚ making it easy to print and distribute for classroom or home use. Always check for browser compatibility to ensure smooth downloading and printing experiences.

Classroom Applications of Multiplication Coloring Worksheets

Multiplication coloring worksheets are versatile tools for engaging math practice. They can be used in math centers‚ group activities‚ or as homework‚ fostering an interactive learning environment.

Engaging Math Practice

Multiplication coloring worksheets transform math practice into a vibrant‚ interactive experience. By combining color-by-number activities with multiplication problems‚ these worksheets captivate students’ attention‚ making repetitive practice enjoyable. They allow children to visualize math concepts while expressing their creativity. This approach not only reinforces multiplication facts but also keeps learners motivated and eager to explore new challenges in a fun and dynamic way.

Math Centers and Group Activities

Multiplication coloring worksheets are ideal for math centers and group activities‚ fostering collaboration and creativity. Students can work together on themed sheets‚ discussing multiplication strategies while coloring. These activities promote teamwork‚ communication‚ and problem-solving skills. They also allow teachers to assess understanding in a relaxed‚ engaging environment‚ making learning a shared and enjoyable experience for all participants.

Seasonal and Holiday-Themed Worksheets

Seasonal and holiday-themed multiplication coloring worksheets add a festive twist to learning. Available for various holidays‚ these engaging PDFs align with the learning process and keep it enjoyable for kids throughout the year.

Holiday-Specific Designs

Holiday-specific multiplication coloring worksheets bring festive excitement to learning. From Christmas trees to Halloween pumpkins‚ these themed PDFs feature holiday imagery‚ combining math practice with colorful creativity. They are perfect for seasonal activities‚ making multiplication fun and engaging during holidays like Easter‚ Valentine’s Day‚ and Thanksgiving. These worksheets cater to diverse celebrations‚ ensuring learning remains joyful and relevant throughout the year for children of all ages.

Keeping Learning Fun Year-Round

Multiplication coloring worksheets PDFs ensure learning stays enjoyable throughout the year with seasonal and holiday-themed designs. From summer vacations to winter snowflakes‚ these vibrant sheets prevent monotony and keep children engaged. By incorporating festive elements‚ they make math practice feel like a fun activity rather than a chore‚ ensuring consistent skill development while maintaining excitement and curiosity in young learners.

Design Variations in Multiplication Coloring Worksheets

Multiplication coloring worksheets PDFs offer diverse designs‚ including single and double-digit problems‚ along with color-by-number and fill-in-the-blank options‚ which makes learning engaging and adaptable for various skill levels.

Single and Double-Digit Problems

Multiplication coloring worksheets PDFs include both single and double-digit problems‚ catering to different skill levels. Single-digit problems introduce basic concepts‚ while double-digit challenges enhance proficiency. These variations ensure a smooth transition from foundational to advanced multiplication skills‚ keeping the learning process both effective and enjoyable for students. This gradual approach helps build confidence and mastery in multiplication facts through engaging and colorful activities. Each problem type is thoughtfully designed to meet the needs of diverse learners‚ making math practice accessible and fun for all.

Color-by-Number and Fill-in-the-Blank Options

Multiplication coloring worksheets PDFs often feature color-by-number and fill-in-the-blank activities‚ blending math with creativity. In color-by-number‚ students solve multiplication problems and color corresponding areas with specific hues‚ fostering problem-solving and artistry. Fill-in-the-blank sections allow learners to write answers‚ reinforcing multiplication facts. These diverse options cater to different learning styles‚ making math practice interactive and enjoyable while ensuring a strong grasp of multiplication concepts through engaging and visually appealing exercises.

Multiplication coloring worksheets PDF provide an interactive and enjoyable way for children to master math skills while fostering creativity and confidence in their abilities.

The Importance of Multiplication Coloring Worksheets

Multiplication coloring worksheets are invaluable for making math engaging and enjoyable. They combine learning with creativity‚ helping children master multiplication facts while developing motor skills and hand-eye coordination. These worksheets also foster logical thinking and spatial awareness‚ making complex concepts accessible. By providing a sense of accomplishment‚ they build confidence and excitement for learning‚ ensuring a strong foundation in mathematics and a lifelong love for education.

Continue Reading

calculus single variable 8th edition pdf

James Stewart’s Calculus: Single Variable‚ 8th Edition is a widely acclaimed textbook designed for students across various disciplines‚ offering a clear‚ accurate‚ and engaging approach to learning calculus. It integrates real-world applications‚ fostering both technical proficiency and an appreciation for the subject’s intrinsic beauty‚ making it an indispensable resource for undergraduate studies and beyond.

Overview of the Textbook and Its Importance

Calculus: Single Variable‚ 8th Edition by James Stewart is a renowned textbook that combines clarity‚ precision‚ and real-world relevance to make calculus accessible to students from diverse academic backgrounds. Its structured approach‚ enhanced problem sets‚ and practical applications in fields like engineering‚ economics‚ and medicine have made it a cornerstone of undergraduate mathematics education. Widely adopted by universities‚ including UC Berkeley for courses like Math 1A and 1B‚ this edition emphasizes active learning and critical thinking‚ bridging the gap between theoretical concepts and their practical implications‚ thus cementing its importance in modern calculus education.

Key Features of the 8th Edition

The 8th Edition features enhanced problem sets‚ real-world applications‚ and interactive tools like applets and Sage worksheets‚ fostering a deeper understanding of calculus concepts through hands-on learning.

Enhanced Problem Sets and Real-World Applications

The 8th Edition of Calculus: Single Variable offers enhanced problem sets designed to engage students through real-world applications. These problems span fields like physics‚ engineering‚ economics‚ and biology‚ providing practical contexts for mathematical concepts. Interactive applets and Sage worksheets further enrich learning‚ allowing students to explore calculus visually and dynamically. The textbook emphasizes critical thinking and skill development‚ ensuring students can apply calculus to solve diverse‚ real-life challenges. This approach not only deepens understanding but also fosters an appreciation for the relevance of calculus in various disciplines‚ making it a valuable tool for both education and professional preparation.

Where to Find the PDF Version

The PDF version of Calculus: Single Variable‚ 8th Edition can be accessed through official sources like the publisher’s website or authorized online retailers. Additionally‚ platforms like Z-Library and certain forums may offer downloadable versions‚ though users should exercise caution regarding legality and safety. Always prioritize obtaining materials through legitimate channels to support authors and publishers.

Official Sources and Availability

The Calculus: Single Variable‚ 8th Edition PDF is available for purchase through official publishers like Wiley and Cengage Learning. Students and educators can access the eBook or physical copy directly from the publisher’s website. Additionally‚ authorized online retailers such as Amazon and Barnes & Noble offer digital versions. Some universities‚ including UC Berkeley‚ may provide access through their libraries or course platforms. Always ensure to purchase from reputable sources to avoid unauthorized or incomplete versions‚ supporting both the author and publisher.

Supplementary Materials and Resources

The 8th Edition offers solution manuals‚ online study guides‚ and interactive applets to enhance learning. Additional resources‚ such as Sage worksheets‚ are available through Cengage Learning and Z-Library.

Solution Manuals and Online Study Guides

The 8th Edition provides comprehensive solution manuals and online study guides to support student learning. These resources include detailed solutions to textbook problems‚ interactive applets‚ and Sage worksheets for hands-on practice. The Student Solutions Manual‚ authored by Daniel Anderson‚ Jeffery A. Cole‚ and Daniel Drucker‚ covers all chapters and is available in PDF format. Additionally‚ online platforms like Z-Library and Cengage Learning offer supplementary materials‚ ensuring students have access to a wealth of resources to master calculus concepts and applications effectively.

Course Applications and Adoption

Calculus: Single Variable‚ 8th Edition is widely adopted in university curriculums‚ including UC Berkeley’s Math 1A and 1B courses‚ due to its comprehensive coverage and real-world applications‚ making it a foundational resource for students across diverse majors and institutions.

Use in University Curriculum‚ Including UC Berkeley’s Math 1A‚B

The 8th edition of Calculus: Single Variable is widely adopted across universities‚ notably in UC Berkeley’s Math 1A and 1B courses. Its clear explanations and real-world applications align perfectly with curriculum goals‚ providing students a robust foundation in calculus. The textbook’s structured approach‚ with detailed examples and exercises‚ helps students grasp complex concepts‚ making it an essential resource for academic success and professional development. Its user-friendly format and additional online resources further enhance the learning experience‚ as noted in various academic sources.

Benefits for Learning and Understanding

The textbook enhances technical skills and fosters an appreciation for calculus‚ offering real-world applications and interactive tools to deepen understanding and engagement with the subject matter.

Developing Technical Skills and Appreciation for Calculus

Calculus: Single Variable‚ 8th Edition is designed to help students develop a strong foundation in technical skills while fostering a deep appreciation for the beauty and relevance of calculus. The textbook emphasizes problem-solving through a variety of exercises‚ from basic computations to complex‚ real-world applications. By integrating practical examples from fields like physics‚ engineering‚ and economics‚ the text makes calculus accessible and meaningful. Interactive tools‚ such as Sage worksheets and applets‚ further enhance learning by allowing students to visualize and explore mathematical concepts. This dual focus on skill development and contextual understanding ensures that students not only master calculus but also gain a lasting appreciation for its role in solving real-world problems.

Digital Learning and Integration

Calculus: Single Variable‚ 8th Edition incorporates interactive applets‚ Sage worksheets‚ and online platforms to enhance learning. These digital tools enable students to visualize and explore calculus concepts dynamically‚ fostering a deeper understanding through hands-on engagement with mathematical problems and real-world applications.

Interactive Applets‚ Sage Worksheets‚ and Online Platforms

The 8th Edition integrates interactive applets and Sage worksheets to enhance learning; These tools allow students to explore calculus concepts dynamically‚ visualizing complex ideas and interacting with graphs. The applets‚ marked with (AP)‚ provide hands-on experiences‚ while Sage worksheets offer computational practice. Additionally‚ the textbook is supported by online platforms that include tutorials‚ quizzes‚ and real-world applications‚ making learning flexible and engaging. These resources cater to diverse learning styles‚ enabling students to grasp abstract concepts and apply them effectively in problem-solving scenarios‚ both in and out of the classroom.

Comparisons with Previous Editions

The 8th Edition enhances clarity‚ expands problem sets‚ and incorporates more real-world applications compared to earlier versions‚ making it a refined and comprehensive learning resource.

What’s New in the 8th Edition

The 8th edition introduces enhanced problem sets‚ expanded real-world applications‚ and improved clarity. It features interactive applets and Sage worksheets‚ enriching the learning experience. Additional resources‚ including a solution manual and online study guides‚ support student success. The textbook now aligns with modern teaching methods‚ ensuring a comprehensive and engaging approach to calculus. These updates make the 8th edition a valuable tool for both students and instructors‚ fostering deeper understanding and practical application of calculus concepts.

Support for Students and Instructors

The 8th edition offers additional resources‚ including solution manuals and instructor guides‚ providing comprehensive support for both students and educators to master calculus effectively.

Additional Resources and Instructor Manuals

The 8th edition of Calculus: Single Variable is supported by a range of supplementary materials‚ including a Student Solutions Manual and an Instructor’s Manual. These resources provide detailed solutions to textbook problems‚ enabling students to review and understand complex concepts independently. Additionally‚ the Student Solutions Manual‚ authored by Anderson‚ Cole‚ and Drucker‚ offers fully worked-out solutions‚ helping students grasp problem-solving strategies. Instructors benefit from comprehensive teaching aids‚ including lecture notes and test banks. These resources enhance both independent study and classroom instruction‚ ensuring a thorough understanding of calculus principles and applications.

Calculus: Single Variable‚ 8th Edition is a comprehensive and insightful resource‚ offering clarity‚ real-world applications‚ and robust supplementary materials. It is highly recommended for both students and instructors seeking a well-rounded calculus education.

Final Thoughts on the Value of the Textbook

Calculus: Single Variable‚ 8th Edition stands out as a exceptional educational resource‚ blending clarity‚ precision‚ and real-world relevance. Its well-structured approach ensures deep understanding‚ while its rich problem sets and interactive tools cater to diverse learning styles. The inclusion of supplementary materials like solution manuals enhances its value‚ making it a complete package for both students and instructors. With its proven track record and widespread adoption‚ this textbook is a trusted companion for mastering calculus‚ offering a balance of theoretical rigor and practical application that fosters long-term understanding and appreciation of the subject.

Continue Reading

c cure 9000 installation guide

Welcome to the C-Cure 9000 Installation Guide, your comprehensive resource for deploying and configuring the system․ This guide covers essential steps, from preparation to final setup, ensuring a smooth and secure installation process․

1․1 Overview of C-Cure 9000 Security System

C-Cure 9000 is a robust security and event management system designed to provide comprehensive access control and surveillance․ It integrates seamlessly with various devices and systems, offering scalability and flexibility for diverse security needs․ The system supports advanced features like real-time monitoring, automated alerts, and secure data encryption, ensuring a reliable and efficient security solution for organizations of all sizes․

1․2 Importance of Proper Installation and Configuration

Proper installation and configuration of C-Cure 9000 are crucial for ensuring system functionality and security․ Incorrect setup may lead to performance issues, data breaches, or integration failures․ Ensuring a correct installation guarantees optimal performance, reliability, and secure operations, which are essential for maintaining a robust security environment․

System Requirements for C-Cure 9000

Ensure your system meets the necessary hardware, software, and network specifications for optimal performance․ This includes compatible operating systems, adequate storage, and required server configurations․

2․1 Hardware Requirements

The C-Cure 9000 system requires a server running Windows 2016 or later with a multi-core processor, 8GB RAM (16GB recommended), and 500GB storage․ Client machines need compatible operating systems and at least 4GB RAM․ Ensure all hardware components meet these specifications for optimal performance and security․ Proper planning is essential to ensure compatibility and scalability․

2․2 Software Requirements

The C-Cure 9000 system requires Windows Server 2016 or later, SQL Server 2017 or newer, and ․NET Framework 4․7․2․ Ensure all servers and clients have compatible 64-bit operating systems and the latest service packs installed․ Verify that all prerequisite software is up to date before proceeding with installation to ensure compatibility and optimal system performance․

2․3 Network Requirements

The C-Cure 9000 system requires a stable network infrastructure with TCP/IP connectivity․ Ensure AES 256-bit encryption for secure communication between servers and clients․ Configure SSL for enhanced security and enable Application Request Routing (ARR) for load balancing․ Verify firewall settings to allow necessary ports and protocols․ Plan your network topology to avoid latency and ensure reliable system performance across all connected devices․

Deployment Options for C-Cure 9000

C-Cure 9000 offers flexible deployment options, including cloud-based, on-premises, and hybrid solutions․ Choose a deployment scenario that aligns with your organizational needs for scalability and security․

3․1 Understanding Deployment Scenarios

Deployment scenarios for C-Cure 9000 vary based on organizational needs․ Cloud-based solutions offer scalability and remote access, while on-premises deployments provide localized control․ Hybrid models combine both, ensuring flexibility․ Each scenario requires careful planning, considering factors like network infrastructure, security requirements, and integration with existing systems․ This guide helps you evaluate and select the most suitable deployment option for your security environment․

3․2 Choosing the Right Deployment Option

Selecting the appropriate deployment option for C-Cure 9000 involves evaluating your organization’s size, security requirements, and infrastructure․ Cloud-based deployments are ideal for scalability and remote access, while on-premises solutions suit businesses needing direct control․ Hybrid models offer flexibility for larger enterprises․ Consider factors like network bandwidth, data privacy, and integration needs to ensure the chosen deployment aligns with your operational goals and constraints․

Installation Process for C-Cure 9000

The C-Cure 9000 installation process involves preparing systems, installing server and client applications, licensing the server, and configuring settings․ Follow the wizard for a setup․

4․1 Pre-Installation Checklist

Before installing C-Cure 9000, ensure your system meets all hardware and software requirements․ Backup existing data, disable antivirus temporarily, and verify network settings․ Check firewall configurations to allow necessary ports․ Ensure SQL Server is installed and configured․ Review the installation guide thoroughly to understand the process and requirements for a smooth setup․

4․2 Installing Server and Client Applications

Installing the C-Cure 9000 server and client applications involves using the Unified Installer․ Run the installer on the server machine, select the server application, and follow on-screen instructions․ Install the client application on each workstation, ensuring network connectivity․ After installation, configure settings as needed, restart services if required, and verify success by checking service status or launching the client interface accordingly․

4․3 Licensing the Server

Licensing the C-Cure 9000 server ensures proper functionality․ Obtain the license file from Software House and activate it during or after installation․ Follow the activation wizard, enter the license key, and restart services․ Verify the license status in the system console to ensure all features are enabled and operational․ Proper licensing is critical for system performance and access to advanced security features․

Configuring C-Cure 9000

Configuration involves setting up network parameters, SSL encryption, and system settings․ Follow the guide to ensure secure and optimal system performance․

5․1 Network Configuration

Network configuration is crucial for ensuring proper communication between C-Cure 9000 components․ Enable Internet Information Services (IIS) and install the web-based client․ Configure SSL for secure data transmission and set up AES 256-bit encryption for TCP/IP connections․ Ensure all servers and clients are connected over a reliable network infrastructure․ Proper network setup guarantees optimal system performance and scalability․

For distributed environments, use pre-installed software and follow the startup wizard for streamlined configuration․ Ensure compatibility with existing infrastructure for seamless integration․

5․2 SSL Configuration

SSL configuration ensures secure communication within the C-Cure 9000 system․ Install SSL certificates to encrypt data transmission between servers and clients․ Enable AES 256-bit encryption for enhanced security․ Configure trust stores and keystores to establish secure connections․ Follow best practices for certificate management and renewal․ Proper SSL setup is critical for protecting sensitive data and maintaining system integrity․

Refer to the CCURE 9000 Installation Guide for detailed certificate installation steps․

User Management in C-Cure 9000

User management in C-Cure 9000 involves creating roles, assigning permissions, and controlling access levels to ensure system security and functionality․

6․1 Creating and Managing User Roles

Creating and managing user roles in C-Cure 9000 involves defining access levels and permissions to ensure secure system operation․ Administrators can assign roles based on organizational needs, ensuring users only access necessary features․ Regular audits and updates to roles are recommended to maintain security and compliance․ This process is critical for optimizing system performance and user experience․

6․2 Assigning Permissions and Access Levels

Assigning permissions and access levels in C-Cure 9000 ensures users only access necessary features based on their roles․ Administrators can customize permissions by role, ensuring alignment with organizational security policies․ Access levels can be granular, from system-wide to specific devices․ Regular reviews of permissions are recommended to maintain compliance and security․ Properly configured permissions enhance system efficiency and user experience while safeguarding sensitive data․

Integration with Other Systems

C-Cure 9000 integrates seamlessly with third-party devices, enhancing functionality and enabling a secure, interconnected environment․ This ensures compatibility and efficiency across diverse security and IT infrastructures․

7․1 Integrating with Third-Party Devices

C-Cure 9000 supports integration with third-party systems, such as SALTO offline locks and SAFR facial recognition, enhancing security capabilities․ These integrations enable seamless communication and centralized control, ensuring compatibility with diverse hardware and software solutions․ The system’s open architecture allows for easy setup and configuration, providing a unified security management platform․ This flexibility ensures enhanced functionality and streamlined operations across integrated devices․

7․2 Ensuring Compatibility with Existing Infrastructure

Compatibility with existing infrastructure is crucial for seamless integration of C-Cure 9000․ The system supports various platforms, including Windows and Linux, and integrates with TCP/IP networks using AES 256-bit encryption․ Ensuring hardware and software alignment with system requirements guarantees optimal performance․ Regular updates and patches maintain compatibility, while detailed guides provide step-by-step instructions for integrating with current security systems and devices, ensuring a harmonious and secure environment․

Troubleshooting Common Issues

Troubleshooting common issues during C-Cure 9000 installation or operation involves checking logs, verifying network connectivity, and ensuring all components are properly configured․ Specific steps include analyzing error messages, validating SSL settings, and reviewing system requirements to resolve installation or runtime errors effectively․

8․1 Identifying and Resolving Installation Errors

Identifying installation errors in C-Cure 9000 involves reviewing logs for specific error messages and verifying system requirements․ Common issues include missing prerequisites, incorrect network settings, or incompatible software․ To resolve these, ensure all hardware and software meet specified requirements, check network connectivity, and reinstall the application if necessary․ Consulting the installation guide or support resources can provide detailed solutions for specific error codes encountered during the process․

8․2 Diagnosing Network Connectivity Problems

Diagnosing network issues in C-Cure 9000 involves checking firewall settings, verifying IP configurations, and ensuring proper port openings․ Test network connectivity using ping commands or telnet to confirm communication between server and clients․ Additionally, inspect network hardware, such as switches and cables, and validate DNS settings․ Utilize network monitoring tools to identify bottlenecks or dropped packets, ensuring reliable data transmission across the system․

Best Practices for Maintenance and Updates

Regularly update software and patches to ensure system stability and security․ Perform routine backups and system checks to maintain optimal performance and prevent data loss․

9․1 Regular System Updates and Patches

Regular system updates and patches are crucial for maintaining the security and functionality of C-Cure 9000․ Ensure all components are updated to the latest version to protect against vulnerabilities and enhance performance․ Schedule updates during low-traffic periods to minimize disruption; Always backup data before applying patches to prevent potential data loss․

9․2 Backup and Recovery Procedures

Implementing robust backup and recovery procedures ensures data integrity and system resilience․ Regularly schedule full database backups and store them securely offsite․ Use built-in tools to automate backups and verify their integrity․ In case of failure, follow the recovery process outlined in the C-Cure 9000 documentation to restore systems quickly, minimizing downtime and ensuring continuous security operations․

Completing the C-Cure 9000 installation ensures a robust security system․ This guide has provided detailed steps for a successful setup․ Regular updates and maintenance will optimize performance and security․

10․1 Summary of Key Installation Steps

The C-Cure 9000 installation involves preparing your system, installing server and client applications, and configuring network settings․ Enable Internet Information Services (IIS) and install the web-based client․ Configure SSL for secure communication and license the server․ Follow the guide for troubleshooting and ensure regular updates for optimal performance․ Proper planning and adherence to the steps ensure a smooth deployment․

10․2 Future Considerations for System Optimization

Planning for future scalability and adopting advanced security protocols like AI-driven threat detection will enhance the system’s longevity․ Regular performance assessments and staying updated with industry standards ensure optimal functionality․ Exploring integrations with emerging technologies, such as IoT devices, and providing ongoing user training are crucial for sustained efficiency and security․

Continue Reading

how to go to confession catholic pdf

How to Go to Confession: A Catholic Guide

Confession is a sacrament of healing and forgiveness. Prepare by praying, examining your conscience, and being sorry for sins. Enter the confessional, greet the priest, confess sins clearly, and receive penance. Perform the penance and reflect on God’s mercy afterward.

The Sacrament of Confession, also known as Reconciliation, is a sacred ritual in the Catholic Church where believers encounter God’s mercy and forgiveness. Instituted by Jesus Christ, it offers a profound way to heal relationships damaged by sin and restore spiritual harmony. Through this sacrament, Catholics acknowledge their shortcomings, express genuine sorrow, and receive absolution, enabling them to grow closer to God and the community. Confession involves three essential elements: contrition (sorrow for sins), confession (verbal acknowledgment of sins to a priest), and penance (acts of atonement to repair harm caused by sin). By participating in this sacrament, the faithful experience liberation from guilt, renewal of grace, and a deeper commitment to living a virtuous life. It is a powerful reminder of God’s boundless love and his desire to forgive and heal his people.

Step 1: Preparing for Confession

Preparing for Confession is a vital step to ensure a meaningful and fruitful experience. Begin by praying for the grace to examine your conscience honestly and thoroughly. Reflect on your life since your last Confession, identifying moments where you may have sinned against God, others, or yourself. Use an Examination of Conscience guide or list to help recall specific sins, especially focusing on mortal sins. It is important to be sincere and thorough in this reflection, as it fosters genuine contrition. Additionally, pray to the Holy Spirit for guidance and clarity, asking for the courage to confront your weaknesses. If needed, write down your sins to ensure clarity during Confession. Remember, preparation is an act of humility and love for God, demonstrating your willingness to grow in holiness and repentance. A well-prepared heart opens the way to receiving God’s mercy and forgiveness in the sacrament.

Step 2: Examining Your Conscience

Examining your conscience is a crucial step in preparing for Confession. It involves reflecting on your actions, thoughts, and omissions since your last Confession to identify sins. Begin by asking the Holy Spirit for light and guidance to see your faults honestly. Use an Examination of Conscience guide, which often includes questions based on the Ten Commandments, prayer life, and relationships with others. Reflect on specific areas such as honoring God, respecting others, and upholding moral values. Be honest with yourself, distinguishing between mortal and venial sins, as mortal sins require special attention. Consider how your actions may have hurt others or displeased God. If needed, write down your sins to ensure clarity during Confession. This step requires humility and courage, as it helps you acknowledge your weaknesses and express genuine contrition. A thorough examination of conscience ensures that your Confession is meaningful and leads to true spiritual growth and reconciliation with God.

Step 3: Expressing Contrition

Expressing contrition is a heartfelt step in the Sacrament of Confession. It involves being truly sorry for your sins, not just out of fear of punishment, but because you have offended God and desire to amend your life. Contrition is an essential part of seeking forgiveness, as it demonstrates your willingness to turn away from sin and return to God’s grace. This sorrow can be expressed through prayer, such as the Act of Contrition, which acknowledges your faults and expresses a firm resolve to avoid sin in the future. It is important to cultivate genuine remorse, understanding that your sins have caused harm to your relationship with God and others. The priest may offer guidance or words of encouragement to deepen your contrition. Remember, true contrition opens your heart to receive God’s mercy and forgiveness, making the Sacrament of Confession a powerful experience of healing and renewal.

Step 4: Entering the Confessional

Entering the confessional is a sacred moment that requires respect and preparation. Begin by making the Sign of the Cross, saying, “In the name of the Father, and of the Son, and of the Holy Spirit.” Greet the priest by saying, “Bless me, Father, for I have sinned. It has been [state the time] since my last confession.” Be honest and concise when stating this. If you are nervous or unsure, inform the priest, and he will guide you through the process. You may choose to confess anonymously behind a screen or face-to-face, depending on your comfort and the confessional’s setup. Once inside, kneel or sit as directed. The priest may offer a brief Scripture reading or a blessing to begin. This step is about humility and openness, setting the stage for a sincere confession. Remember, the confessional is a place of mercy and healing, where you encounter Christ through the priest. Approach it with reverence and trust in God’s forgiveness.

Step 5: Confessing Your Sins

Confessing your sins is the heart of the sacrament. Be honest and clear in stating your sins, avoiding unnecessary details. Start with the most serious offenses, such as mortal sins, and include their approximate number if applicable. Use an Examination of Conscience or a list to ensure accuracy. Speak calmly and confidently, trusting in God’s mercy. If unsure about a sin’s gravity, ask the priest for guidance. Remember, confession is not a time for excuses but for acknowledging your faults humbly. After confessing, listen as the priest may offer advice or reflections to help you grow spiritually. This step is a liberation from sin, allowing you to receive healing and grace. Be precise and avoid generalizations, ensuring all mortal sins are confessed; The priest acts as Christ’s instrument, offering forgiveness and peace. Your sincerity and openness are key to a fruitful confession.

Step 6: Receiving Penance

After confessing your sins, the priest will assign a penance, which may include prayers, good works, or reflections. This penance is intended to help you grow in holiness and make amends for your sins. Listen carefully to the priest’s instructions and accept the penance humbly. If the penance seems unclear or difficult, you may politely ask for clarification or a different penance. Penance is not a punishment but a means of healing and spiritual growth. Once the penance is assigned, the priest will typically offer words of encouragement or advice. You are then free to ask for intercessory prayers or express any concerns. Finally, the priest will pray the Prayer of Absolution, forgiving your sins in the name of the Father, Son, and Holy Spirit. This moment is a profound encounter with God’s mercy and grace. After receiving absolution, thank the priest and leave the confessional, ready to carry out your penance and live a more virtuous life.

Step 7: Performing the Penance

After receiving penance from the priest, it is essential to fulfill it promptly and sincerely. Penance is a spiritual exercise designed to help you grow in holiness and make amends for your sins. It may include prayers, acts of charity, or reflections. Approach your penance with gratitude, recognizing it as an opportunity to deepen your relationship with God. If the penance involves prayer, recite it thoughtfully and with devotion. For acts of service, perform them with kindness and generosity. Reflect on how your actions can bring you closer to God and others. If you find the penance difficult or unclear, seek guidance from the priest or a spiritual advisor. Completing your penance is a vital part of the sacrament, as it demonstrates your commitment to conversion and spiritual growth. By fulfilling your penance, you not only honor God’s mercy but also strengthen your resolve to live a virtuous life. Remember, penance is a gift to help you grow in faith and holiness.

Step 8: After Confession

After confession, take time to reflect on the mercy and forgiveness you have received. Express gratitude to God for the sacrament and the grace to amend your life. This moment is an opportunity for spiritual renewal and growth. Many Catholics find it helpful to say a prayer of thanksgiving, such as the Hail Mary or a simple expression of praise. Reflect on the penance assigned and how it can deepen your spiritual life. Consider journaling about your experience to track your progress in living a virtuous life. Additionally, resolve to avoid the occasions of sin and to grow in holiness. After confession, it is also customary to recite prayers for the priest and for those who supported you on your spiritual journey. Finally, embrace the peace and reconciliation you have received, knowing that God’s mercy is boundless and transformative. This step is a beautiful conclusion to the sacrament, inviting you to live with renewed faith and love for God.

Prayers Before and After Confession

Prayer is an essential part of preparing for and concluding the sacrament of confession. Before confession, it is customary to pray for the Holy Spirit’s guidance, asking for clarity and courage to acknowledge your sins honestly. Many Catholics recite the Prayer to the Holy Spirit, seeking enlightenment and strength. Additionally, praying the Psalm of Repentance (Psalm 51) can foster a contrite heart. Some also invoke the intercession of the Blessed Virgin Mary or their patron saints for assistance.

After confession, express gratitude through prayer. A common practice is to recite the Hail Mary or the Our Father to thank God for His mercy. Some Catholics also pray the Prayer of Thanksgiving, acknowledging the grace received and expressing a commitment to amendment. These prayers deepen the spiritual experience and help integrate the forgiveness and reconciliation received in the sacrament into daily life. Praying after confession strengthens faith and fosters a renewed relationship with God.

Common Mistakes to Avoid

When going to confession, there are several common mistakes that Catholics should avoid to ensure a fruitful and meaningful experience. One of the most frequent errors is failing to prepare properly. This includes not taking the time to examine one’s conscience or not being honest about the gravity and number of serious sins. Another mistake is being vague or withholding sins out of embarrassment or fear of judgment. It is important to remember that the priest is there to offer God’s mercy and forgiveness, not to condemn.

Some individuals also neglect to express genuine contrition or fail to resolve to amend their lives. Confession is not just about listing sins but also about showing sorrow and a commitment to change. Additionally, rushing through the confession or failing to listen to the priest’s advice can hinder the spiritual benefits of the sacrament. Finally, neglecting to perform the assigned penance or not reflecting on the experience afterward can diminish the graces received. Avoiding these mistakes helps ensure a more sincere and transformative confession.

Benefits of Regular Confession

Regular confession offers numerous spiritual benefits, fostering a deeper relationship with God and personal growth. It provides an opportunity to receive forgiveness for sins, healing for the soul, and grace to overcome weaknesses. Through confession, Catholics experience reconciliation with God and the Church, restoring their spiritual communion. Regular practice also increases self-awareness, helping individuals recognize sinful patterns and grow in virtue. Additionally, it strengthens the conscience, enabling better moral decisions and a greater sense of accountability.

The sacrament also brings peace of mind and freedom from the burden of guilt. By receiving penance, the faithful are able to make amends for their sins and grow in holiness. Regular confession fosters humility, gratitude, and a deeper appreciation for God’s mercy. It also prepares one for the sacraments, especially the Eucharist, and strengthens the resolve to live a life aligned with Christ’s teachings. Ultimately, frequent confession is a powerful means of spiritual renewal and a key component of a vibrant Catholic faith life.

Continue Reading

kenwood dpx505bt manual

Welcome to the Kenwood DPX505BT manual! This guide provides comprehensive instructions for installing‚ operating‚ and troubleshooting your car stereo. It covers features like Amazon Alexa integration‚ Bluetooth connectivity‚ and CD/USB playback‚ ensuring optimal use of your device.

1.1 Overview of the Kenwood DPX505BT Car Stereo

The Kenwood DPX505BT is a dual DIN car stereo designed for seamless entertainment and connectivity. It features Amazon Alexa voice control‚ Bluetooth for hands-free calls and audio streaming‚ and compatibility with CDs‚ USB devices‚ and AUX inputs. The intuitive interface includes large buttons and a clear display‚ making it easy to navigate. This versatile system combines modern technology with user-friendly design‚ offering enhanced audio quality and convenience for drivers.

1.2 Importance of Reading the Manual

Reading the Kenwood DPX505BT manual is crucial for optimal performance and safety. It provides step-by-step installation guidance‚ explains advanced features‚ and offers troubleshooting tips. Understanding the manual ensures proper setup‚ prevents potential damage‚ and helps you maximize the stereo’s capabilities. Familiarizing yourself with safety precautions and operation guidelines is essential for a safe and enjoyable driving experience. Keep the manual handy for future reference and updates.

Key Features of the Kenwood DPX505BT

Reading the Kenwood DPX505BT manual ensures safe and proper installation‚ optimal feature utilization‚ and troubleshooting. It provides essential guidelines for setup‚ operation‚ and maintenance‚ helping you avoid potential issues and maximize performance. The manual is a vital resource for understanding advanced features like Amazon Alexa and Bluetooth connectivity‚ ensuring a seamless and enjoyable user experience. Keep it handy for quick reference and updates.

2.1 Amazon Alexa Voice Control Integration

The Kenwood DPX505BT features seamless Amazon Alexa voice control integration‚ enabling hands-free commands for music‚ navigation‚ and calls. This innovative feature enhances convenience and safety while driving‚ allowing users to access Alexa skills without distraction. The manual provides detailed steps to set up Alexa‚ ensuring a smooth and intuitive experience. With voice commands‚ you can control your stereo‚ manage smart home devices‚ and enjoy endless entertainment options on the go.

2.2 Bluetooth Connectivity and Hands-Free Calling

The Kenwood DPX505BT offers robust Bluetooth connectivity‚ supporting wireless audio streaming and hands-free calls. Pair your smartphone effortlessly for seamless music playback and crystal-clear voice calls. The built-in microphone ensures high-quality sound during conversations‚ minimizing background noise. This feature enhances driving safety by keeping your eyes on the road and hands on the wheel while staying connected. The manual guides you through pairing and managing Bluetooth devices for a trouble-free experience.

2.3 CD and USB Playback Compatibility

The Kenwood DPX505BT supports CD playback‚ including CD-R and CD-RW formats‚ ensuring compatibility with your music library. Additionally‚ the USB port allows for convenient playback of audio files from USB drives‚ offering versatile entertainment options. This feature enables you to enjoy high-quality music from various sources‚ enhancing your in-car audio experience with flexibility and ease of use.

Installation and Setup Guide

This section provides a detailed guide for installing and setting up your Kenwood DPX505BT. Follow the step-by-step instructions to ensure proper installation and initial configuration.

3.1 Pre-Installation Safety Precautions

Before installing your Kenwood DPX505BT‚ ensure your vehicle is parked safely and the ignition is turned off. Disconnect the battery to prevent electrical hazards. Refer to the manual for specific instructions tailored to your vehicle’s make and model. Avoid installing the stereo in locations that obstruct the driver’s view or interfere with airbag deployment. Always follow the manufacturer’s guidelines to ensure a safe and proper installation. This will help prevent accidents and ensure optimal performance.

3.2 Step-by-Step Installation Instructions

Begin by disconnecting the vehicle’s battery to ensure safety. Carefully remove the old stereo and wiring harness. Mount the Kenwood DPX505BT in the dash‚ securing it with the provided brackets. Connect the wiring harness to the stereo‚ matching colors for accuracy. Reconnect the battery and test all functions‚ including Bluetooth‚ USB‚ and audio playback. Refer to the manual for specific wiring diagrams and mounting instructions tailored to your vehicle.

Operating the Kenwood DPX505BT

Learn to operate your Kenwood DPX505BT with ease. Familiarize yourself with the controls‚ adjust settings‚ and enjoy seamless playback of music and hands-free calls.

4.1 Navigating the Front Panel Controls

The Kenwood DPX505BT’s front panel offers intuitive controls. Use the volume knob for easy adjustments‚ while the buttons provide quick access to functions like source selection‚ track navigation‚ and phone operations. The display screen shows essential information‚ ensuring a user-friendly experience. Familiarize yourself with each control to optimize your driving and listening experience seamlessly.

4.2 Using the Kenwood Remote App

Enhance your experience with the Kenwood Remote App‚ compatible with iOS and Android. This app allows wireless control of your DPX505BT‚ enabling easy access to functions like music playback‚ volume adjustment‚ and source selection. Download the app to streamline your interactions and enjoy a seamless connection between your smartphone and car stereo for a more convenient driving experience.

Connectivity Options

Explore versatile connectivity options with the Kenwood DPX505BT‚ including Bluetooth‚ USB‚ and AUX inputs‚ ensuring seamless integration with your devices for high-quality audio entertainment on the go.

5.1 Pairing Your Smartphone via Bluetooth

Pairing your smartphone with the Kenwood DPX505BT via Bluetooth is straightforward. Enable Bluetooth on your device‚ search for available devices‚ and select the stereo’s name. If prompted‚ enter the PIN code provided in the manual. Once connected‚ you can enjoy hands-free calls and wireless audio streaming. Ensure your phone is compatible and within range for a stable connection. This feature enhances your driving experience with convenient‚ distraction-free control.

5.2 Connecting USB Devices and AUX Inputs

Connect your USB devices or AUX inputs to the Kenwood DPX505BT for seamless audio playback. Insert your USB drive into the designated port or use the AUX cable to link external devices. The stereo will automatically detect the connection and begin playback. Ensure your USB device is formatted correctly and contains compatible audio files for optimal performance. This feature allows you to enjoy your favorite music from various sources with high-quality sound.

Advanced Features and Customization

Explore advanced features like Amazon Alexa voice control and customizable sound settings. Adjust EQ presets‚ set up voice commands‚ and personalize your listening experience for optimal enjoyment.

6.1 Setting Up Amazon Alexa for Voice Commands

To enable Amazon Alexa on your Kenwood DPX505BT‚ download and install the Kenwood Remote App. Link your Amazon account through the app‚ then pair your stereo. Once connected‚ use voice commands to play music‚ set reminders‚ or access information. Ensure your smartphone is Bluetooth paired and the stereo is in Alexa mode for seamless voice control functionality.

6.2 Customizing Sound Settings and EQ Presets

Customize your audio experience with the Kenwood DPX505BT by adjusting sound settings and EQ presets. Use the 13-band equalizer to fine-tune frequencies for optimal sound quality. Select from preset modes like Rock‚ Jazz‚ or User settings to match your music preferences. Adjust bass‚ treble‚ and balance to enhance your listening experience. Save your settings for easy access‚ ensuring your car stereo delivers the perfect sound every time you drive.

Safety Precautions and Warnings

Ensure safe operation by avoiding distractions while driving. Keep the manual in an accessible place for future reference. Always prioritize road safety.

7.1 General Safety Guidelines for Operation

Always operate the Kenwood DPX505BT safely. Avoid distractions while driving‚ and use features like voice control or the remote app to minimize interaction. Ensure proper installation to prevent electrical issues. Keep the manual handy for quick reference. Never attempt repairs yourself. Follow all traffic laws and maintain focus on the road to ensure a safe driving experience.

7.2 Avoiding Distractions While Driving

To ensure safe driving‚ minimize distractions while using the Kenwood DPX505BT. Set up voice commands or use the remote app to control functions without touching the stereo. Mount the unit in a visible yet accessible location to avoid obstructing your view. Adjust settings before driving and use Bluetooth for hands-free calls and music playback. Never manually browse menus or adjust settings while operating the vehicle.

Troubleshooting Common Issues

This section helps resolve common issues with your Kenwood DPX505BT. Check connections‚ restart the unit‚ and refer to the manual for detailed troubleshooting solutions.

8.1 Resolving Bluetooth Connection Problems

If experiencing Bluetooth issues‚ restart your Kenwood DPX505BT and smartphone. Ensure both devices are in pairing mode and within range. Clear old pairings and update firmware. Refer to the manual for detailed steps to restore connectivity and enjoy uninterrupted wireless audio streaming and hands-free calls.

8.2 Diagnosing USB and AUX Input Issues

For USB issues‚ ensure your device is properly connected and formatted. Try using a different USB port or cable. If the AUX input isn’t working‚ check the cable connections and volume settings. Restart the stereo and test with another AUX device. Consult the manual for specific troubleshooting steps to resolve input-related problems effectively.

The Kenwood DPX505BT manual provides essential guidance for maximizing your car stereo’s potential. With detailed instructions and troubleshooting tips‚ it ensures a seamless and enjoyable audio experience for all users.

9.1 Maximizing the Potential of Your Kenwood DPX505BT

To fully utilize your Kenwood DPX505BT‚ explore its advanced features like Amazon Alexa for voice commands‚ Bluetooth for seamless connectivity‚ and customizable sound settings. Regularly update firmware and refer to the manual for troubleshooting tips. Experiment with EQ presets to enhance audio quality. Pair your smartphone for hands-free calls and access streaming services. By mastering these features‚ you can enjoy a premium in-car entertainment experience tailored to your preferences.

Downloading the Kenwood DPX505BT Manual

The Kenwood DPX505BT manual is available for download from the official Kenwood website or trusted sources like manual.jvckenwood.com. Ensure compatibility with your browser for smooth access and download the PDF version for future reference.

10;1 Official Sources for the PDF Manual

The Kenwood DPX505BT manual is available for download from Kenwood’s official website and trusted sources like manual.jvckenwood;com. Visit these platforms to access the PDF version directly. Ensure you download from authorized sites to avoid unauthorized or outdated versions. The manual is provided in multiple languages‚ including English‚ Spanish‚ and French‚ catering to a global audience.

Continue Reading