jimmy dean griddle cake instructions

Jimmy Dean Griddle Cakes are a delicious breakfast option‚ offering a perfect blend of savory sausage‚ fluffy eggs‚ and sweet maple syrup in a convenient format. With easy cooking methods like air fryer preparation‚ they provide a quick and tasty morning meal that satisfies cravings and energizes your day. Perfect for busy mornings‚ these griddle cakes combine classic breakfast flavors in a modern‚ easy-to-make package.

Overview of Jimmy Dean Griddle Cakes

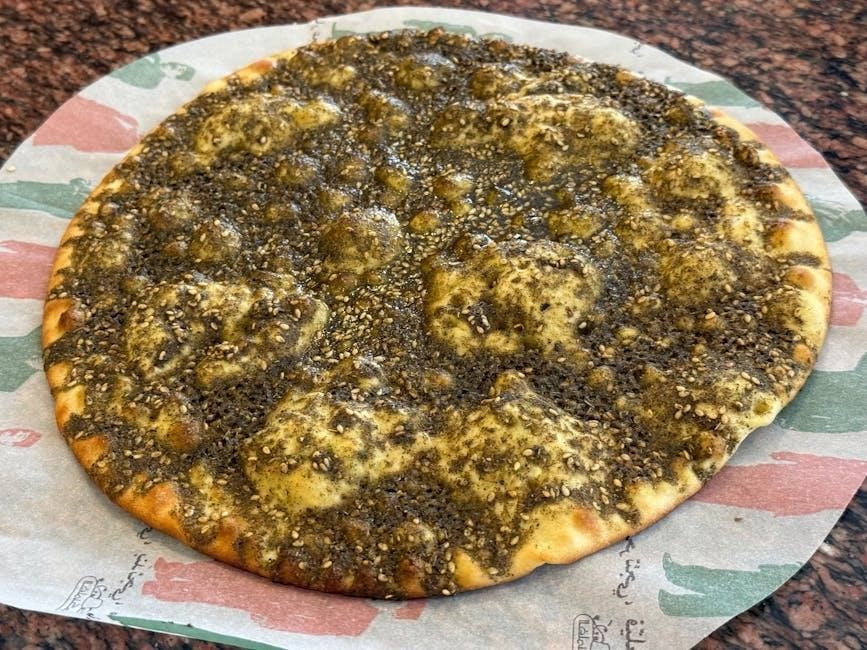
Jimmy Dean Griddle Cakes are a beloved breakfast option‚ combining savory sausage‚ scrambled eggs‚ and melted cheese sandwiched between two maple syrup-infused pancakes. Perfect for quick and delicious meals‚ these griddle cakes offer a convenient solution for busy mornings. They can be cooked on a griddle‚ skillet‚ or even in an air fryer‚ ensuring a crispy exterior and a fluffy interior. The ideal cooking temperature is 375°F‚ and they thaw quickly for easy preparation. With fresh ingredients and proper handling‚ Jimmy Dean Griddle Cakes provide a flavorful and satisfying start to the day. They’re also versatile‚ allowing for customization with toppings or alternative cooking methods to suit any preference.

Importance of Proper Preparation

Proper preparation is crucial for achieving the perfect Jimmy Dean Griddle Cakes. Ensuring the griddle or skillet is preheated to the ideal temperature‚ typically 375°F‚ guarantees even cooking and a golden-brown finish. Using fresh ingredients enhances the flavor and texture‚ while correct thawing and handling prevent sogginess. Following the recommended cooking time and method prevents overcooking‚ maintaining the cakes’ fluffiness. Proper preparation also ensures food safety‚ as undercooked or improperly thawed products can pose health risks. By adhering to these steps‚ you achieve a delicious‚ safe‚ and satisfying breakfast experience. Proper preparation is key to maximizing the taste and quality of Jimmy Dean Griddle Cakes.

Ingredients and Supplies Needed

The essential ingredients include fresh flour‚ sugar‚ baking powder‚ salt‚ milk‚ egg‚ and oil. Recommended supplies are a mixing bowl‚ whisk‚ measuring cups‚ and a preheated griddle or skillet.

  • Fresh ingredients ensure optimal flavor.
  • Proper tools and equipment are vital for preparation.

Essential Ingredients for Jimmy Dean Griddle Cakes

To make Jimmy Dean Griddle Cakes‚ you’ll need a few simple ingredients. Start with 1 cup of flour‚ 1/4 cup of sugar‚ and 2 teaspoons of baking powder. Add 1/2 teaspoon of salt for flavor. Wet ingredients include 1 cup of milk and 1 egg‚ mixed well for a smooth batter. Finally‚ incorporate 2 tablespoons of oil to ensure the cakes cook evenly and lightly. These ingredients combine to create a fluffy‚ sweet‚ and savory base for your griddle cakes. Using fresh ingredients ensures the best flavor and texture. Proper measurement of each component is key to achieving the perfect consistency in your batter.

  • 1 cup of flour
  • 1/4 cup of sugar
  • 2 teaspoons of baking powder
  • 1/2 teaspoon of salt
  • 1 cup of milk
  • 1 egg
  • 2 tablespoons of oil

Freshness of ingredients is crucial for optimal taste and texture.

Recommended Cooking Equipment

To achieve the best results when cooking Jimmy Dean Griddle Cakes‚ having the right equipment is essential. A griddle or skillet is ideal for even cooking and a golden-brown finish. Preheat it to 375°F for optimal results. If you prefer a quicker method‚ an air fryer is a great alternative‚ offering a crispy texture with minimal effort. Ensure your griddle or skillet is properly heated before adding batter to prevent sticking. Using a non-stick surface or lightly greasing the pan with oil or butter enhances the cooking experience. Proper equipment ensures your griddle cakes are cooked evenly and taste delicious every time. Investing in quality tools will make the process smoother and more enjoyable.

Preparation Instructions

Start by whisking together dry ingredients like flour‚ sugar‚ baking powder‚ and salt. Gradually mix in milk‚ egg‚ and oil until smooth. Heat a griddle to 375°F for optimal cooking. Pour batter evenly and cook until golden brown‚ flipping halfway. This ensures a fluffy interior and crispy exterior. Proper preparation guarantees delicious results every time.

Step-by-Step Mixing Guide

To prepare the batter‚ start by whisking together 1 cup of flour‚ 1/4 cup of sugar‚ 2 teaspoons of baking powder‚ and 1/2 teaspoon of salt in a large bowl. In a separate bowl‚ combine 1 cup of milk‚ 1 egg‚ and 2 tablespoons of oil. Gradually pour the wet ingredients into the dry mixture‚ stirring until just combined. Avoid overmixing to ensure tender griddle cakes. If using Jimmy Dean sausage or additional toppings‚ gently fold them into the batter at this stage. Let the mixture rest for 5 minutes to allow the baking powder to activate. Your batter is now ready for cooking‚ ensuring a light and fluffy texture.

Heating the Griddle to the Right Temperature

Preheat your griddle to 375°F for optimal cooking results. Allow the griddle to heat for about 10 minutes to ensure even warmth. Lightly grease the surface with oil or cooking spray to prevent sticking. To test readiness‚ flick a few drops of water onto the griddle; if they sizzle and evaporate quickly‚ it’s ready. Adjust the heat as needed to maintain a consistent temperature‚ ensuring your Jimmy Dean Griddle Cakes cook evenly and develop a golden-brown crust. Proper preheating is crucial for achieving the perfect texture and flavor in your griddle cakes.

Cooking the Griddle Cakes

Cook Jimmy Dean Griddle Cakes on a preheated griddle or pan at 375°F. Cook for 4-5 minutes per side until golden brown and cooked through. Serve hot.

Cooking on a Pan or Skillet

For cooking Jimmy Dean Griddle Cakes in a pan or skillet‚ preheat the pan over medium heat and lightly spray with non-stick cooking spray. Once heated‚ pour the batter in desired portions. Cook until bubbles appear on the surface and edges look dry‚ about 2-3 minutes. Flip and cook the other side until golden brown‚ another 1-2 minutes. Ensure the internal temperature reaches 165°F for safety. Adjust heat as needed to prevent burning. Serve hot with your favorite toppings or syrup for a delicious breakfast treat. This method ensures a crispy exterior and fluffy interior‚ perfect for a quick and tasty meal.

Cooking on a Griddle

Cooking Jimmy Dean Griddle Cakes on a griddle ensures an even‚ golden-brown finish. Preheat the griddle to 375°F and lightly grease it with non-stick cooking spray or oil. Pour the batter in circular motions to form round cakes. Cook for 2-3 minutes until bubbles form on the surface and edges dry. Flip carefully and cook another 1-2 minutes until golden brown. Avoid overcrowding the griddle to ensure even cooking. Use a thermometer to maintain the ideal temperature‚ preventing burning. Flip only once to preserve the cake’s structure. Serve immediately for a crispy exterior and fluffy interior. This method delivers a classic griddle cake experience‚ perfect for breakfast or brunch.

Tips and Tricks for Perfect Griddle Cakes

Ensure the griddle is preheated to 375°F for even cooking. Use fresh ingredients for optimal flavor and texture. Adjust batter consistency for the perfect pour and golden finish.

Ensuring Even Cooking

To achieve even cooking‚ preheat your griddle to 375°F and lightly grease it with oil or cooking spray. Pour batter in a steady‚ circular motion to ensure uniform thickness. Avoid overcrowding the griddle; cook in batches if necessary. Use a spatula to gently lift and peek at the bottom for golden brown color before flipping. Maintain medium heat to prevent burning and promote consistent cooking. This method ensures each griddle cake cooks evenly‚ resulting in a fluffy interior and a perfectly toasted exterior every time. Proper temperature control and careful pouring are key to a delicious outcome.

Achieving the Ideal Golden Brown Color

Achieving the perfect golden brown color for Jimmy Dean Griddle Cakes requires attention to heat control and cooking technique. Preheat your griddle to 375°F and lightly grease it with oil or cooking spray to prevent sticking. Pour the batter evenly and avoid overcrowding the griddle. Cook for 2-3 minutes until bubbles form on the surface‚ then flip gently. Cook for another 1-2 minutes until the other side is golden brown. Adjust heat if browning too quickly to ensure even cooking. Avoid pressing down on the cakes with your spatula‚ as this can flatten them and disrupt the color; Proper browning enhances both texture and flavor‚ making your griddle cakes a delicious breakfast treat.

Variations and Add-Ons

Customize Jimmy Dean Griddle Cakes with fresh fruits‚ syrups‚ or whipped cream. Add chocolate chips or nuts for extra flavor. Experiment with savory toppings like cheese or bacon bits for a unique twist.

Customizing with Toppings

Jimmy Dean Griddle Cakes can be personalized with a variety of toppings to enhance their flavor. Fresh fruits like strawberries or blueberries add natural sweetness‚ while syrups such as maple or honey provide a rich‚ velvety texture. For a decadent treat‚ drizzle with chocolate sauce or sprinkle with powdered sugar. Nuts like almonds or walnuts offer a satisfying crunch‚ and a dollop of whipped cream adds a creamy finish. Savory options include shredded cheese‚ crispy bacon bits‚ or a fried egg‚ creating a delightful balance of flavors. Experiment with different combinations to find your perfect griddle cake creation and enjoy a truly personalized breakfast experience.

Alternative Cooking Methods

Beyond traditional griddle cooking‚ Jimmy Dean Griddle Cakes can be prepared using alternative methods for convenience. The air fryer is a popular choice‚ offering a quick and easy way to achieve crispy exteriors and fluffy interiors. Simply preheat the air fryer to 375°F‚ place the griddle cakes inside‚ and cook for 4-5 minutes on each side until golden brown. Another option is the toaster oven‚ which provides even heating and a crispy texture. Place the cakes on a baking sheet lined with parchment paper and bake at 375°F for 8-10 minutes‚ flipping halfway. These methods allow you to enjoy your griddle cakes with minimal effort‚ perfect for busy mornings or experimentation with new textures and flavors.

Safety and Storage

Always handle Jimmy Dean Griddle Cakes safely. Store them in airtight containers or freezer bags to maintain freshness. Keep refrigerated at 40°F or below‚ and thaw overnight in the fridge for safe consumption. Ensure proper food safety practices to prevent contamination and foodborne illness.

Safe Handling and Thawing

Safe handling and proper thawing of Jimmy Dean Griddle Cakes are crucial to maintain quality and safety. Always store them in an airtight container or freezer bag at 0°F (-18°C) for up to 3 months. To thaw‚ place the desired number of griddle cakes in the refrigerator overnight. Never thaw at room temperature to prevent bacterial growth. Once thawed‚ use immediately and do not refreeze. Ensure all utensils and surfaces are clean to avoid contamination. Proper storage and handling practices ensure the griddle cakes remain fresh and safe to eat‚ maintaining their delicious flavor and texture for a satisfying breakfast experience.

Proper Storage Techniques

Proper storage is essential to maintain the quality and freshness of Jimmy Dean Griddle Cakes. For uncooked griddle cakes‚ store them in the freezer at 0°F (-18°C) or below. Place them in an airtight container or freezer bag to prevent freezer burn. Cooked griddle cakes can be stored in the refrigerator for up to 3 days in an airtight container. For longer storage‚ freeze cooked cakes at 0°F (-18°C) for up to 2 months. When thawing‚ place them in the refrigerator overnight or thaw at room temperature for a few hours. Always ensure the storage container is sealed tightly to preserve flavor and texture. Proper storage techniques help maintain the delicious taste and freshness of Jimmy Dean Griddle Cakes for a satisfying breakfast anytime.

Continue Reading

pdf arabic grammar

Arabic grammar is the foundation for understanding Arabic language and literature, with roots tracing back to classical Arabic. It remains a vital tool for comprehending Quranic and modern Arabic texts, offering detailed rules for pronunciation, verb conjugation, and sentence structure. Resources like “Key to a New Arabic Grammar” by Haywood and Nahmad provide essential insights, while PDF guides simplify learning for beginners, making Arabic grammar accessible and essential for linguistic mastery.

1.1 Importance of Arabic Grammar

Arabic grammar is fundamental for mastering the Arabic language, serving as the backbone for understanding its structure, syntax, and literary nuances. It is essential for comprehending the Quran, classical texts, and modern Arabic literature. The intricate rules of Arabic grammar, including verb conjugation, plural formation, and sentence composition, ensure clarity and precision in communication. Given its rich linguistic heritage, Arabic grammar is not only a tool for language learning but also a gateway to the cultural and religious traditions of the Arab world. Resources like “A Reference Grammar of Modern Standard Arabic” and “Key to a New Arabic Grammar” emphasize its importance, providing detailed insights for learners. Understanding Arabic grammar is crucial for both academic and practical purposes, enabling effective communication and a deeper appreciation of the language’s elegance and complexity.

1.2 Historical Context of Arabic Grammar

Arabic grammar has a rich historical roots, tracing back to the 6th century with classical Arabic, the language of the Quran. Its development was influenced by the need to preserve the purity and accuracy of Quranic recitation and understanding. Early grammarians like Sibawayh laid the groundwork for Arabic grammar, establishing rules that remain foundational today. Over centuries, Arabic grammar evolved, adapting to the linguistic needs of a vast and diverse Arab world. The grammar of classical Arabic remains largely intact, even as modern standard Arabic emerged for contemporary use. Historical texts, such as “Key to a New Arabic Grammar” by Haywood and Nahmad, highlight the enduring relevance of these rules, ensuring their application in both religious and literary contexts. The study of Arabic grammar is deeply intertwined with the study of Islamic texts and Arab culture, making it a cornerstone of linguistic and cultural preservation.

Structure of Arabic Grammar

Arabic grammar is built on a rich alphabetical system with 28 letters, each representing distinct sounds. The script is cursive and read right-to-left, with pronunciation integral to meaning. The structure emphasizes consonants, vowels, and rhythm.

2.1 Arabic Alphabet and Sounds

The Arabic alphabet consists of 28 letters, each representing distinct consonantal and vocalic sounds. These letters are written in a cursive script, read from right to left, and are fundamental to pronunciation and meaning. Unlike English, Arabic emphasizes consonants as the core of words, with vowels serving as modifiers. The sounds range from guttural stops like غ (ghayn) to trilled ر (rā’). Vowels, though not always written, include َ (fatḥah), ِ (kasrah), and ُ (ḍammah). PDF resources like “A Reference Grammar of Modern Standard Arabic” and “Learn Arabic Grammar The Easy Way” provide detailed charts and exercises to master these sounds. Understanding the alphabet and its sounds is crucial for correct pronunciation and forming words in Arabic. These resources often include audio aids and practice drills, making learning accessible for beginners and advanced learners alike.

2.2 Arabic Script and Pronunciation

The Arabic script is a cursive writing system that flows from right to left, with letters connecting to each other. Its unique design ensures that words are easily recognizable, even in their varied forms. Pronunciation is deeply tied to the script, as each letter carries specific phonetic values. For instance, the letter ه (hā’) is pronounced as a harsh “h” sound, while خ (khā’) represents a guttural “kh” sound. Vowels, though not always written, play a crucial role in pronunciation and meaning. PDF resources, such as “A Reference Grammar of Modern Standard Arabic,” provide detailed pronunciation guides, including audio aids and practice exercises. These tools help learners master the connection between script and sound. Additionally, books like “Essentials of Arabic Grammar for Learning Quranic Language” offer insights into the historical and modern pronunciation rules, making them invaluable for both beginners and advanced learners. Proper pronunciation is essential for accurate communication in Arabic.

Arabic Verbs

Arabic verbs are complex, central to sentence structure, and express actions or states. They have various forms and tenses. PDF guides like “Arabic Verbs and the Essentials of Grammar” offer comprehensive verb indexes and conjugation rules, aiding learners in mastering their use.

3.1 Conjugation of Arabic Verbs

Arabic verb conjugation is a complex yet essential aspect of mastering the language. Verbs are conjugated based on tense, gender, and number, with distinct patterns for past, present, and imperative forms. For example, the verb كَتَبَ (kataba, “he wrote”) changes to تَكْتُبُ (takutubu, “you write”) in the present tense. PDF resources like “Arabic Verbs and the Essentials of Grammar” provide detailed charts and exercises to simplify this process. These guides often include high-frequency verbs and their conjugations, making them invaluable for learners. Additionally, books such as “A Reference Grammar of Modern Standard Arabic” offer comprehensive overviews of verb forms and usage. Understanding verb conjugation is crucial for constructing grammatically correct sentences and communicating effectively in Arabic. With practice and the right resources, learners can master this fundamental aspect of the language.

3.2 Types of Verbs in Arabic

Arabic verbs are categorized into different types based on their form and function. The most common types include past tense verbs, present tense verbs, and imperative verbs. Past tense verbs, such as كَتَبَ (kataba, “he wrote”), indicate completed actions, while present tense verbs like يَكْتُبُ (yaktubu, “he writes”) denote ongoing or repeated actions. Imperative verbs, such as اكْتُبْ (uktub, “write!”), are used for commands. Additionally, Arabic verbs can be classified as regular or irregular, with irregular verbs like هُوَ (huwa, “he”) and أَنَا (ana, “I”) following unique conjugation patterns. Hollow verbs, such as عَلِمَ (alima, “he knew”), and defective verbs, like أَكَلَ (akala, “he ate”), further add complexity. Resources like “Arabic Verbs and the Essentials of Grammar” provide detailed charts and examples to help learners master these types. Understanding these categories is essential for effective communication in Arabic.

Arabic Nouns

Arabic nouns are categorized by gender (masculine or feminine) and number (singular or plural). They also exhibit case endings, with nominative, accusative, and genitive forms. Examples include كِتَابٌ (kitābun, “book”) and كِتَابٍ (kitābin).

4.1 Types of Nouns in Arabic

Arabic nouns, or أسماء (asmāʾ), are categorized into several types based on their meaning and grammatical properties. Proper nouns, or اسم علم (ism ʿalam), denote specific individuals, places, or entities, such as محمد (Muḥammad) or مكة (Makkah). Common nouns, or اسم جنس (ism jins), represent general categories, like كتاب (kitāb, “book”) or بيت (bayt, “house”). Collective nouns, or اسم جماعة (ism jamāʿah), refer to groups, such as رجال (rijāl, “men”) or نضار (nuḍār, “locusts”). Abstract nouns, or اسم مفرد (ism mufrad), represent non-physical concepts, like حب (ḥubb, “love”) or شجاعة (shajāʿah, “courage”). Arabic nouns also exhibit grammatical features such as gender (masculine or feminine) and number (singular, dual, or plural), with specific rules governing their declension and agreement in sentences.

4.2 Plural Formation in Arabic

Arabic plural formation is a complex yet systematic process that varies based on gender, number, and the nature of the noun. Masculine nouns often form their plural by adding و (wāw) or ي (yāʾ) to the singular form, such as كتاب (kitāb, “book”) becoming كتب (kutub, “books”). Feminine nouns typically add ات (āt), as in جبل (jabal, “mountain”) turning into جبال (jibāl, “mountains”). Irregular plurals, known as الجمع القليل (al-jamʿ al-qalīl), follow unique patterns, such as مدينة (madīnah, “city”) becoming مدن (madāʾin, “cities”). Some nouns, like student (طالب, ṭālib), have irregular plurals like طلاب (ṭalabāʾ). Additionally, certain nouns retain the same form in singular and plural, such as يوم (yawm, “day”) and أيام (ayyām, “days”). Understanding these rules is essential for mastering Arabic grammar and sentence structure.

Resources for Learning Arabic Grammar

Premium resources like “Key to a New Arabic Grammar” by Haywood and Nahmad, and “A Reference Grammar of Modern Standard Arabic,” offer comprehensive guides for mastering Arabic grammar rules and structures effectively through detailed explanations and exercises.

5.1 Top PDF Resources for Arabic Grammar

Several high-quality PDF resources are available for learning Arabic grammar, catering to both beginners and advanced learners. “Key to a New Arabic Grammar” by J. A. Haywood and H. M. Nahmad is a widely recommended book, offering detailed explanations of grammar rules and exercises. Another essential resource is “A Reference Grammar of Modern Standard Arabic,” which provides a comprehensive overview of the language’s structure. For those focusing on verbs, “Arabic Verbs and the Essentials of Grammar” includes a verb index with 400 high-frequency verbs, making it invaluable for mastering conjugation. Additionally, “Essentials of Arabic Grammar for Learning Quranic Language” is tailored for students of the Quran, focusing on the grammatical aspects of Quranic Arabic. These PDFs are accessible online and serve as excellent companions for anyone seeking to deepen their understanding of Arabic grammar through structured and authoritative guidance.

5.2 Verb and Grammar Guides

Verb and grammar guides are indispensable tools for mastering Arabic grammar, particularly for understanding verb conjugation and sentence structure. These guides often include detailed verb charts, examples, and exercises to practice conjugation in various tenses. Many resources, such as “Arabic Verbs and the Essentials of Grammar,” provide comprehensive verb indices, listing high-frequency verbs with their conjugations. Some guides also focus on specific aspects of grammar, like plural formation and grammatical states, offering clear explanations and practical examples. Additionally, resources like “A Reference Grammar of Modern Standard Arabic” simplify complex rules, making them accessible to learners. These guides are especially useful for beginners, as they break down grammar into manageable sections, often accompanied by exercises to reinforce learning. They also include helpful sections on dictionary usage and glossaries of grammatical terms, ensuring learners can navigate the language confidently. These resources are essential for anyone aiming to master Arabic grammar effectively.

Continue Reading

emperor grandfather clock manual

The Emperor Grandfather Clock is a timeless piece known for its elegant design and precise engineering. This traditional timepiece combines rich historical charm with modern functionality.

1.1 Historical Background and Popularity

The Emperor Grandfather Clock has a rich history, dating back to its origins as a classic timepiece. Its popularity grew due to its elegant design and precise engineering. Many models were crafted with quality materials and attention to detail, making them sought-after pieces for both functionality and aesthetic appeal. Their timeless charm continues to captivate clock enthusiasts worldwide.

1.2 Key Features and Design Elements

The Emperor Grandfather Clock features a tall, stately cabinet with intricate carvings and a polished finish. Its mechanical movement ensures accurate timekeeping, while the pendulum adds a touch of classic elegance. The clock often includes chime and strike mechanisms for melodious sounds, along with ornate dials and decorative weights that enhance its traditional appeal.

Understanding the Movement of the Emperor Grandfather Clock

The Emperor Grandfather Clock’s movement is its core, controlling timekeeping, striking, and chimes. It relies on weights and a pendulum for power and precision, ensuring smooth operation. Regular maintenance is essential for longevity and accuracy.

2.1 The Role of the Movement in Timekeeping

The movement is the heart of the Emperor Grandfather Clock, responsible for accurate timekeeping. It integrates gears, escapements, and a pendulum to measure time precisely. The weights provide power, while the pendulum regulates the release of energy, ensuring consistent time accuracy. Proper alignment and adjustments are crucial for optimal performance and reliability. Regular maintenance ensures the movement operates smoothly over years.

2.2 Differences Between Cable and Chain-Driven Movements

Cable-driven movements use a crank for winding, offering smoother operation and reduced wear. Chain-driven systems require pulling the chain to raise weights, often simpler but less refined. Both systems power the clock’s timekeeping, strikes, and chimes, with cables providing quieter, more consistent energy transfer compared to chains, which can be noisier but equally reliable if properly maintained. Each system has its unique advantages and requirements for optimal performance.

Setting Up Your Emperor Grandfather Clock

Setting up your Emperor Grandfather Clock involves unboxing, leveling, and assembling components like the pendulum and weights. Ensure stability to prevent tipping and ensure accurate timekeeping from the start.

3.1 Unboxing and Initial Preparation

Begin by carefully cutting the nylon bands around the shipping carton and opening the box from both sides. Remove the box containing the product manual and other accessories. Gently slide the clock out of the carton, ensuring it remains upright and stable. Locate the pendulum, weights, and crank, which are packaged separately to prevent damage during transit. Always handle components with care to avoid scratches or bends.

3.2 Leveling and Positioning the Clock

Place the Emperor Grandfather Clock on a firm, level floor to ensure stability. Move it close to its final location and ensure the base is square. Check the floor for evenness and use the built-in levelers or shims if necessary. Proper alignment is crucial for the clock’s stability and accurate operation. Avoid leaning the clock, as this could cause damage or misalignment.

3.3 Hanging the Pendulum and Weights

Gently attach the pendulum to its guide, ensuring it hangs securely. For weights, hang each from the correct position and raise them using a crank or by pulling the chain. Install them carefully to avoid tangling or misalignment. The pendulum should swing freely, while the weights provide consistent power to the clock’s mechanism. Proper installation ensures smooth operation and accurate timekeeping.

Operating the Emperor Grandfather Clock

Start the clock by winding it and hanging the pendulum. Set the time by moving the minute hand counter-clockwise. The chime and strike mechanisms will activate automatically, enhancing the clock’s functionality and charm.

4.1 Starting the Clock and Setting the Time

To start the Emperor Grandfather Clock, wind it using the provided crank, ensuring weights are properly hung. Gently lift and release the pendulum to begin its swing. To set the time, move the minute hand counter-clockwise until the hour and minute hands align with the correct time. Allow the clock to operate for 24 hours before fine-tuning accuracy.

4.2 Understanding the Strike and Chime Mechanisms

The Emperor Grandfather Clock features a mechanical strike and chime system. Hammers strike metal rods to produce distinct tones, creating melodious chimes. The sequence of strikes corresponds to the hour and selected melody. Proper weight alignment ensures accurate timekeeping and chime operation, with the left weight powering the strike, the center for time, and the right for chimes. Correct weight installation is essential for seamless functionality.

Maintenance and Care

Regular cleaning and lubrication are essential for optimal performance. Dust the exterior gently and polish surfaces as needed. Lubricate mechanical parts periodically to ensure smooth operation and longevity.

5.1 Regular Cleaning and Lubrication

Regular cleaning and lubrication are crucial for maintaining your Emperor Grandfather Clock’s performance. Dust the exterior with a soft cloth and polish surfaces using high-quality wood care products. Lubricate mechanical components periodically, such as the movement and pivot points, using a silicone-based spray. This ensures smooth operation and prevents wear. Clean and maintain the pendulum and weights to preserve accuracy and longevity. Regular maintenance helps sustain precise timekeeping and extends the clock’s lifespan. Always follow the manufacturer’s recommendations for cleaning and lubrication to avoid damage. If unsure, consult a professional for assistance.

5.2 Raising Weights and Winding the Clock

Raising the weights and winding the Emperor Grandfather Clock ensures smooth operation. For cable-driven clocks, use the provided crank to wind the weights. For chain-driven models, pull the chain gently until the weights reach their highest position. Perform this process every 7-8 days to maintain accurate timekeeping. Always handle weights carefully to avoid damage. Winding incorrectly can cause mechanical issues, so follow the manual’s instructions precisely. Regular winding keeps the clock running reliably and prolongs its lifespan. Ensure the clock is stationary during this process to prevent accidents. Properly winding and raising weights is essential for optimal performance and longevity of your Emperor Grandfather Clock.

Troubleshooting Common Issues

This section addresses common issues like timekeeping errors, chiming problems, and weight inconsistencies. Regular maintenance and proper setup often resolve these issues. Record your clock’s model number for service.

6.1 The Clock Gains or Loses Time

If your Emperor Grandfather Clock gains or loses time, check the pendulum’s regulation. Move the pendulum bob up or down to adjust accuracy. Allow the clock to run for 24 hours after adjustments to ensure proper timekeeping. Refer to the manual for detailed guidance on regulating the pendulum for optimal performance.

6.2 The Clock Does Not Chime or Strike

If the Emperor Grandfather Clock fails to chime or strike, ensure the chime mechanism is activated and not silenced. Check that the hammers are properly aligned with the chime rods and not obstructed. Verify that the weights are correctly hung and provide sufficient power. Also, ensure the moon dial and night silence features are not interfering with the chime function.

6.3 Weights Do Not Drop at the Same Level

If the weights in your Emperor Grandfather Clock do not drop evenly, check their alignment and ensure they are properly hung. Verify that each weight is correctly positioned on its respective hook and that no obstructions are present. Additionally, ensure the chime and strike mechanisms are not interfering with the weights’ movement. Adjust as needed to maintain synchronized operation.

Advanced Adjustments

Advanced adjustments involve fine-tuning the pendulum for precise timekeeping and aligning the moon dial for accuracy. These tweaks ensure optimal performance and maintain the clock’s elegance and functionality.

7.1 Regulating Timekeeping via the Pendulum

Regulating timekeeping via the pendulum involves adjusting its length to achieve precise accuracy. Gently move the pendulum disk up or down to fine-tune the swing. After 24 hours, check the time accuracy and make minor adjustments if necessary. This process ensures the clock keeps perfect time, maintaining its reliability and elegance over years of use.

7.2 Adjusting the Moon Dial for Accuracy

The moon dial on the Emperor Grandfather Clock tracks the lunar cycle and must be manually adjusted for accuracy; Move the dial to match the current moon phase, ensuring synchronization with the lunar cycle. After adjustment, restart the clock to ensure proper alignment and smooth operation of all mechanisms. Regular checks and adjustments maintain its precision and aesthetic appeal.

Moving and Storing the Clock

When moving or storing the Emperor Grandfather Clock, ensure the pendulum and weights are removed and properly packed to prevent damage. This ensures safe transportation and storage.

8.1 Safe Relocation of the Grandfather Clock

When relocating the Emperor Grandfather Clock, remove the pendulum and weights to prevent damage. Wrap the clock in bubble wrap or a protective cover and ensure it remains upright. Use a sturdy dolly or cart to move the clock, placing it on a soft surface like a blanket. Avoid winding the clock before moving, and ensure all parts are securely packed.

8.2 Preparing the Clock for Long-Term Storage

For long-term storage, disassemble key components like the pendulum and weights, storing them separately in labeled containers. Clean the clock thoroughly and cover it with a breathable fabric or plastic wrap. Place silica gel packets inside to prevent moisture damage. Store the clock in a dry, climate-controlled area away from direct sunlight and extreme temperatures to preserve its condition.

Accessing Internal Components

Access internal parts through the front door, top panels, or back access. Panels are secured with tape or plastic clips. Refer to the manual for detailed instructions.

9.1 Removing and Installing Top Side Panels

Top side panels on the Emperor Grandfather Clock are secured with tape or plastic clips. To remove, gently peel off the tape or release the clip. Lift the panels straight up, ensuring no cables are caught. For reinstallation, align the panels properly and secure them using the original fastening method. Always handle with care to avoid damage.

9.2 Accessing the Movement and Chime Area

Access to the movement and chime area can be achieved through the front door, side panels, or the back access panel. To access, remove the panels as described in the manual. Always ensure the area is secure and free from obstructions. Handle internal components with care to avoid damage. This access allows for maintenance, repairs, or adjustments to the clock’s mechanism.

Product Information and Documentation

The Emperor Grandfather Clock includes essential documentation for operation and maintenance. This documentation provides detailed instructions, model-specific guidance, and troubleshooting tips to ensure optimal performance and longevity of your timepiece.

10.1 Locating the Product Information Label

The product information label is crucial for identifying your Emperor Grandfather Clock model and serial number. It can be found on the back of the clock, inside the top back corner, or behind the dial. This label includes essential details for maintenance, repairs, and ordering parts, ensuring you have everything needed to keep your clock functioning perfectly over the years.

10.2 Recording Model and Serial Numbers for Service

Record the model number and serial number from the product information label for future reference. These details are essential for ordering parts or scheduling service. Store them with your clock’s manual or in a safe place to ensure easy access when needed, avoiding delays in maintenance or repairs for your Emperor Grandfather Clock.

Owning an Emperor Grandfather Clock is a rewarding experience, blending heritage and precision; Proper care ensures lasting performance. Enjoy the timeless elegance and rich chimes it brings to your home.

11.1 Final Tips for Enjoying Your Emperor Grandfather Clock

To fully enjoy your Emperor Grandfather Clock, ensure regular maintenance, such as cleaning and lubrication. Keep the clock level and stable to maintain accurate timekeeping. Always allow the clock to run for 24 hours before adjusting. Avoid placing it near drafts or direct sunlight. Appreciate its craftsmanship and the soothing chimes that enhance your home’s ambiance. Proper care will ensure it remains a cherished family heirloom for generations.

11.2 Where to Find Additional Resources and Support

For additional resources, visit the official Emperor Grandfather Clock website or authorized dealers. Online forums and clock enthusiast communities offer valuable insights. Refer to the product manual or contact customer support for specific inquiries. Websites like theclockdepot.com provide instructional guides and troubleshooting tips. Always ensure you have the model and serial number handy for accurate assistance and parts ordering.

Continue Reading

evolution webquest answer key pdf

This WebQuest introduces students to the fundamental concepts of evolution through interactive online activities. It explores natural selection, genetic variation, and species adaptation, fostering critical thinking and collaboration.

What is a WebQuest?

A WebQuest is an interactive online learning activity where students engage in structured tasks using web resources. It combines inquiry-based learning with digital tools, promoting critical thinking and collaboration. Designed to guide learners through specific topics, WebQuests often include defined tasks, relevant links, and assessment criteria. They encourage active participation, making complex concepts accessible and engaging. WebQuests are versatile, suitable for various subjects, and can be adapted to different skill levels, making them a valuable educational tool for exploring topics like evolution, science, or history. By integrating technology and hands-on learning, WebQuests foster deeper understanding and creativity in students.

Importance of Evolution Education

Evolution education is crucial for understanding life’s diversity and biological processes. It provides a foundational knowledge of how species adapt and change over time. By studying evolution, students gain insights into ecological interactions, genetic variation, and natural selection. This knowledge is essential for fields like medicine, conservation, and agriculture. Evolution education fosters critical thinking and scientific literacy, enabling students to evaluate evidence and understand the natural world. It also promotes interdisciplinary connections, linking biology to Earth sciences, chemistry, and environmental studies. Teaching evolution equips students with the skills to address real-world challenges, such as combating diseases and managing ecosystems. Thus, evolution education is vital for preparing scientifically informed and environmentally conscious citizens.

Key Concepts in Evolution

Evolution explains how species adapt, diversify, and change over time through mechanisms like natural selection, genetic variation, and speciation, shaping life’s complexity and biodiversity on Earth.

Natural Selection

Natural selection is a fundamental mechanism of evolution, driving species adaptation by favoring traits that enhance survival and reproduction in specific environments. It operates on genetic variation within populations, where individuals with advantageous characteristics are more likely to survive, mate, and pass their traits to offspring. Over generations, this process leads to the accumulation of adaptive features, shaping biodiversity. For example, the peppered moth’s color shift during the Industrial Revolution illustrates how environmental pressures influence trait selection. Natural selection is a key driver of evolutionary change, ensuring that species remain suited to their ecological niches and enabling life to thrive in diverse conditions. This concept underscores the dynamic interplay between organisms and their environments.

Mutations and Genetic Variation

Mutations are random changes in DNA that introduce new genetic variation, serving as the raw material for evolution. They occur during DNA replication and can result in beneficial, harmful, or neutral traits. Genetic variation within populations is essential for adaptation, as it provides the diversity upon which natural selection acts. Mutations can alter gene function, leading to new traits that may enhance survival in changing environments. For example, antibiotic resistance in bacteria arises from mutations that confer a survival advantage. This genetic diversity ensures populations can evolve and adapt, maintaining their fitness across generations. Mutations and genetic variation are critical drivers of evolutionary change, enabling species to respond to environmental challenges and ecological shifts.

Species Adaptation and Diversity

Species adaptation and diversity are central to evolution, enabling organisms to survive in dynamic environments; Adaptation occurs as populations develop traits that enhance their fitness, driven by natural selection and genetic variation. This process fosters biodiversity, as species evolve unique characteristics suited to their ecological niches. For example, the peppered moth’s color shift in response to industrial pollution exemplifies rapid adaptation. Similarly, antibiotic resistance in bacteria highlights how genetic variation fuels survival under selective pressure. Diversity ensures ecosystems remain resilient, with each species contributing to ecological balance. By studying adaptation, students gain insights into how life evolves and thrives, underscoring the importance of conservation to preserve this natural diversity for future generations.

Structure of the Evolution WebQuest

The Evolution WebQuest is organized into clear sections, guiding students through interactive tasks, key concepts, and assessments. It integrates engaging online resources for a structured learning experience.

WebQuest Design and Layout

The Evolution WebQuest features a user-friendly design with clear navigation, ensuring students can easily access and explore its educational content. The layout incorporates multimedia elements such as videos, images, and interactive simulations to enhance engagement. Each section is visually distinct, with headers, subheaders, and bullet points to organize information effectively. The design emphasizes readability, using appropriate fonts and spacing to accommodate diverse learning needs. Additionally, the WebQuest includes interactive tools like quizzes and discussion forums to promote active learning. Clear instructions and a progress tracker guide students through the activities, helping them stay focused and motivated. The overall design supports the learning objectives by creating an immersive and structured environment for exploring evolutionary concepts.

Interactive Learning Elements

The Evolution WebQuest incorporates interactive learning elements to engage students and deepen their understanding of evolutionary concepts. These include simulations where students can manipulate variables to observe evolutionary processes, such as natural selection, in real-time. Quizzes and puzzles are embedded throughout the WebQuest to reinforce key ideas and assess comprehension. Discussion forums and collaborative activities encourage peer interaction, allowing students to share insights and learn from one another. Additionally, interactive timelines and maps provide visual representations of evolutionary history, helping students connect concepts across time and geography. These dynamic tools foster active learning, making the exploration of evolution both enjoyable and impactful.

Educational Benefits of WebQuests

WebQuests enhance engagement, promote deeper understanding, and foster critical thinking. They encourage independent learning, collaboration, and effective use of technology, making education more interactive and meaningful.

Enhancing Critical Thinking Skills

WebQuests are designed to enhance critical thinking by engaging students in structured, inquiry-based activities. By exploring evolutionary concepts through guided research, students analyze data, evaluate evidence, and draw informed conclusions. Interactive tasks encourage deeper understanding of natural selection, genetic variation, and species adaptation. Collaborative problem-solving fosters intellectual curiosity and the ability to approach complex questions from multiple perspectives. This method promotes logical reasoning and the application of scientific principles to real-world scenarios, preparing students to think analytically and creatively. The WebQuest format ensures that learning is both challenging and rewarding, as students develop essential skills for academic success and lifelong learning.

Facilitating Collaborative Learning

WebQuests are tailored to facilitate collaborative learning by incorporating group work and peer interaction. Students engage in shared tasks, fostering teamwork and communication. These activities encourage students to support one another, promoting a sense of community and mutual understanding. Collaborative problem-solving enhances critical thinking and ensures that all group members contribute their unique perspectives. The structured nature of WebQuests helps divide responsibilities, ensuring that each student plays an active role in achieving common goals. This collaborative approach not only strengthens interpersonal skills but also deepens the understanding of evolutionary concepts through shared discovery and discussion. The integration of technology and resources further supports group activities, making learning both engaging and effective for all participants.

Answer Key and Assessment Tools

The answer key provides clear solutions to WebQuest tasks, ensuring accuracy. Evaluation criteria assess student understanding and critical thinking, aligning with learning objectives for effective assessment.

Key Concepts Assessment

The key concepts assessment evaluates students’ understanding of evolution principles, such as natural selection, mutations, and species adaptation. It ensures comprehension of how these elements drive evolutionary changes.

Students are tested on their ability to apply theoretical knowledge to real-world scenarios, fostering critical thinking and analytical skills. The assessment aligns with learning objectives, providing a clear measure of student progress.

Multiple-choice questions, short answers, and case studies are used to evaluate mastery of evolution concepts. The answer key offers detailed solutions, enabling students to review and improve their understanding effectively.

Evaluation Criteria for Student Responses

Student responses are evaluated based on accuracy, completeness, and critical thinking. Assessments focus on understanding evolutionary concepts, ability to apply knowledge, and clarity of explanations.

Key criteria include correct use of terminology, logical reasoning, and evidence-based answers. Responses are scored on depth of insight, organization, and adherence to scientific principles.

Participation in discussions and collaboration with peers are also assessed, ensuring a holistic evaluation of learning outcomes and engagement with the WebQuest activities.

Additional Resources for Teachers

Curriculum Integration Ideas

Teachers can access curriculum-aligned resources, interactive tools, and professional development guides to enhance their Evolution WebQuest implementation and student engagement.

  • Curriculum resources for integrating evolution concepts.
  • Interactive tools for student engagement.
  • Guides for effective lesson planning.

Teachers can enhance their curriculum by integrating the Evolution WebQuest with existing biology lessons, ensuring a cohesive learning experience. The WebQuest aligns with educational standards, making it easy to incorporate into lesson plans. Educators can supplement the activity with additional resources, such as interactive simulations, videos, and real-world case studies, to deepen student understanding. Schools can also integrate First Nations stories and cultures into the curriculum to provide diverse perspectives on evolution. Additionally, professional development guides and workshops are available to help teachers effectively implement the WebQuest and assess student progress. These resources ensure a comprehensive and engaging approach to teaching evolution, fostering both critical thinking and collaboration among students.

Continue Reading