taylor meat thermometer manual

Taylor meat thermometers are essential tools for precise cooking, ensuring perfectly cooked dishes by avoiding under or overcooking. They’re known for accuracy, ease of use, and durability.

1.1 What is a Taylor Meat Thermometer?

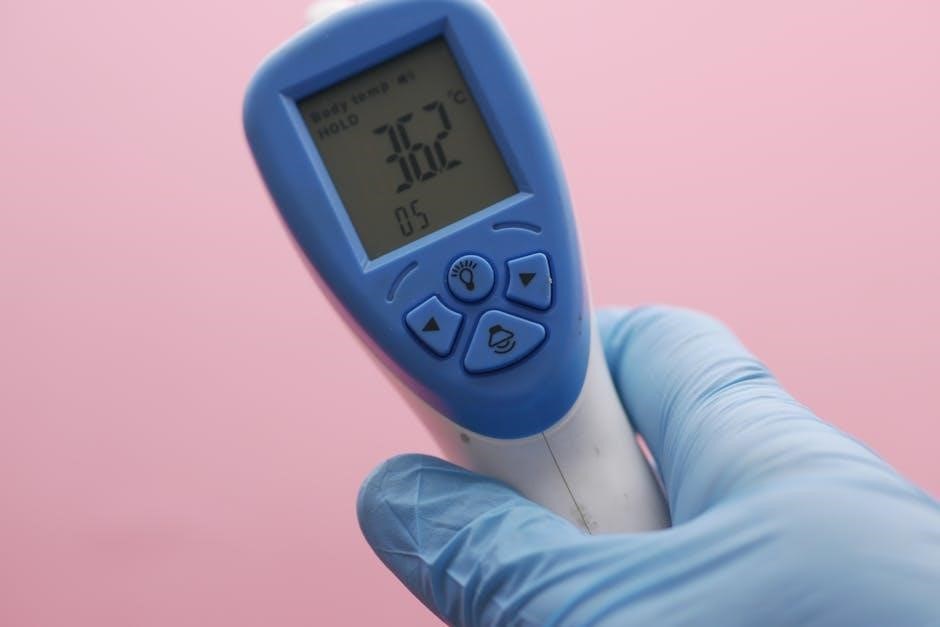
A Taylor meat thermometer is a kitchen tool designed to measure internal food temperatures accurately. It ensures meats are cooked to safe and desired levels, preventing overcooking. With preset settings for various meats, it offers ease of use and reliability. The device features a durable design, digital accuracy, and user-friendly controls, making it a versatile tool for home cooks and professionals alike.

1.2 Importance of Using a Meat Thermometer

Using a Taylor meat thermometer ensures accurate internal temperatures, preventing overcooking and undercooking. It guarantees food safety by meeting USDA guidelines, eliminating guesswork, and delivering consistent results. This tool is essential for achieving perfectly cooked meats, avoiding foodborne illnesses, and enhancing overall culinary precision for both novice and experienced cooks.

Key Features of the Taylor Meat Thermometer

Taylor meat thermometers offer digital accuracy, preset temperature settings, and durable designs, ensuring precise cooking and long-term reliability for home and professional use.

2.1 Design and Build Quality

Taylor meat thermometers are crafted with high-quality materials, ensuring durability and longevity. Their sleek, user-friendly designs include robust probes and clear displays, making them both functional and visually appealing. The thermometers are built to withstand regular use, offering a reliable solution for precise temperature monitoring in various cooking environments, from home kitchens to professional settings.

2.2 Digital Accuracy and Speed

Taylor meat thermometers deliver fast and precise temperature readings, ensuring accuracy within seconds. Their advanced digital technology provides consistent and reliable results, essential for achieving perfectly cooked meals. The thermometers are designed to quickly adapt to temperature changes, making them ideal for both novice and experienced cooks seeking accurate and efficient performance in their culinary endeavors.

2.3 Preset Temperature Settings

Taylor thermometers feature preset temperature settings for various meats, ensuring optimal cooking results. These settings are based on USDA guidelines, offering precise Doneness levels for beef, poultry, pork, and more. Users can easily select the desired preset, streamlining the cooking process and eliminating guesswork. This feature ensures that your dishes are cooked safely and to your preferred level of doneness every time.

Setting Up Your Taylor Meat Thermometer

Setting up your Taylor meat thermometer involves unboxing, inspecting, and inserting the probe. Ensure the probe is securely connected and batteries are installed for accurate readings.

3.1 Unboxing and Initial Inspection

When unboxing your Taylor meat thermometer, inspect the unit for any damage. Ensure all components, including the probe and batteries, are included. Gently remove packaging materials and clean the probe with a damp cloth before first use. Check for any visible defects or damage to the probe or display. Verify the battery compartment is intact and batteries are properly installed. This initial inspection ensures your thermometer is ready for accurate and safe operation.

3.2 Inserting the Probe

Insert the probe into the thickest part of the meat, avoiding contact with bone, fat, or gristle. Ensure the probe is dry to prevent moisture interference. Gently push the probe until the tip is centered in the meat. Avoid submerging the probe in water. Plug the sensor into the thermometer securely to ensure accurate readings. Proper probe placement is crucial for precise temperature measurement and food safety.

3.3 Battery Installation

Open the battery compartment on the back of the thermometer. Insert a new AAA battery, ensuring correct polarity as marked. Close the compartment securely. If the display is dim, replace the battery. Proper battery installation ensures accurate readings and functionality. Always use high-quality batteries for optimal performance and longevity of your Taylor meat thermometer.

Operating the Thermometer

Insert the probe into the thickest part of the meat, avoiding bone or fat. Set the desired temperature and monitor the display. An alarm sounds when done.

4.1 Basic Usage

For basic operation, preheat your oven and insert the probe into the thickest part of the meat, ensuring no contact with bone or fat. Turn the mode switch to cooking position. The display will show real-time temperature readings. Once the target temperature is reached, an alarm sounds, indicating your meat is perfectly cooked. Always handle the probe with care to avoid damage and ensure accurate results every time.

4.2 Advanced Features

The Taylor meat thermometer offers advanced features like preset temperature settings for various meats and a countdown timer for precise cooking control. It includes specific settings for beef, poultry, and pork, aligning with USDA recommendations. The timer function allows you to monitor cooking progress, while the alarm ensures you never miss the perfect doneness. These features enhance cooking accuracy and versatility, making it a comprehensive tool for both novice and experienced cooks.

Preset Temperature Settings

Taylor thermometers include preset temperatures for beef, poultry, pork, and more, ensuring safe and perfectly cooked meals. Users can easily adjust settings to suit their preferences.

5.1 Understanding Different Meat Types

Taylor thermometers cater to various meats, each requiring specific temperatures. Beef, poultry, pork, lamb, and fish have unique cooking needs. Understanding these differences ensures safe and flavorful results. For instance, poultry needs higher temperatures than beef, while fish cooks at lower heat. The thermometer’s preset settings guide users, making it easy to achieve optimal doneness for any meat type. This ensures every dish is cooked to perfection.

5.2 Recommended Internal Temperatures

For safe cooking, use these USDA-recommended internal temperatures: beef (140°F-170°F), poultry (165°F), pork (145°F with a 3-minute rest), lamb (145°F), and fish (145°F). Ground meats like chicken or turkey require 165°F. These guidelines ensure food safety and prevent undercooking or overcooking, helping you achieve perfectly cooked meals every time with your Taylor thermometer.

Troubleshooting Common Issues

Common issues with Taylor thermometers include incorrect readings and probe problems. Check connections, ensure the probe is dry, and clean the sensor for accurate results.

6.1 Incorrect Temperature Readings

Incorrect temperature readings on a Taylor meat thermometer can occur due to moisture in the sensor plug, improper probe placement, or loose connections. Ensure the plug is dry and securely connected. Avoid inserting the probe near bone or fat, as this can lead to inaccurate results. Clean the probe regularly and check for any damage. If issues persist, recalibrate the thermometer or contact Taylor support for assistance.

6.2 Probe Connection Problems

A dashed display indicates a probe connection issue. Check if the sensor plug is securely inserted into the thermometer. Ensure the plug is dry, as moisture can disrupt connectivity. Gently clean the plug with a dry cloth and reconnect. Avoid yanking the cord, as this may damage the connection. If problems persist, inspect the probe for damage or corrosion. Replace the probe if necessary to restore proper functionality and ensure accurate readings.

Cleaning and Maintenance

Regularly clean the thermometer with a damp cloth and mild soap. Avoid submerging the unit in water. Dry thoroughly after cleaning to prevent damage or rust.

7.1 Proper Cleaning Techniques

Regular cleaning ensures accuracy and longevity. Use a damp cloth with mild soap to wipe the thermometer unit and probe. Avoid submerging in water or using abrasive cleaners. Dry thoroughly after cleaning to prevent rust or damage. For the probe, clean with a soft brush or damp cloth, ensuring no food residue remains. Moisture inside the sensor plug can cause incorrect readings, so dry it with a cloth before use. Proper cleaning maintains precise temperature readings and extends the product’s lifespan.

7.2 Storage and Handling Tips

Store the thermometer in a dry place, away from direct heat or extreme temperatures. Use a protective case to prevent damage; Avoid exposing the unit to water or moisture. Handle the probe with care to prevent bending or breaking. Clean the thermometer before storage to maintain hygiene. Check for any damage before storing. Proper storage ensures longevity and accuracy, keeping your Taylor meat thermometer reliable for future use.

Warranty and Customer Support

Taylor thermometers are backed by a limited warranty covering defects in materials and workmanship. For assistance, contact Taylor’s customer support at 1-866-843-3905 or visit their website.

8.1 What is Covered Under Warranty

Taylor meat thermometers are backed by a limited one-year warranty covering defects in materials and workmanship. This ensures protection against manufacturing faults, providing users with peace of mind. The warranty excludes damage caused by misuse, commercial use, or unauthorized repairs. Proper care and adherence to manual guidelines are essential to maintain warranty validity. For details, refer to the manual or contact Taylor support.

8.2 Contacting Taylor Support

For assistance, users can contact Taylor support at 1-866-843-3905 or visit their website for troubleshooting guides and FAQs. The manual also provides detailed contact information and resources to address any queries or issues promptly, ensuring a smooth experience with your Taylor meat thermometer.

Using a Taylor meat thermometer ensures perfectly cooked meals with ease and accuracy. Regularly clean and calibrate your device for long-term precision and reliability in the kitchen.

9.1 Best Practices for Use

Always insert the probe into the thickest part of the meat, avoiding bone or fat for accurate readings. Clean the thermometer with a damp cloth and dry thoroughly after use. Store the device in a protective case to prevent damage. Regularly check the battery and replace it when necessary. For optimal performance, avoid exposing the thermometer to extreme temperatures or moisture.

9.2 Ensuring Long-Term Accuracy

To maintain your Taylor meat thermometer’s accuracy, calibrate it regularly by following the instructions in the manual. Store the thermometer in a protective case to prevent damage. Avoid exposure to extreme temperatures or moisture, as this can affect performance. Clean the probe thoroughly after each use and ensure it is dry before storage. Replace batteries promptly when low to prevent inconsistent readings.

Continue Reading

hunter icc2 manual

Overview of the Hunter ICC2 Controller

The Hunter ICC2 is a modular‚ residential‚ and commercial irrigation controller designed for flexibility and reliability‚ offering advanced features like Solar Sync compatibility and manual single-station operation.

1.1 Key Features and Benefits

The Hunter ICC2 offers a modular design‚ expandable up to 54 stations‚ making it ideal for both residential and commercial use. Key features include Solar Sync compatibility for automatic weather-based adjustments‚ manual single-station operation‚ and advanced flow rate monitoring to optimize water savings. Its non-volatile memory retains settings during power outages‚ and the intuitive interface simplifies programming. These features ensure efficient‚ reliable‚ and customizable irrigation control.

1.2 Target Applications (Residential and Commercial)

The Hunter ICC2 is designed for both residential and commercial irrigation systems‚ offering scalability to suit various property sizes. It supports up to 54 stations‚ making it ideal for large commercial landscapes and expansive residential lawns. Its modular design ensures flexibility‚ allowing it to adapt to different irrigation needs while maintaining reliable performance in diverse applications.

System Setup and Configuration

The Hunter ICC2 setup involves configuring date/time‚ start times‚ and station run times‚ enabling a customized watering schedule that aligns with specific irrigation needs and preferences.

2.1 Setting the Date and Time

To configure the Hunter ICC2‚ turn the dial to the Date/Time position. Use the + and ー buttons to set the current year‚ month‚ and date. Press B to confirm. Next‚ set the hour and minutes using the same buttons. The display will show the current date and time. This ensures the controller operates on the correct schedule. Press B again to save and exit. The system retains these settings even during power outages.

2.2 Configuring Start Times and Watering Schedules

To set up watering schedules on the Hunter ICC2‚ turn the dial to the Start Times position. Use the + and ― buttons to select the desired start time for each program. Choose specific days of the week or use the interval feature for flexible scheduling. The controller allows up to four independent programs‚ ensuring customized watering plans. Settings are saved automatically‚ even during power outages‚ for reliable operation.

2.3 Adjusting Station Run Times

Adjusting station run times on the Hunter ICC2 is straightforward. Use the control panel to select the desired station and modify its run time with the + and ― buttons. Once set‚ the controller saves the duration automatically. The system’s non-volatile memory ensures these settings remain even during power outages‚ providing consistent and reliable operation for each irrigation cycle.

Advanced Features of the Hunter ICC2

The Hunter ICC2 offers advanced features like Solar Sync sensor compatibility‚ manual single-station operation‚ and flow rate monitoring for optimal water savings and system efficiency.

3.1 Solar Sync Sensor Compatibility

The Hunter ICC2 is compatible with the Solar Sync sensor‚ which automatically adjusts watering schedules based on local climate conditions. This optional sensor integrates seamlessly with the controller‚ offering wired or wireless installation options. It ensures water conservation by adapting irrigation schedules to weather changes‚ optimizing water usage. The Solar Sync feature enhances efficiency and reduces waste‚ making it a valuable addition to the ICC2 system.

3.2 Manual Single-Station Operation

The Hunter ICC2 allows manual operation of individual stations‚ enabling one-time watering without affecting the programmed schedule. This feature bypasses sensor inputs‚ providing direct control for maintenance or quick adjustments. It is activated through the controller’s interface‚ offering flexibility for specific watering needs while maintaining overall system automation. This ensures precise control and adaptability in irrigation management.

3.4 Flow Rate Monitoring and Water Savings

The Hunter ICC2 features advanced flow rate monitoring‚ enabling precise tracking of water usage and detection of irregularities like leaks or excessive flow. This capability promotes water conservation by optimizing irrigation schedules and ensuring efficient resource use. The system integrates seamlessly with the Solar Sync sensor‚ adjusting watering based on environmental conditions to further enhance water savings and sustainability in both residential and commercial applications. This feature is user-friendly and highly effective in reducing water waste.

Product Specifications

The Hunter ICC2 includes models like the I2C-800-PL‚ I2C-800-M‚ and I2C-800-SS‚ offering expandable station counts and various cabinet options. It operates on 12/24V DC power‚ with dimensions and designs tailored for flexibility and durability in residential and commercial settings.

4.1 Controller Models and Expandability

The Hunter ICC2 is available in multiple models‚ including the I2C-800-PL‚ I2C-800-M‚ I2C-800-SS‚ and I2C-800-PP‚ offering base station counts of 8 stations. The plastic cabinet models expand up to 38 stations‚ while metal and stainless steel models support up to 54 stations. Expandability is achieved through modules like the ICM-2200‚ which adds 22 stations‚ and the ICM-400‚ enabling flexible system growth. This modularity ensures the controller can adapt to varying project sizes and requirements.

4.2 Power Requirements (12/24V DC)

The Hunter ICC2 controller operates on 12/24V DC power‚ ensuring reliable performance across various installations. It features a non-volatile memory that retains programming even during power outages‚ eliminating the need for a backup battery. An optional 9-volt battery can be used for programming when the controller is removed from its cabinet‚ though it does not support automatic scheduling or station activation. This dual-power capability enhances flexibility and system dependability.

4.3 Physical Dimensions and Cabinet Options

The Hunter ICC2 controller measures 11.5 inches in width and 5 inches in depth‚ offering a compact design for versatile installation. It is available in multiple cabinet options‚ including plastic‚ metal‚ and stainless steel‚ to suit different environmental conditions. The controller also comes in a plastic pedestal model for added flexibility. These options ensure durability and adaptability‚ making it suitable for both residential and commercial settings while maintaining a sleek‚ professional appearance.

Installation and Wiring

The Hunter ICC2 controller is installed by mounting it securely on a wall or pedestal‚ ensuring proper alignment and access. The wiring compartment simplifies connections for power‚ sensors‚ and stations‚ while the SmartPort enables remote compatibility. Detailed steps guide drill holes‚ securing screws‚ and organizing wires for a neat‚ professional setup.

5.1 Mounting the Controller

The Hunter ICC2 controller is mounted using a wall or pedestal installation method. For wall mounting‚ drill pilot holes using the provided template‚ secure with screws‚ and ensure the controller is level. Plastic and metal cabinets require slightly different handling‚ while pedestal mounting involves preparing a concrete base for stability. Ensure proper alignment and access to the wiring compartment for seamless connections. Follow the manufacturer’s instructions for a secure and professional installation.

5.2 Connecting Sensors and Accessories

Connect sensors and accessories to the Hunter ICC2 controller by following specific terminal assignments. The Solar Sync sensor links directly to the controller‚ enabling weather-based adjustments. Clik sensors and remotes‚ like ROAM and ROAM-XL‚ use the SmartPort connector for easy setup. The P/MV terminal connects optional master valves or pumps‚ while sensor inputs monitor environmental conditions. Ensure proper wiring and secure connections to maintain system functionality and reliability. Always refer to the manual for terminal locations and compatibility.

5.3 Power and Station Wiring

Connect the Hunter ICC2 controller to a 120/230 VAC power supply using wire nuts or terminal blocks. Station wires are connected to the module terminals‚ with each station corresponding to its output slot. The transformer provides 24 VAC for the controller and sensors. Ensure proper grounding by connecting the green wire to the grounding terminal. Install station modules by locking them into place‚ and verify all connections are secure before powering on. Always turn off power before wiring to avoid electrical hazards.

Programming the Controller

Program the Hunter ICC2 by setting watering days‚ start times‚ and run times using the control dial. Adjust seasonal settings to modify run times based on weather conditions.

6.1 Setting Watering Days and Schedules

Set watering days by selecting specific days of the week or choosing odd/even options. Use the control dial to navigate and buttons to adjust. Define start times for each program‚ and assign station run times. The Hunter ICC2 allows multiple start times per program‚ ensuring flexible scheduling. Confirm settings to activate your customized irrigation plan‚ optimizing water usage for your lawn or commercial space.

6.2 Using Seasonal Adjustment

The Hunter ICC2 allows you to adjust watering schedules seasonally using a percentage-based system. Set adjustments from 5% to 300% of the original run times. This feature helps optimize water usage based on weather conditions without altering the base program. Use the control dial to select the Seasonal Adjust option and modify percentages with the + or ー buttons. This ensures efficient watering year-round‚ adapting to changing seasonal needs.

6.3 Activating the Pump/Master Valve

To activate the Pump/Master Valve on the Hunter ICC2‚ ensure the P/MV module is installed. Connect the Pump Start Relay’s yellow wires to the COM and P/MV terminals. With the dial in the Run position‚ the Pump/Master Valve activates automatically during scheduled programs. For manual activation‚ use the remote or control panel. This feature ensures efficient water distribution in irrigation systems‚ adapting to specific landscape needs.

Maintenance and Troubleshooting

Regular maintenance ensures optimal performance. Check sensors and wiring for issues. Common problems include incorrect schedules or sensor interference. Troubleshooting guides help resolve these issues quickly.

7.1 Routine Maintenance Tips

Regularly inspect and clean the controller‚ ensuring all connections are secure. Check sensors like Solar Sync for proper alignment and function. Verify wiring integrity‚ especially station and power connections. Replace worn-out or damaged components promptly. Update settings seasonally to maintain efficient watering schedules. Ensure the cabinet is tightly closed to protect against environmental elements. Perform these checks periodically to prevent system downtime and ensure optimal performance.

7.2 Common Issues and Solutions

Common issues with the Hunter ICC2 include sensor malfunctions‚ incorrect wiring‚ or display malfunctions. For sensor issues‚ ensure proper alignment and connection. If wiring problems occur‚ inspect connections and replace damaged wires. For display issues‚ restart the controller or check power supply. If stations fail to activate‚ verify run times and start times are set correctly. Regularly cleaning the controller and updating settings can prevent many issues and ensure smooth operation.

Continue Reading

manual walkie talkie motorola

Motorola walkie talkie manuals provide essential guidance for setting up, programming, and safely operating your device. They include step-by-step instructions and important safety guidelines.

1.1 Overview of Motorola Walkie Talkie Models

Motorola offers a range of walkie talkie models, including the T42, T62, XT180, and T82 Extreme. Each model varies in features, durability, and functionality, catering to different user needs, from casual to professional use. These models are designed for clear communication and reliability in various environments.

1.2 Importance of Reading the Manual

Reading the Motorola walkie talkie manual ensures safe and efficient use, highlighting proper setup, operation, and safety guidelines. It helps users understand features, troubleshoot issues, and comply with regulations, enhancing overall communication experience and device longevity.

Setting Up Your Motorola Walkie Talkie

Setting up your Motorola walkie talkie involves unboxing, initial configuration, and programming channels. Adjust volume and sound settings for optimal performance.

2.1 Unboxing and Initial Setup

When unboxing your Motorola walkie talkie, ensure all accessories are included. Carefully remove the device and charge it fully before initial use. Follow the manual for correct battery installation and preliminary settings to ensure proper functionality.

2.2 Programming Channels and Frequencies

Programming channels and frequencies on your Motorola walkie talkie requires selecting the desired channel and setting the frequency manually or via software. Ensure compatibility with other devices and adhere to local regulations for optimal communication.

2.3 Adjusting Volume and Sound Settings

Adjust the volume on your Motorola walkie talkie using the volume control button. Access sound settings via the menu to customize tones, voice clarity, and noise reduction. Ensure optimal audio quality by testing settings in different environments and saving your preferred configuration for consistent communication.

Operating the Motorola Walkie Talkie

Learn to turn the radio on/off, use basic communication functions, and navigate the menu. Follow the manual for smooth operation and efficient two-way communication.

3.1 Turning the Radio On/Off

To turn the Motorola walkie talkie on or off, press and hold the MENU button until the device powers up or shuts down completely. Ensure the radio is properly functioning after startup.

3.2 Basic Communication Functions

Press the Push-to-Talk (PTT) button to transmit messages. Ensure the device is turned on and channels are correctly set. Use the volume control for clear audio. Access private and group communication modes. Utilize the LED flashlight during emergencies. Adjust settings via the menu for optimal performance. Properly follow manual instructions for easy, seamless operation.

3.3 Using the Menu and Navigation

Navigate through the menu using the MENU/ button and directional keys. Select options like channel selection, volume adjustment, and backlight settings. Press the MENU/ button to access the menu, scroll using navigation keys, and confirm selections with the PTT or OK button. Refer to your model’s manual for specific menu structures and options.

Safety and Precautions

Always follow RF energy exposure guidelines and handle the device properly. Store in a cool, dry place and dispose of batteries responsibly. Read safety instructions before use.

4.1 RF Energy Exposure Guidelines

Ensure compliance with RF exposure limits to avoid health risks. Use Motorola-approved accessories and follow guidelines for safe transmission. Avoid placing the device directly on the body while transmitting to minimize exposure. Always refer to the manual for detailed safety precautions and regulatory compliance information.

Regularly review and adhere to the provided safety instructions to maintain optimal device performance and user well-being; Proper handling ensures both safety and efficiency in communication.

4.2 Proper Handling and Storage

Handle your Motorola walkie talkie with care to prevent damage. Store it in a dry, cool place away from direct sunlight. Clean the device regularly with a soft cloth. Avoid exposing it to extreme temperatures or moisture. Proper storage ensures longevity and optimal performance of your walkie talkie.

4.3 Disposal and Recycling Information

Dispose of your Motorola walkie talkie responsibly. Follow local e-waste regulations and use authorized recycling centers. Remove batteries and store them separately. Motorola supports eco-friendly disposal to minimize environmental impact. Proper recycling helps conserve resources and promotes sustainability.

Advanced Features of Motorola Walkie Talkies

Motorola walkie talkies offer advanced features like emergency alerts, LED flashlights, and customizable settings. They support private and group communications, enhancing functionality for various user needs and scenarios.

5.1 Emergency Alert and LED Flashlight

Motorola walkie talkies feature an emergency alert system, sending distress signals to group members. The built-in LED flashlight provides visibility in low-light conditions, enhancing safety and utility during nighttime operations or emergencies. These features ensure quick responses and improved visibility, making them indispensable for critical situations and outdoor activities. Always use approved accessories for optimal performance.

5.2 Private Calls and Group Communications

Motorola walkie talkies support private calls for one-to-one conversations and group communications for one-to-many interactions. This feature enhances communication efficiency, allowing users to switch between private and group modes seamlessly. It is ideal for coordinating tasks in professional settings or staying connected with friends during outdoor adventures, ensuring clear and private interactions with minimal interruptions.

5.3 Customizing Settings for Optimal Use

Motorola walkie talkies allow users to customize settings like channel programming, volume levels, and backlight preferences. These adjustments ensure optimal performance tailored to specific needs, enhancing communication efficiency and user experience in various environments, whether for professional or recreational use.

Troubleshooting Common Issues

Motorola walkie talkie manuals provide solutions for common problems like interference, battery issues, and connectivity. Refer to the guide for step-by-step troubleshooting tips and repairs.

6.1 Resolving Interference Problems

Interference can be caused by physical obstructions or nearby devices. Change channels, adjust antennas, or relocate to reduce static. Use interference elimination features or reset settings. Regular maintenance and proper antenna alignment also help minimize disruptions.

6.2 Battery Life and Charging Issues

Low battery life? Ensure proper charging using Motorola-approved cables. Avoid overcharging, as it reduces battery longevity. Clean charging ports regularly. Replace batteries if they no longer hold charge. Follow manual guidelines for optimal charging and battery maintenance.

6.3 Resetting the Device to Factory Settings

To reset your Motorola walkie talkie, follow the manual’s instructions for your specific model. This process erases all custom settings, returning the device to its original configuration. Ensure you backup any important data before performing a factory reset.

Downloading and Accessing Manuals

Motorola walkie talkie manuals are available online for models like T42, T62, and XT180. These guides provide detailed instructions for setup, programming, and troubleshooting your device.

7.1 Finding the Correct Manual for Your Model

To find the correct manual, identify your Motorola walkie talkie model (e.g., T42, T62, or XT180) and visit Motorola’s official website or trusted platforms like ManualsLib. Enter your model number, download the PDF, and ensure it matches your device for accurate setup and operating instructions.

7.2 Accessing Manuals Online

Visit Motorola’s official website or trusted platforms like ManualsLib to access walkie talkie manuals. Navigate to the support section, enter your model number, and download the PDF manual. Ensure the manual matches your device for accurate instructions and safety guidelines.

7.3 Printing and Saving the Manual

Download the PDF manual from Motorola’s official website or trusted platforms like ManualsLib. Print the document on standard paper for easy reference. Save the manual digitally for future access, ensuring it matches your specific walkie talkie model for accurate instructions and proper device operation.

Motorola Walkie Talkie Models Comparison

Compare popular Motorola models like T42, T62, XT180, and T82 Extreme, each offering unique features suited for different needs, ensuring optimal performance in various environments and conditions.

8.1 Popular Models: T42, T62, XT180, T82 Extreme

The T42, T62, XT180, and T82 Extreme are among Motorola’s most popular walkie-talkie models, each designed for specific use cases. The T42 is ideal for casual use, while the T62 offers advanced features like weather resistance. The XT180 and T82 Extreme are built for rugged environments, ensuring durability and reliable communication in tough conditions.

8.2 Key Features and Differences

Motorola walkie-talkie models vary in features, with the T42 offering basic communication, while the T62 adds weather resistance and extended range. The XT180 includes advanced two-way radio capabilities, and the T82 Extreme boasts enhanced durability for extreme conditions, making each model suitable for different user needs and environments.

8.3 Choosing the Right Model for Your Needs

Selecting the right Motorola model depends on your usage. For casual use, the T42 is ideal. For outdoor activities, the weather-resistant T62 is perfect. The XT180 suits professional settings, while the T82 Extreme excels in rugged environments, ensuring optimal performance tailored to your specific requirements and preferences.

Maintenance and Care Tips

Regularly clean your Motorola walkie talkie with a soft cloth and avoid harsh chemicals. Update software for optimal performance and store the device in a dry, cool place to ensure longevity.

9.1 Cleaning the Device

Use a soft, dry cloth to wipe down the walkie talkie, removing dirt and grime. Avoid harsh chemicals or abrasive materials. For stubborn spots, dampen the cloth slightly but ensure no moisture enters the device. Regular cleaning prevents damage and maintains optimal performance. Always power off before cleaning.

9.2 Updating Software and Firmware

Regularly update your Motorola walkie talkie’s software and firmware to ensure optimal performance. Connect the device to a computer, use Motorola’s software tool, and follow on-screen instructions. Updates may add new features, improve functionality, or fix issues. Always use genuine Motorola tools to ensure compatibility and safety.

9.3 Regular Maintenance Checks

Perform regular checks on your Motorola walkie talkie to ensure optimal performance. Inspect the antenna, battery, and firmware for updates. Test all functions and clean the device. Check for physical damage and ensure all accessories are securely connected. Refer to the manual for specific guidelines and Motorola-recommended maintenance schedules.

Legal and Compliance Information

Motorola walkie talkies comply with FCC regulations and include copyright protections. Adhere to all legal standards and review warranty details for repair and service options.

10.1 FCC Regulations and Compliance

Motorola walkie talkies comply with FCC regulations, ensuring safe RF energy exposure levels. Devices are tested to meet strict standards, and users must follow guidelines to maintain compliance, including proper accessory use.

10.2 Warranty and Repair Options

Motorola walkie talkies come with a limited warranty covering manufacturing defects for a specified period. For warranty details, refer to the product manual. Repairs must be performed by authorized Motorola service centers to maintain warranty validity and ensure compliance with safety standards.

10.3 Copyright and Intellectual Property

Motorola walkie talkie manuals and products are protected by copyright. The manuals contain proprietary information, including software and semiconductor data. Users must adhere to copyright laws and avoid unauthorized reproduction or distribution of the material. The manual serves as a comprehensive guide, ensuring lawful use of Motorola’s intellectual property.

Motorola walkie talkie manuals provide comprehensive guidance for safe and efficient use. They cover setup, operation, and advanced features, ensuring optimal performance. Explore more to maximize your device’s potential.

11.1 Summary of Key Points

The Motorola walkie talkie manual is crucial for understanding device setup, programming channels, and safety guidelines. It ensures efficient operation and compliance with regulations, enhancing communication reliability and user experience.

11.2 Encouragement to Explore More Features

Explore advanced features like emergency alerts, private calls, and customizable settings to maximize your Motorola walkie talkie’s potential. Discover how these tools enhance communication efficiency and user experience, ensuring you get the most out of your device with guided support from the manual.

Continue Reading

apc back-ups ns 600 manual

The APC Back-UPS NS 600 Manual serves as your primary guide for understanding and utilizing the UPS effectively. It covers installation, operation, and troubleshooting, ensuring optimal performance and safety for your devices.

Overview of the APC Back-UPS NS 600

The APC Back-UPS NS 600 is a reliable uninterruptible power supply (UPS) designed to protect computers and electronic devices from power outages, surges, and spikes. It provides battery backup and surge protection, ensuring uninterrupted operation during power failures. This UPS is ideal for home and small office use, supporting critical systems like desktops, gaming consoles, and networking equipment. Compact and user-friendly, it offers essential features for safe and efficient power management. The NS 600 is engineered to prevent data loss and equipment damage, making it a vital component for safeguarding your digital setup.

Importance of the User Manual for Proper Setup and Usage

The user manual is essential for the correct installation, operation, and maintenance of the APC Back-UPS NS 600. It provides detailed, step-by-step instructions to ensure safe and proper setup, minimizing the risk of errors. The manual includes critical information about safety precautions, electrical connections, and troubleshooting common issues. By following the guidelines outlined, users can optimize the UPS’s performance, prolong its lifespan, and ensure reliable power protection for their devices. Understanding the manual’s content is vital for maximizing the benefits of the APC Back-UPS NS 600 and safeguarding connected equipment from power-related damage.

Key Features and Specifications

The APC Back-UPS NS 600 offers 600VA capacity, reliable power protection, and battery backup for electronic devices. It features surge protection, automatic voltage regulation, and an LCD status display.

Technical Specifications of the APC Back-UPS NS 600

The APC Back-UPS NS 600 has a rated capacity of 600VA and an output voltage of 120V. It supports a maximum load of 340 watts and includes 6 battery-backed outlets for protected devices. The UPS features an Automatic Voltage Regulation (AVR) system to stabilize power fluctuations without battery usage. The battery type is a 12V, 7Ah sealed lead-acid unit, with a typical recharge time of 16 hours for full capacity. It also includes data line protection and an LCD display for real-time status monitoring. The unit weighs approximately 10.5 lbs and measures 7.5 x 4.5 x 12 inches.

Benefits of Using the APC Back-UPS NS 600 for Power Protection

The APC Back-UPS NS 600 provides reliable power protection for your devices, safeguarding them from outages, surges, and voltage fluctuations. Its 600VA capacity supports essential electronics like computers, routers, and gaming consoles. The battery backup ensures uninterrupted operation during power failures, while surge protection prevents damage from voltage spikes. The automatic voltage regulation (AVR) stabilizes power without battery usage, extending device lifespan. Easy setup, intuitive controls, and a compact design make it ideal for home offices or small businesses. The LCD display offers real-time monitoring, ensuring peace of mind and optimal performance.

Installation and Setup

The APC Back-UPS NS 600 installation involves connecting the battery and charging it for at least 16 hours. Follow the manual for a seamless setup process.

Step-by-Step Instructions for Installing the APC Back-UPS NS 600

Carefully unbox and inspect the APC Back-UPS NS 600 for any damage.
Connect the battery by linking the disconnected wire, ensuring proper alignment.

Charge the unit for at least 16 hours before first use.
Plug in your devices, such as your computer, into the UPS outlets.
Power on the UPS and verify the indicator lights function properly.
For optimal performance, use the provided USB cable to connect to your computer.
Refer to the manual for additional setup and configuration details.
Ensure all connections are secure to avoid power interruptions.
This setup ensures reliable protection for your electronic devices during power outages.

Connecting the Battery and Initial Charging Requirements

The APC Back-UPS NS 600 is shipped with one battery wire disconnected for safety. Connect the battery wire securely to ensure proper function. Charge the UPS for at least 16 hours before first use. Avoid interrupting the charging process to maximize battery capacity. If the battery is not fully charged, runtime during power outages may be limited. Use only APC-authorized replacement batteries to maintain safety and performance. Incorrect battery connections can damage the UPS or pose safety risks. Always follow the manual’s guidelines for battery installation and charging.

Safety and Maintenance

Always follow safety guidelines when handling the APC Back-UPS NS 600. Avoid damaged cords, overloading, and using unauthorized batteries. Regularly inspect the UPS and battery for wear. Ensure proper ventilation and keep the unit away from flammable materials. Clean vents periodically to prevent dust buildup. Use only APC-approved replacement parts for maintenance. Store the UPS in a dry, cool environment. Proper care extends the lifespan and ensures reliable performance.

Safety Precautions When Handling the UPS and Battery

Always follow safety guidelines when handling the APC Back-UPS NS 600 and its battery. Avoid damaged cords, overloading, or using unauthorized batteries. Wear protective gear when handling electrical components. Ensure the UPS is grounded properly and keep it away from flammable materials. Do not expose the battery to extreme temperatures or physical stress. If the Building Wiring Fault indicator lights up, unplug the UPS immediately. Never attempt to open or modify the unit. Use only APC-approved replacement batteries to avoid hazards. Proper safety practices ensure reliable performance and prevent potential risks.

Maintenance Tips to Ensure Optimal Performance and Longevity

Regularly inspect the APC Back-UPS NS 600 for dust or debris, ensuring proper airflow. Charge the unit for at least 16 hours before first use. Avoid extreme temperatures and physical stress. Replace the battery every 3-5 years or when capacity drops below 50%. Use only APC-approved replacement batteries. Check cords and connections for damage. Update firmware if available. Store the UPS in a dry, cool place when not in use. Proper maintenance extends the lifespan and ensures reliable power protection for your devices.

Troubleshooting Common Issues

Identify and resolve common APC Back-UPS NS 600 issues like the Building Wiring Fault indicator or battery problems. Check connections, charge the unit, and consult the manual for solutions. If unresolved, contact APC support.

Identifying and Resolving Common Problems with the APC Back-UPS NS 600

Common issues with the APC Back-UPS NS 600 include the Building Wiring Fault indicator lighting up or battery-related problems. To resolve these, ensure the unit is properly charged for at least 16 hours. Check all connections and consult the manual for guidance. If the issue persists, reset the UPS or replace the battery if necessary. For detailed troubleshooting, refer to the APC Back-UPS NS 600 manual or visit the official APC website for support resources and FAQs.

Understanding Indicator Lights and Alarm Signals

The APC Back-UPS NS 600 features indicator lights and alarm signals to notify users of its status. The Power On light indicates normal operation, while the Battery light shows charge status. If the Building Wiring Fault light illuminates, it signals a potential electrical issue. Alarm signals, such as a steady or repeating beep, indicate low battery, overload, or fault conditions. Refer to the manual for a detailed explanation of each light and sound. Understanding these indicators helps ensure proper functionality and timely resolution of issues. For further assistance, consult the official APC support resources.

FAQs and Additional Resources

Visit the official APC website for FAQs, troubleshooting guides, and replacement battery information. The Back-UPS NS 600 manual and support forums are also available for detailed assistance.

Frequently Asked Questions About the APC Back-UPS NS 600

Common questions include replacement battery part numbers, such as the BE600M1, and how to resolve the Building Wiring Fault indicator. Users often inquire about initial charging requirements, which recommend at least 16 hours for optimal performance. Additional FAQs cover indicator light meanings, alarm signals, and runtime capabilities. For troubleshooting, resetting the unit or checking battery connections is often advised. Visit the APC support forum or official website for detailed answers and guides to ensure your Back-UPS NS 600 operates efficiently and safely.

Accessing the Full Manual and Additional Support from APC

To access the APC Back-UPS NS 600 manual, visit the official APC by Schneider Electric website at www.apc.com. The website offers downloadable PDF versions of the manual, ensuring easy access to guidance on installation, operation, and troubleshooting. For additional support, explore the APC support forum, where users share knowledge and solutions. Replacement parts, such as batteries, can also be ordered directly from APC’s website. The manual is available in multiple languages, including English, and provides comprehensive safety information to ensure proper usage and maintenance of your UPS. Visit www.apc.com/support for more resources.

The APC Back-UPS NS 600 manual is an essential resource for ensuring the proper setup, operation, and maintenance of your UPS. It provides detailed guidance on installation, safety precautions, and troubleshooting, helping you maximize the performance and longevity of your device. By following the manual’s instructions, you can protect your electronics from power disruptions and ensure reliable backup power. For any additional support or resources, APC offers comprehensive online assistance, including FAQs and downloadable materials. Refer to the manual regularly to address any issues and maintain optimal functionality of your APC Back-UPS NS 600.

Continue Reading

google home manual

Google Home is a smart speaker and voice assistant that integrates with various smart devices, allowing users to control their home, play media, and access information seamlessly. It serves as a central hub for smart home automation, enabling voice commands to manage lights, thermostats, and more. With its intuitive setup and compatibility with multiple devices, Google Home enhances daily convenience and connectivity.

1.1 What is Google Home?

Google Home is a voice-activated speaker developed by Google, designed to streamline smart home control, play music, and provide hands-free access to information. It integrates with Google Assistant, enabling users to manage devices, set reminders, and enhance daily life through voice commands and seamless technology integration.

1.2 Key Features of Google Home

Google Home offers multi-room audio, smart home device control, and voice-activated commands via Google Assistant. It supports routines, integrates with compatible devices, and provides hands-free access to information, entertainment, and home automation, making it a versatile and convenient smart speaker for everyday use.

Setting Up Your Google Home Device

Setting up your Google Home device involves unboxing, plugging in the power cable, and using the Google Home app to connect to Wi-Fi. Follow the app’s instructions to complete the setup and integrate with other smart devices for a seamless smart home experience.

2.1 Unboxing and Physical Setup

Unboxing your Google Home device involves carefully removing it from the packaging and plugging in the power cable. Place the device on a stable, flat surface in a well-ventilated area. Ensure it is away from direct sunlight and moisture for optimal performance. Avoid exposing it to water or extreme temperatures.

Use only the provided power cable to prevent damage. Once plugged in, the device will automatically enter setup mode, ready for configuration through the Google Home app. Proper placement ensures clear audio output and reliable voice recognition.

2.2 Downloading and Installing the Google Home App

Download the Google Home app from the App Store (iOS) or Google Play (Android). Open the app, sign in with your Google account, and ensure your device is connected to the same Wi-Fi network. Follow the in-app instructions to complete the installation and prepare for device setup.

This step is essential for configuring your Google Home device and integrating it with other smart home features.

2.3 Connecting Google Home to Wi-Fi

Open the Google Home app and select your device. Choose your Wi-Fi network from the list, enter the password, and wait for the connection to complete. Ensure your router is operational and the network is compatible; A stable connection is crucial for optimal performance and smart home integration.

2.4 Setting Up Multiple Google Home Devices

Open the Google Home app and navigate to the device settings. Add each Google Home device one by one, ensuring they are connected to the same Wi-Fi network. Assign each device to a specific room or area for clarity. This setup enables seamless multi-device control and synchronized functionality across your home.

Using the Google Home App

The Google Home app provides a centralized interface to control smart devices, set up multi-room audio, and access features like routines and automation for seamless home management.

3.1 Navigating the Google Home App Interface

The Google Home app offers an intuitive interface with tabs for favorites, devices, and scenes. Users can easily navigate to control smart home devices, access routines, and manage settings. The app’s streamlined design ensures quick access to essential features, enhancing the smart home experience with minimal effort required.

3.2 Managing Smart Home Devices

The Google Home app allows seamless control of compatible smart devices. Users can add or remove devices, adjust settings, and customize preferences. The app enables sharing access with others and setting up automations for enhanced convenience, ensuring all smart home devices work together harmoniously under one interface.

3.3 Setting Up and Controlling Multi-Room Audio

Multi-room audio allows synchronized music playback across multiple Google Home devices. Users can create groups, adjust volume levels, and control playback seamlessly through the app. This feature enhances whole-house audio experiences, ensuring perfect synchronization and effortless control for a unified entertainment setup.

Smart Home Automation

Google Home centralizes smart device control, enabling seamless automation of lighting, thermostats, and security systems. Users can create custom routines and integrate with compatible devices for enhanced convenience and efficiency in managing their smart home ecosystem.

4.1 Compatible Devices for Smart Home Automation

Google Home supports a wide range of smart devices, including lights, thermostats, security cameras, doorbells, and appliances from brands like Philips Hue, Nest, and more. Compatibility ensures seamless voice control and integration, allowing users to manage their smart home efficiently through a single interface.

4.2 Creating Custom Routines and Automations

Custom routines allow users to group multiple actions into a single command. For example, “Good night” can turn off lights and lock doors. Use the Google Home app to create routines, set triggers, and automate smart home devices based on time, voice commands, or device activity for enhanced convenience.

4.3 Integrating with Other Smart Home Systems

Google Home seamlessly integrates with other smart systems like Nest, Philips Hue, and more. By connecting these systems, users can control all devices through one interface. The Google Home app simplifies setup, allowing synchronization of smart home products for a unified and efficient smart home experience.

Voice Commands and Controls

Google Home’s voice commands simplify tasks, from playing music to controlling smart devices. Users can access information, set reminders, and manage routines hands-free, enhancing home automation and convenience.

5.1 Basic Voice Commands for Google Home

Basic voice commands for Google Home include asking for news, weather, or setting reminders. Users can play music, set alarms, or inquire about general information. These commands simplify daily tasks, making it easy to interact with the device hands-free.

5.2 Advanced Voice Commands for Smart Home Control

Advanced voice commands enable precise control over smart devices, such as adjusting light brightness, turning off multiple lights, or setting specific temperatures. Users can also activate custom routines, like “Goodnight” to lock doors and turn off lights, enhancing home automation efficiency and convenience seamlessly.

5.3 Using Google Home for Multi-Room Audio Control

Google Home allows seamless multi-room audio control, enabling synchronization of music playback across multiple speakers. Users can group devices, play audio in specific rooms, or adjust volume levels individually. Voice commands like “Play music everywhere” or “Turn up the living room volume” enhance the multi-room audio experience effortlessly.

Troubleshooting Common Issues

Resolve connectivity, voice recognition, or setup problems by restarting your Google Home device or checking Wi-Fi settings. The Google Home app offers diagnostic tools to identify and fix issues quickly.

6.1 Resetting Google Home Device

Resetting your Google Home device restores it to factory settings. To reset, press and hold the microphone mute button for 15 seconds until the device confirms the reset. This process will erase all settings and preferences, requiring you to set it up again through the Google Home app.

6.2 Fixing Wi-Fi Connectivity Problems

To resolve Wi-Fi issues with Google Home, restart your router, ensure the device is close to the router, and check your network name and password. Resetting the device or updating the Google Home app and firmware can also resolve connectivity problems. Ensure stable internet connection for proper functionality.

6.3 Resolving Voice Recognition Issues

Ensure your Google Home device has clear audio input by checking for dust or obstructions. Restart the device, update the Google Home app, and recalibrate voice match in settings; If issues persist, reset the device to factory settings via the app or physical buttons. Ensure stable internet connection.

Maintenance and Care

Regularly update Google Home software for optimal performance. Clean the device with a soft cloth and avoid exposure to extreme temperatures or water. Store properly when not in use.

7.1 Updating Google Home Software

Regular software updates ensure your Google Home device runs smoothly. The Google Home app automatically checks for updates when connected to Wi-Fi. For manual updates, open the app, select the device, and check for updates under settings. Always keep your device updated for the latest features and security patches.

7.2 Cleaning and Physical Maintenance

Keep your Google Home device clean by gently wiping it with a soft, dry cloth to remove dust and fingerprints. Avoid using liquids or harsh chemicals, as they may damage the speaker or electronics. For the grille, use a dry, small brush to carefully sweep away debris. Store it in a cool, dry place and avoid exposing it to direct sunlight or extreme temperatures to ensure optimal performance and longevity.

7.3 Storing Google Home Devices Properly

When storing your Google Home device, place it in a protective case or original packaging to prevent damage. Store it in a dry, cool environment, away from direct sunlight and moisture. Avoid extreme temperatures, ensuring it remains between -20°C and 60°C (-4°F and 140°F) to maintain functionality and longevity.

Advanced Features

Discover advanced capabilities like multi-device control, custom routines, and seamless integration with Google services. Enhance your smart home experience with voice-controlled automations and tailored settings for enhanced convenience and efficiency.

8.1 Using Google Home for Home Automation

Google Home enables seamless home automation by integrating with compatible devices. Control lights, thermostats, and security systems effortlessly using voice commands. Create custom routines to automate multiple actions, enhancing convenience and efficiency in your smart home setup with minimal effort and maximum control.

8.2 Setting Up Multi-Device Control

Google Home allows you to group multiple smart devices, enabling synchronized control through voice commands or the app. This feature streamlines operations, letting you manage lights, speakers, and more simultaneously. Use the Google Home app to create groups, ensuring seamless coordination across all connected devices for a unified smart home experience.

8.3 Integrating Google Home with Other Google Services

Google Home seamlessly integrates with other Google services, enhancing its functionality. Users can access Google Calendar for scheduling, Google Maps for navigation, and Google Photos for sharing memories. This integration allows for a cohesive and personalized smart home experience, making daily tasks easier and more enjoyable.

Safety and Security

Google Home prioritizes user safety and security, offering privacy controls and secure networks. It ensures data protection and allows management of user access to maintain a safe smart home environment, while adhering to safety guidelines for device usage and storage;

9.1 Understanding Google Home Privacy Settings

Google Home offers comprehensive privacy controls, allowing users to manage voice recordings, data sharing, and device access. Through the app, you can review and delete recordings, adjust third-party permissions, and customize settings to ensure your data remains secure and private, enhancing overall security and trust in the system.

9.2 Securing Your Smart Home Network

Ensure your smart home network is secure by using strong passwords, enabling two-factor authentication, and regularly updating device firmware. Isolate IoT devices on a guest network and disable unnecessary features to protect against unauthorized access and potential breaches, safeguarding your connected home environment effectively.

9.3 Managing User Access to Google Home

Control who can use your Google Home by adding or removing accounts through the Google Home app. Enable voice match for personalized responses and ensure only authorized users can access sensitive features, maintaining privacy and security for all connected devices and services.

Warranty and Support

Google Home devices come with a limited warranty, and support is available through the Google Help Center or authorized service providers. Repairs must be performed by Google or authorized providers to maintain warranty validity and ensure device safety.

10.1 Google Home Warranty Information

Google Home devices are covered by a limited warranty, which ensures protection against manufacturing defects for a specified period; Unauthorized repairs or modifications can void the warranty. Proper usage and storage within recommended temperature ranges are essential to maintain warranty validity and device performance.

10.2 Contacting Google Support for Assistance

For assistance with Google Home, users can contact support through the Google Home app or visit the official support website. Options include live chat, phone support, and access to troubleshooting guides. Additional resources like user manuals and community forums are also available to address common issues and concerns effectively.

10.3 Finding Authorized Service Providers

To ensure proper repairs, locate authorized Google Home service providers through Google’s official support website. Unauthorized repairs can void warranties or damage devices. Visit Google’s support site for a list of approved providers and detailed warranty information to maintain your device’s functionality and warranty coverage.

Additional Resources

Explore official Google Home manuals, guides, and online communities for tips and troubleshooting. Discover recommended accessories to enhance your Google Home experience and functionality seamlessly.

11.1 Official Google Home Manual and Guides

The official Google Home manual provides comprehensive guidance for setup, troubleshooting, and advanced features. Available as a free PDF download, it covers device installation, voice command usage, and smart home integration. Access detailed instructions and tips to maximize your Google Home experience through official resources.

11.2 Online Communities and Forums for Google Home Users

Online communities and forums provide valuable resources for Google Home users, offering troubleshooting tips, user experiences, and expert advice. Platforms like Reddit and Google’s official support forums allow users to share insights and resolve issues collaboratively, enhancing their smart home experience.

11.3 Recommended Accessories for Google Home

Recommended accessories for Google Home include compatible smart devices like cameras, doorbells, and thermostats, as well as wall mounts and multi-device controllers. These enhance functionality, providing seamless integration for security, energy efficiency, and convenience, while expanding your smart home ecosystem.

Continue Reading

statics and mechanics of materials 3rd edition pdf

This comprehensive textbook by Russell C․ Hibbeler combines statics and mechanics of materials, offering a clear, well-illustrated introduction for undergraduate engineering students․

1․1 Overview of the Book

Statics and Mechanics of Materials, 3rd Edition PDF by Russell C․ Hibbeler is a comprehensive textbook designed for undergraduate engineering students․ It combines the fundamentals of statics and mechanics of materials, providing a clear and structured approach to understanding key concepts․ The book is well-illustrated with diagrams and examples, focusing on problem-solving and real-world applications․ It is part of Hibbeler’s renowned series, known for its clarity and pedagogical excellence․

1․2 Importance of Statics and Mechanics of Materials in Engineering Education

Statics and mechanics of materials form the foundation of engineering education, enabling students to understand the behavior of structures and materials under various loads․ These principles are essential for designing safe and efficient systems, fostering problem-solving skills, and preparing engineers to address real-world challenges in construction, manufacturing, and other fields․ They are core to advancing engineering innovation and practical applications․

Key Topics Covered in the Book

  • Analysis of structural members under tension, compression, torsion, and bending․
  • Fundamental equations of mechanics of materials․
  • Comprehensive coverage of axial load, torsion, bending, and compression․

2․1 Analysis of Structural Members Under Various Loads

The book provides an in-depth analysis of structural members subjected to tension, compression, torsion, bending, and combined loads․ It includes detailed discussions on stress distributions, deformation calculations, and design considerations․ Practical examples and fundamental equations illustrate how to analyze real-world structural components, ensuring a solid understanding of load effects on various materials and shapes․

2․2 Fundamental Equations of Mechanics of Materials

The book outlines key equations for analyzing stress, strain, and deformation in materials․ These include normal stress (σ = P/A), shear stress (τ = VQ/It), and torsion (θ = TL/GJ)․ These formulas are essential for predicting material behavior under various loads, ensuring accurate design and analysis in engineering applications․

2․3 Axial Load, Torsion, Bending, and Compression

The book explores axial loads, torsion, bending, and compression, detailing how materials deform under these forces․ Axial loads cause tension or compression, while torsion creates shear stress․ Bending induces tensile and compressive stresses, and compression tests material limits․ These concepts are crucial for analyzing structural integrity and designing safe, efficient engineering systems․

Stress and Strain Analysis

This section covers the fundamental concepts of stress and strain, essential for analyzing material behavior under external forces, and their significance in engineering design․

3․1 Normal Stress and Strain

Normal stress occurs due to axial forces, either tensile or compressive, and is calculated as σ = P/A, where P is the applied load and A is the cross-sectional area․ Normal strain, ε, represents deformation and is given by ε = δ/L, where δ is deformation and L is the original length․ These concepts are fundamental for understanding material behavior under load․

3․2 Shear Stress and Strain

Shear stress arises from shear forces causing deformation by sliding along a plane․ It is calculated as τ = VQ/It, where V is the shear force, Q is the first moment of area, and It is the moment of inertia․ Shear strain γ represents the angular deformation due to shear stress, given by γ = τ/G, where G is the shear modulus of the material․

Beams and Bending Moments

Beams are structural members subjected to lateral loads, causing bending moments․ This section covers types of beams, supports, and methods for calculating bending moments and deflections․

4․1 Types of Beams and Supports

Beams are classified based on their supports and loading conditions, such as simply supported, cantilever, and overhanging beams․ Supports include roller, pin, and fixed ends, each providing different constraints․ Understanding these types is essential for analyzing beam behavior under various loads, ensuring accurate calculations of stress and deflection in engineering applications․

4․2 Calculation of Bending Moments and Deflections

The calculation of bending moments involves integrating shear force diagrams, while deflections are determined using methods like the double integration of the moment of inertia․ These calculations are essential for assessing beam behavior under various loads, ensuring structural integrity, and preventing excessive deformation․ Accurate computations are fundamental for engineering design and safety in construction․

Importance of SI Units in the Book

The book emphasizes SI units, ensuring clarity and consistency in engineering calculations․ This aligns with global standards, enhancing understanding and practical application for international students and professionals․

5․1 SI Units in Mechanics of Materials

The book consistently applies SI units throughout, ensuring compatibility with international engineering standards․ This facilitates accurate calculations for stress, strain, and deformation, making it easier for students to grasp fundamental concepts and apply them in real-world scenarios․ The use of SI units also enhances the book’s accessibility for a global audience, aligning with modern educational practices in engineering․

5․2 Conversion and Application of SI Units

The book emphasizes the importance of SI units, providing clear guidance on unit conversion and application․ This ensures consistency in problem-solving and aligns with global engineering practices․ Students are equipped to handle conversions seamlessly, enhancing their ability to analyze and design structural elements accurately, while preparing them for real-world engineering challenges․

Features of the 3rd Edition

The 3rd edition offers comprehensive illustrations, enhanced problem-solving techniques, and a structured pedagogical approach, ensuring clarity and depth in understanding statics and mechanics of materials․

6․1 Comprehensive Illustrations and Diagrams

The 3rd edition features detailed illustrations and diagrams that enhance understanding of complex concepts․ Clear visuals, including free-body sketches and deformation diagrams, aid in visualizing theories and applications, making the material more accessible for students․ The illustrations are integrated seamlessly with the text, providing a comprehensive learning experience focused on statics and mechanics of materials․

6․2 Pedagogical Approach and Problem-Solving Techniques

The 3rd edition employs a proven pedagogical approach, blending theory with practical problem-solving techniques․ It emphasizes clear explanations, step-by-step examples, and interactive exercises to help students master statics and mechanics of materials; The book’s focus on logical progression and real-world applications ensures students develop a deep understanding of key concepts and their practical relevance in engineering․

Example Problems and Solutions

The book provides detailed example problems and solutions, covering topics like axial load, torsion, and bending․ These examples help students understand complex concepts through practical applications․

7․1 Sample Problems from the Book

The book includes numerous sample problems covering axial load, torsion, bending, and shear stress․ These problems are practical and relevant, helping students apply theoretical concepts to real-world engineering scenarios effectively․

7․2 Step-by-Step Solutions for Better Understanding

The book provides detailed, step-by-step solutions to sample problems, ensuring clarity and deeper understanding․ Each solution is accompanied by visual aids and explanations, making complex concepts like stress analysis and bending moments accessible․ This approach helps students master fundamental equations and methodologies essential for engineering applications․

Benefits of the PDF Version

The PDF version offers enhanced accessibility and convenience, allowing students to access content anytime, anywhere․ Digital tools enable interactive learning, fostering a deeper understanding of complex topics․

8․1 Accessibility and Convenience

The PDF version enhances learning by providing easy access to content across various devices․ Students can navigate chapters, sections, and problems effortlessly, with search functionality for quick reference․ The digital format allows carrying the entire textbook on laptops or tablets, reducing physical burden and ensuring availability anytime, anywhere, while also supporting environmental sustainability through reduced paper usage․

8․2 Digital Tools for Enhanced Learning

The PDF version integrates interactive features like hyperlinks, zoom, and annotations, improving study efficiency․ It supports highlighting and note-taking, enabling students to emphasize key concepts․ The digital format also includes access to supplementary materials, such as solution manuals and online resources, fostering a deeper understanding of statics and mechanics of materials through interactive problem-solving and visual aids․

Applications in Real-World Engineering

Principles from the book are applied in designing buildings, bridges, and mechanical systems, ensuring safety and efficiency under various loads, essential for real-world engineering challenges․

9․1 Practical Examples of Statics and Mechanics

The book provides real-world examples, such as analyzing beams under bending loads, designing structural members, and assessing the stability of mechanical systems․ These practical applications illustrate how statics and mechanics principles ensure safety and efficiency in engineering designs, from bridges to machinery, under various tension, compression, and torsion scenarios․

9․2 Case Studies in Structural Design

The book includes detailed case studies of real-world structural designs, such as bridges and high-rise buildings, to demonstrate the application of statics and mechanics principles․ These studies emphasize analyzing critical loads, stress distributions, and material selection to ensure structural integrity and safety, providing students with practical insights into modern engineering challenges and solutions;

Author Background

Russell C․ Hibbeler is a renowned author and educator in engineering mechanics, known for his clear pedagogical approach; His work emphasizes practical applications and problem-solving techniques in statics and mechanics of materials, making his textbooks indispensable for students worldwide․

10․1 Russell C․ Hibbeler’s Contributions to Engineering Education

Russell C․ Hibbeler has significantly impacted engineering education through his textbooks․ His works, such as Statics and Mechanics of Materials, provide comprehensive coverage with clear explanations and practical examples․ Hibbeler’s approach emphasizes problem-solving and visual learning, making complex concepts accessible․ His contributions have helped students and instructors worldwide, establishing him as a leader in engineering education․

10․2 Other Notable Works by the Author

Beyond Statics and Mechanics of Materials, Russell C․ Hibbeler authored influential texts like Engineering Mechanics: Statics and Engineering Mechanics: Dynamics․ His works are known for clarity and practical relevance, aiding students in understanding fundamental engineering principles․ Hibbeler’s books are widely adopted in academic programs globally, solidifying his reputation as a leading engineering educator and writer․

Resources and Supplements

The Statics and Mechanics of Materials 3rd Edition PDF is accompanied by a solution manual and study guides․ Additional online resources, such as interactive tutorials and problem sets, enhance learning and understanding of key concepts․

11․1 Solution Manuals and Study Guides

The Statics and Mechanics of Materials 3rd Edition PDF is supported by a detailed solution manual and study guides․ These resources provide step-by-step solutions to problems, enhancing understanding of statics and mechanics concepts․ Additional online materials, including interactive problem sets, further assist students in mastering the subject․

11․2 Additional Online Resources for Students

Beyond the textbook, students can access interactive problem sets, video tutorials, and online forums․ These resources provide dynamic visualizations of statics and mechanics concepts, enabling deeper understanding․ Additionally, collaborative learning spaces and digital tools offer personalized support, helping students grasp complex topics in a self-paced environment․

Continue Reading